Installation, Warning, Caution – Legrand OS300S 120/277VAC User Manual
Page 6
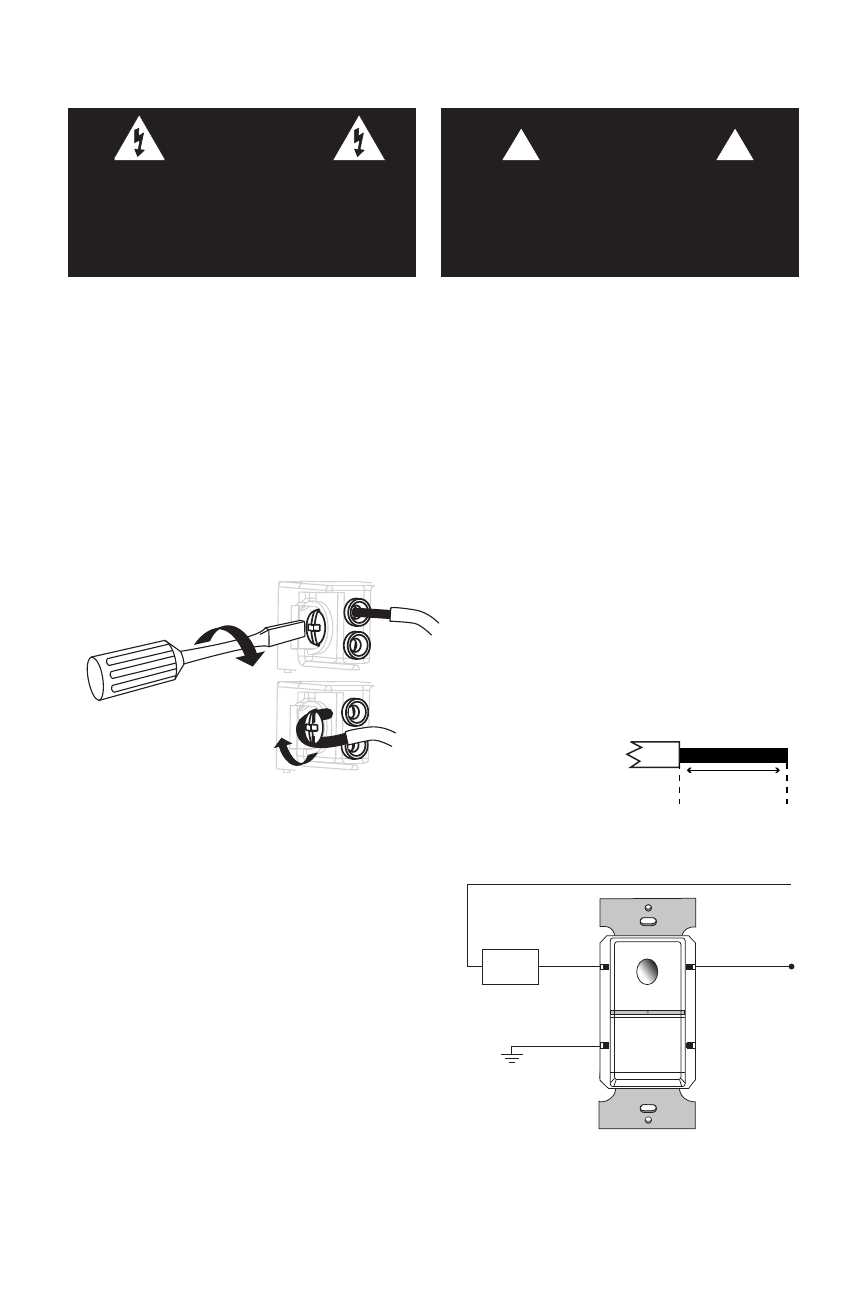
1. Make sure that the power has been turned OFF at the circuit breaker.
2. Connect the existing wires to the sensor terminals.
• Hot or Black to Line; Load or Red to Load; Ground or Green to Ground
• Do not allow bare wire to show above connector.
• The ground wire must be tightly fastened or the unit will not operate
properly.
• If the metal junction box is grounded, attachment of the strap (by screws)
to the junction box can constitute a suitable ground. Assure that the green
ground screw on the sensor is completely tightened.
3. Attach the sensor to the wall box by
inserting screws into the two wide
holes on the top and bottom of the
attached metal bracket. Match them
up with the holes in the wall box and
tighten.
4. Turn circuit breaker ON. Wait one
minute, then push the auto/OFF switch
and the lights will turn ON. There is a
delay due to initial power-up of the
sensor that only occurs during
installation.
Screw Terminal
Push–In
INSTALLATION
Load
Red
Hot BLK
Neutral
Ground
GRN
Single-Level Wiring
Insert or wrap wire as
shown and tighten screw
in the clockwise direction.
Strip Gage
1/2"
12.7mm
#12 – #14 AWG
Cu Wire Only
WARNING
TURN THE POWER OFF AT THE
CIRCUIT BREAKER BEFORE
INSTALLING THE SENSOR OR
WORKING ON THE LOAD.
CAUTION
THE GROUND MUST BE TIGHTLY
SECURED OR THE SENSOR WILL
NOT WORK.
!
!