Is-0321 rev. a, Figure 2, Reserved – Legrand F7417-XX User Manual
Page 2: Lyriq, Copyright 2007 by on-q/legrand all rights
301 Fulling Mill Road, Suite G
Middletown, PA 17057
Phone (800) 321-2343 / Fax (717) 702-2546
www.onqlegrand.com
Page 2 of 2
INSTRUCTION/INSTALLATION SHEET
lyriQ™ Local Source Input
IS-0321 REV. A
©Copyright 2007 by On-Q/Legrand All Rights
Reserved
.
1. Run Cat 5 cable from the lyriQ™ Single Source 4 Zone Distribution Module located in the Enclosure to
the single gang box at the location that will contain the lyriQ™ Local Source Input. Also run Cat 5 cable
from the single gang box that will contain the lyriQ™ Local Source Input to the volume control location.
B. “Trim-out”
steps:
NOTE: Use a standard punch down tool with a 110 style blade, maintain less than ½” of untwisting of
pairs, and make sure the 110 blade cuts any excess conductor completely.
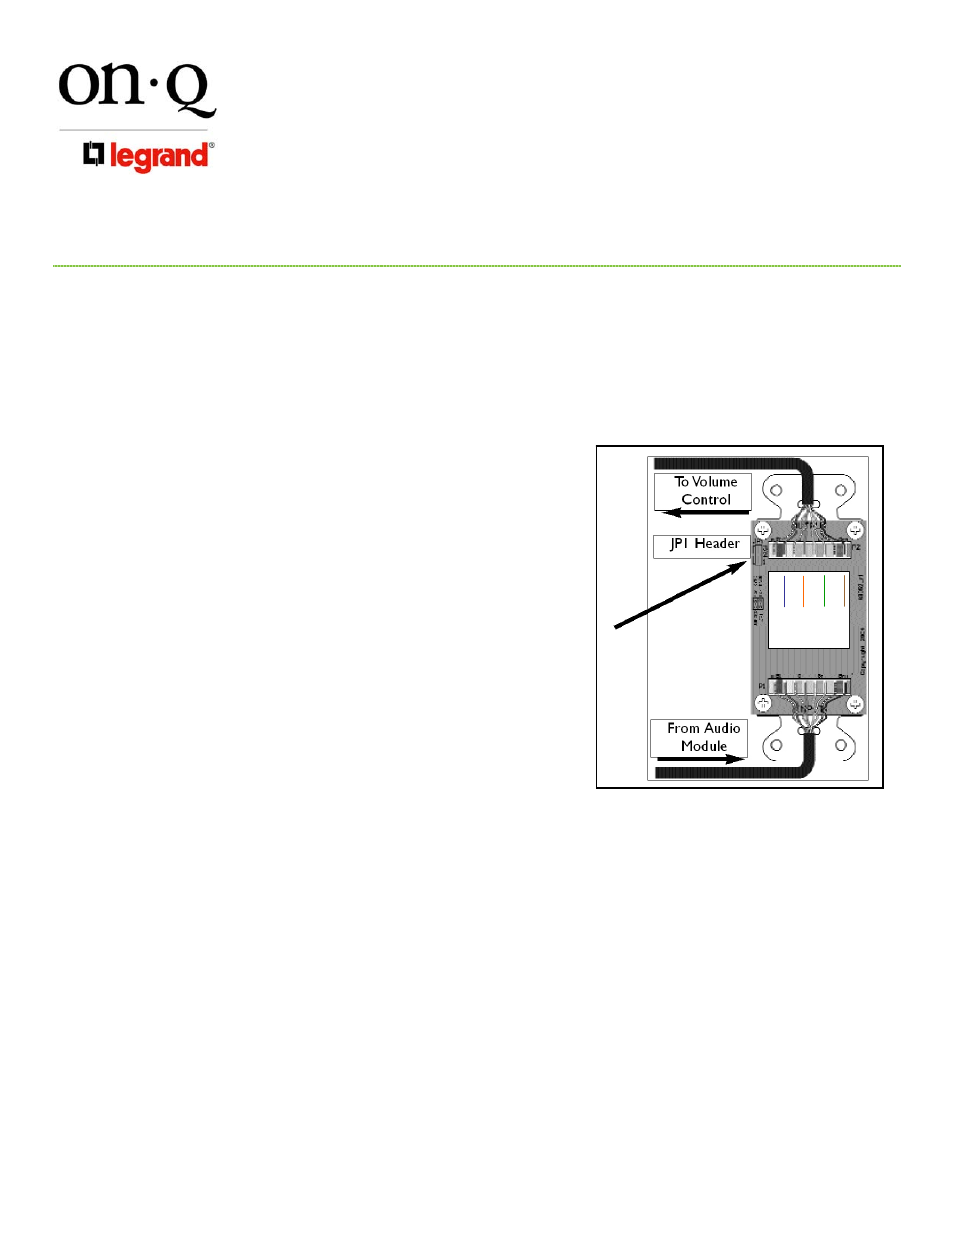
1. Punch down the prewired Cat 5e cable from the lyriQ™
Single Source 4 Zone Distribution Module onto the 110 strip
labeled “INPUT” at the bottom of the unit (see Figure 2).
2. Punch down the prewired Cat 5e cable to the lyriQ™
Volume Control onto the 110 style block labeled “OUTPUT”
at the top of the unit (see Figure 2).
3. The JP1 header next to the “OUTPUT” 110 strip is set to
the “KNOB” (pins 2 and 3 jumpered) position by default and
this position is suitable for knob only or mixed knob and
keypad systems. If the system uses keypad volume
controls only, move JP1 to the “KEYPAD” (pins 1 and 2
jumpered) position.
4. Mounting: Use the included screws to install the lyriQ™
Local Source Input into a standard single gang box and use
a standard Decorator style cover.
4. Important Safety Precautions:
READ ALL INSTRUCTIONS CAREFULLY BEFORE INSTALLING THE lyriQ™ AUDIO SYSTEM.
• Do not attempt to service, move or change any component of this system unless you are qualified to do so.
• This system should be installed by a qualified installer and must conform to all local building and electrical codes.
• Do not apply power to the
lyriQ™
Audio System until all components have been installed and all wiring has been properly
terminated.
• Do not attempt to terminate, change or un-install any wiring without first turning off power to the
lyriQ™
Audio System which
is located in the enclosure. Unplug the power transformer that is powering the
lyriQ™
Audio System from the power outlet
before proceeding with wiring terminations or changes.
• Install each component of this system away from heat sources such as HVAC ducts/registers, stoves or any other heat
source.
• Do not expose any component that was designed for indoor use to moisture. Doing so can create electrical hazards or
render the component unusable. Exposure to moisture will also void the warranty on the system.
• Only use a damp cloth to clean the cover plates of the system components. Do not use vacuum cleaners, liquid or aerosol
cleaners.
Figure 2
B
lue
/W
hi
te
---
------
-
Bl
u
e
O
rang
e/
W
h
it
e
-----
-----
Or
an
g
e
Gr
ee
n/
W
h
it
e
-----
-----
Gre
e
n
B
rown/
W
h
it
e
--
------
--
Br
o
w
n
B
lue
/W
hi
te
---
------
-
Bl
u
e
O
rang
e/
W
h
it
e
-----
-----
Or
an
g
e
Gr
ee
n/
W
h
it
e
-----
-----
Gre
e
n
B
rown/
W
h
it
e
--
------
--
Br
o
w
n
Figure 2