Installation and operating instructions, Microphone connection, Mounting information – Louroe Electronics LE-775 User Manual
Page 2
INSTALLATION AND OPERATING INSTRUCTIONS
LOUROE ELECTRONICS 6 9 5 5 VA L J E A N AVENUE, VAN NUYS, CA 91406
TEL (818) 994-6498
FAX
994-6458
website: www.louroe.com e-mail: [email protected]
(818)
®
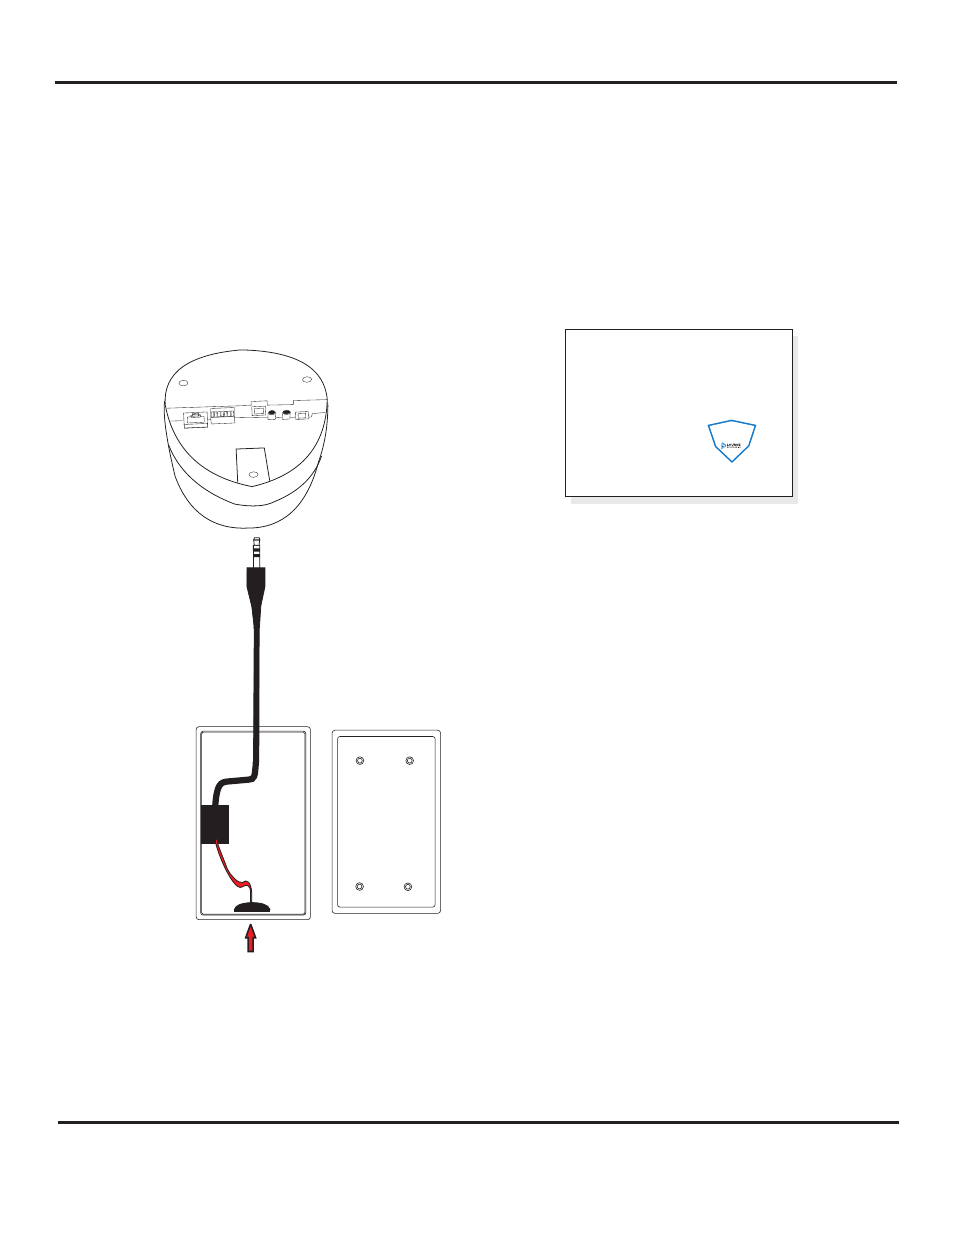
The Model E-ML
6 to 8ft. from the area of desired coverage. One inch threaded knock-outs are located at the top and
back side of Bell Box® for conduit connection. As a finished unit, the Model E-ML Microphone is
classified as WEATHER RESISTANT. Sealing around face plate and conduit
connection is
required. Make certain Model E assembly is mounted so that microphone portion is
facing downward.
Microphone is designed for surface mounting to a wall or a pole. It should be located
MICROPHONE CONNECTION
IMPORTANT NOTICE
When this equipment is used as part of an
audio monitoring system, the law requires
that the public be given notice of AUDIO
MONITORING ON THE PREMISES. A
decal notice is included with each
microphone shipped.
Federal Law References:
Federal Regulations, US Code, Title 18.
Crime and Criminal Procedure, Sec 2510.
AUDIO
MONITORING
On
These Premises
®
WARRANTY
LOUROE ELECTRONICS warrants that at the time of shipment products manufactured by LOUROE ELECTRONICS to be free of defects in material and workmanship.
Should a defect appear within one year (12 months) from date of shipment, LOUROE ELECTRONICS will, at its sole discretion, repair or replace the defective equipment.
This equipment shall not be accepted for repair or return without prior notification by LOUROE ELECTRONICS .
This warranty does not extend to any Louroe product that has been subjected to improper or incorrect installation, misuse, accident, or in violation of installation
instructions provided by LOUROE ELECTRONICS.
Returned shipments to LOUROE ELECTRONICS shall be at customer’s expense. LOUROE ELECTRONICS will return the equipment prepaid via best way.
®
®
®
®
®
®
MOUNTING INFORMATION
IP CAMERA
BACK BOX
FACE PLATE
Microphone
position
Connect the other end of the cable with a 3.5mm Stereo
Plug to the Audio Input of the IP camera.The camera
has to be configured to Mic level settings.
E_ml_inst_12/14