LSC Lighting Redback Patch Bays User Manual
Patching system installation guide
LIGHTING SYSTEMS
www.lsclighting.com
patching system installation guide
Please READ these instructions
BEFORE INSTALLING the Redwall patch system
1.
2.
3.
Patch tail panels
are installed from the bottom up
4.
5.
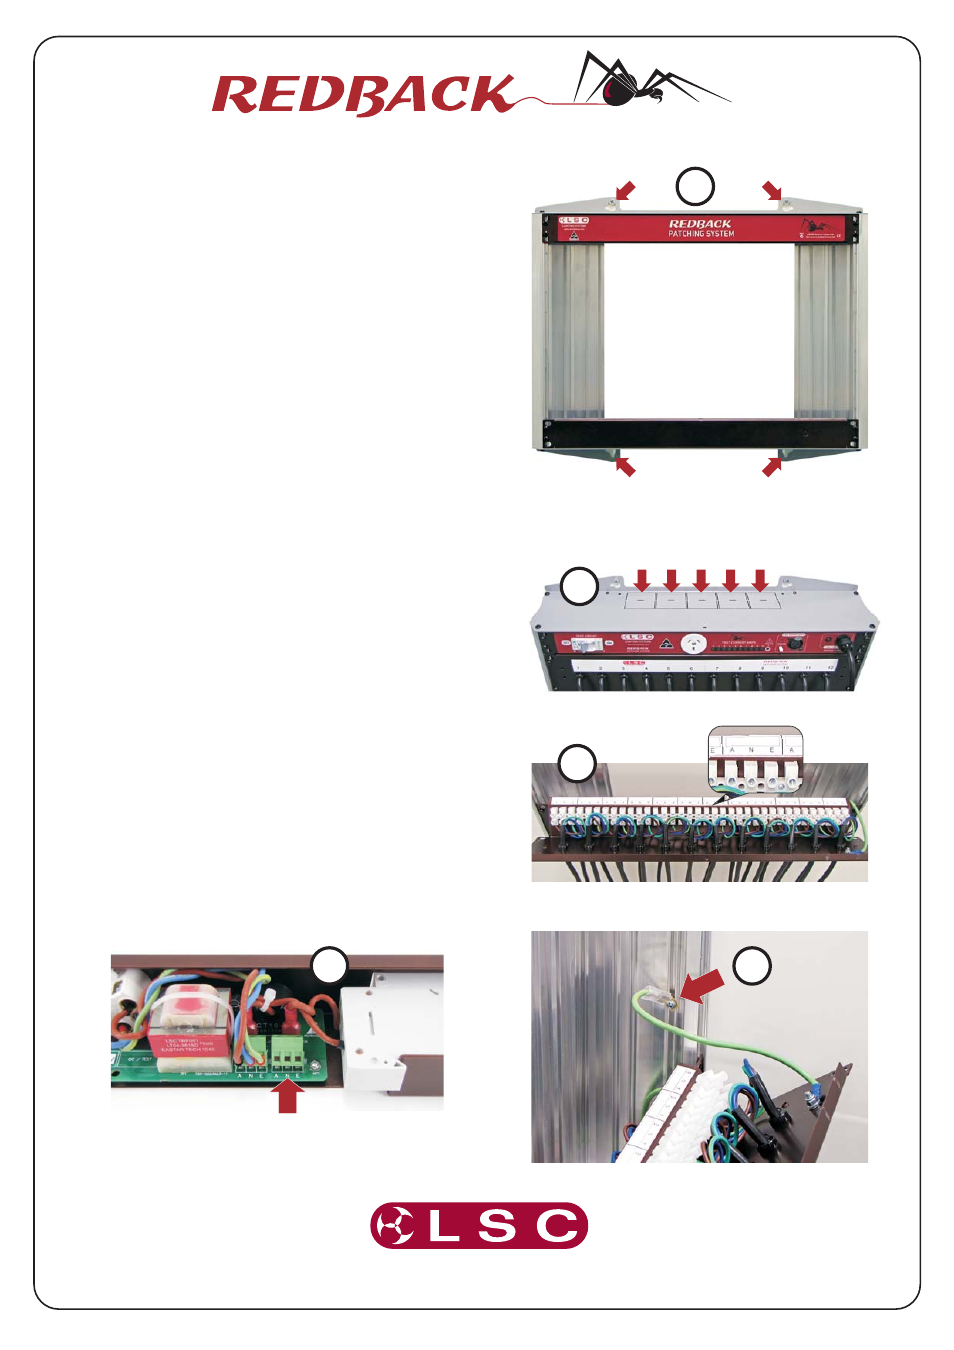
Install the empty Redpatch mounting frame onto the wall
surface using 6mm or ¼ inch fasteners in all four
mounting holes. LSC recommends installing the bottom
of the chassis 127cm above the floor to allow
hanging
clearance.
tail
Installation building wiring can enter the chassis either
directly through the wall cavity or through the end
panels by removing the required quantity of cable
knockouts.
With the installation frame secured, the patch tail panels
can now be installed and terminated.
. Each tail circuit has a
Active (A), Neutral (N) and Earth (E) screw termination.
An empty box above each tail termination allows custom
patch numbers to be written.
Ensure that each tail patch panel has the earth
terminated to the chassis using the provided spade
terminal. Extra spade terminals are provided internally
for the termination of the installation building wiring
earth to the Redwall patch chassis.
An optional test circuit panel can be installed at the top of
the Redwall patch chassis.
This panel requires a
240VAC/10 Amp mains source which provides power to
connected test loads.
A three terminal screw header allows for Active (A),
Neutral (N) and Earth (E) screw termination. The panel
earth wire is terminated to the chassis using the spade
terminal provided.
1
3
4
5
240VAC/10Amp
External wiring
cable knockouts
Internal
wiring
area
2