MacroSystem Caladan User Manual
Page 18
18
19
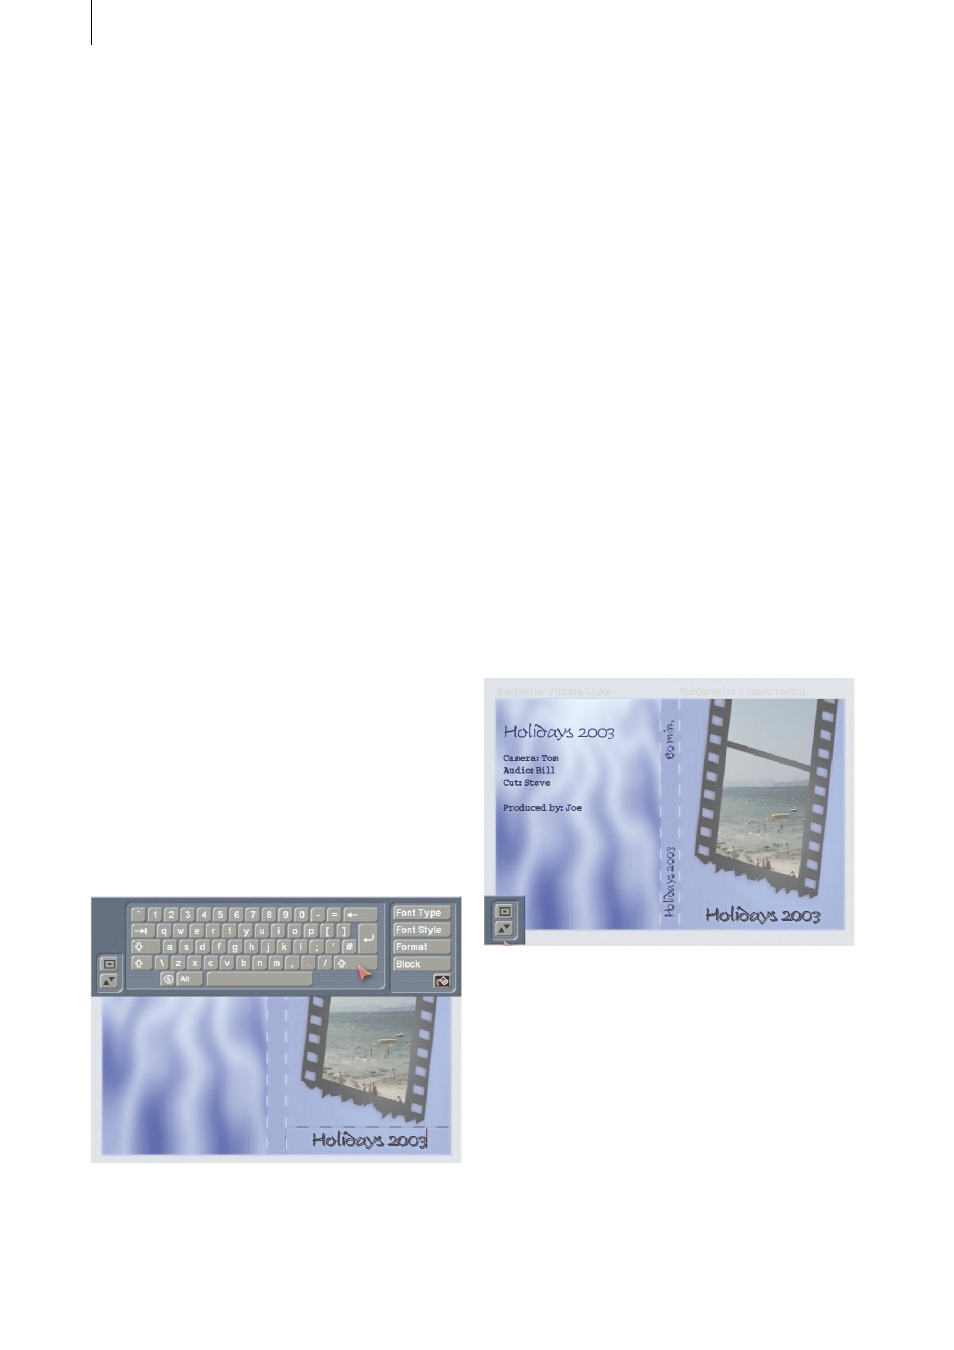
You can now move on to labeling the DVD
cover with text. To do so, click on the top menu
symbol to open the “Boxes” menu. Select the
“New Box” button and draw a new box in any
area of the image you like. A suitable area is
one that has a uniform background (as in our
example). Draw a narrow box that spans the
entire width of the front side.
Afterwards, click on the Paint Can symbol
and, in the toolbar that then appears, select
the “transparent” function for the “Content”
menu item – you will then be able to see the
video image again that you inserted earlier on.
Next, click on the “Text” button, which opens
the on-screen keyboard. Use this keyboard or
an external keyboard to enter a suitable text for
your video material. In our example, we have
decided to use “Vacation 2003”. Check the text
in the box and, if necessary, click on the “Font
Type” button to make changes to the font type
or size.
Afterwards, you can configure additional
properties under “Font Style”, such as the font
color, italicized text or settings relating to the
border and shadow.
If you are not yet satisfied with the position of
the text, click on the “Format” button in order
to make further settings changes in the window
that then appears. For instance, you can place
the text in the center or change the character
spacing and distance to the edges of the box.
After you have closed the “Format” window
again, open the “Content” menu by clicking
on the Paint Can symbol. Click on the left box
to position a text on the back of the DVD cover.
Proceed in the same way as described before.
If you do not want to have text that covers the
entire back cover, you can of course simply draw
a new box to contain only text and then position
it freely. Once you have entered a text of your
choice, e.g. the names of the camera operator,
narrator, etc., you can start designing the text
that you want to appear on the DVD cover’s
spine.
Activate the box and click on the “Text” button.
Configure the font type and size that you
want (e.g. Manuel, 100) and then click on the
“Format” button. In the subsequently appearing
window, set the “Justification” option to
“vertical (left rotated)”. Now enter the title of
the DVD and, if required, the length of the film,
as is shown in our example. The text should be
contained on one line and should not be wider
than the width of the DVD cover’s spine. It is
useful to move the toolbar to the top edge of
the screen so you can see the entered text more
easily.
Finally, you can print out the label that you have
just designed. To do so, insert the appropriate
paper into the printer, open the main Caladan
menu and click on “Print”. Printing will begin
once your printer is ready.