Installation, Installing the log set, Removing and installing the modular insert – Montigo MW38 DV User Manual
Page 13
MW38-DV Modular Fireplace
P/N XG0112
Page 13 of 19
Installation
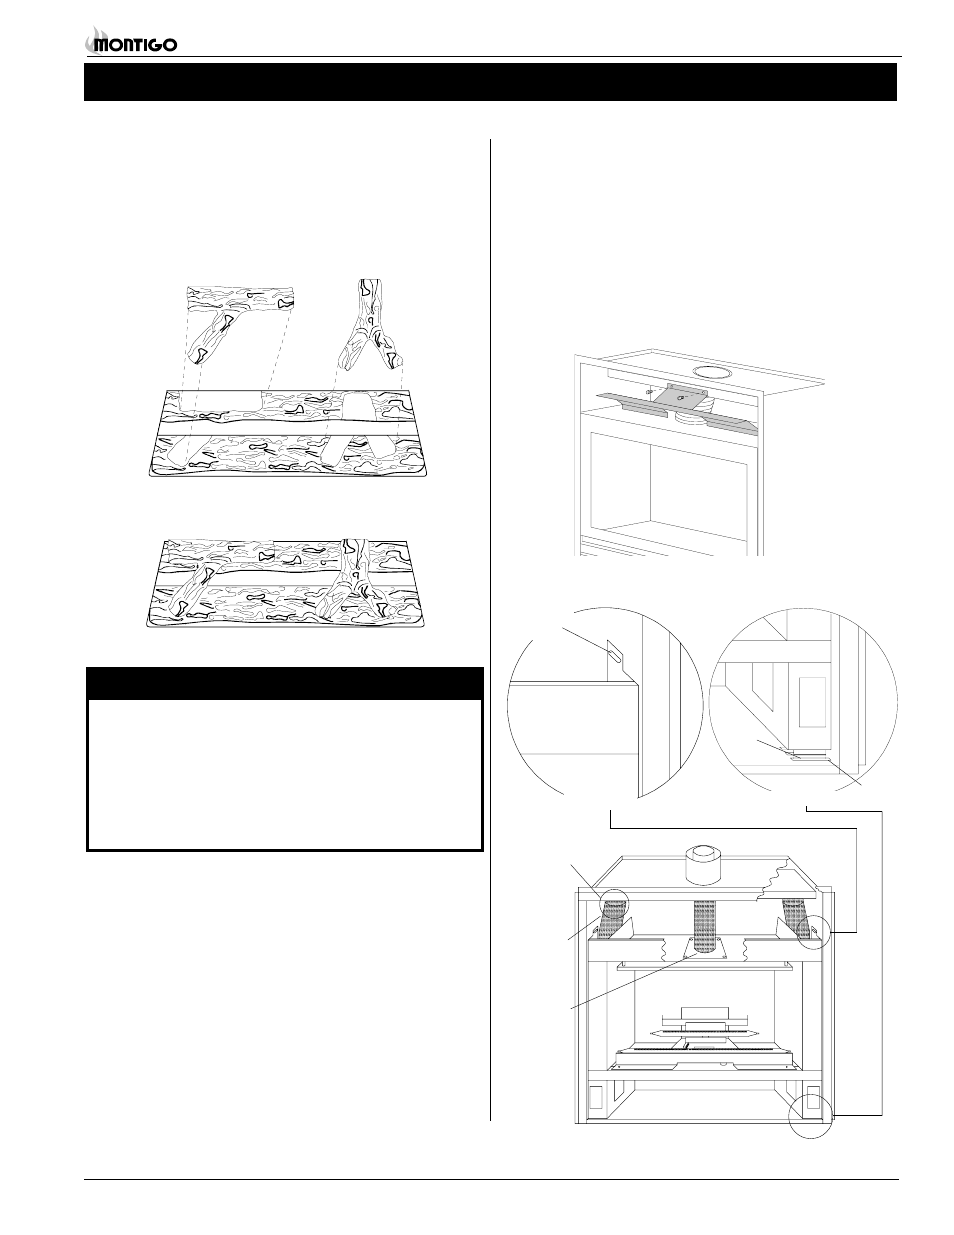
Figure 23b. MW38-DV insert.
Fresh Air
Flex (4" dia.)
High temp.
silicone seal
Venting Plate
Mounting
Bracket
INSET 1
Tab
INSET 2
Front
Slot
Figure 23a. Installing the heat baffle on the MW38-DV.
4. Remove the 4 machine screws that hold the venting plate to the
insert.
5. Remove the insert by tipping the top of the insert outward and
lifting the tabs past the slots in the bottom of the shell. See Figure
23b - Inset 2.
Store the screws and clamps in a safe place to ensure that they are
not lost.
To re-install the insert, simply reverse the steps above. When
upgrading from an E or D model, be sure to add the efficiency baffle
as shown below.
Installing the Log Set
The MW38-DV is supplied with four (4) fibre logs. Logs "A" and "B"
are permanently attached to the log rest, which is pre-installed by the
factory. To install the two small logs ("C" and "D"), simply place them
onto their mating positions as shown in figure 22a below. When log
set is installed it should look like figure 22b.
Figure 22a. Log placement.
Figure 22b. Completed log installation.
Log 'C'
Logs 'A' and 'B'
Log 'D'
NOTES
:
If logs are not placed properly, excessive sooting will result.
If handling or vacuuming the logs, do not attempt to move
the two large logs. They are extremely fragile, and will break
easily.
The surface of the logs will crack due to the heat from the
flames. This is a normal occurance.
Removing and Installing
the Modular Insert
You may remove the insert to protect it from theft and damage
during construction.
1. Remove the two machine screws (1 left & 1 right) at the top of the
insert that attach the insert to the shell. See Figure 23b - Inset 1.
2. Take out the heat baffle (shown in Figure 23a) by removing the 2
machine screws.
3. Remove the fresh air flex from the collars on the shell. See Figure
23b. Important: Be careful not to damage the fresh air flex
during removal or storage.