8 channel poe nvr 16 channel poe nvr, Usb ports, Playing back recorded video – OpenEye EasyNVR Quick Start User Manual
Page 2: Searching for recorded video, Enable motion recording, Exporting video, Playing a backup file on a pc, Viewing video files remotely
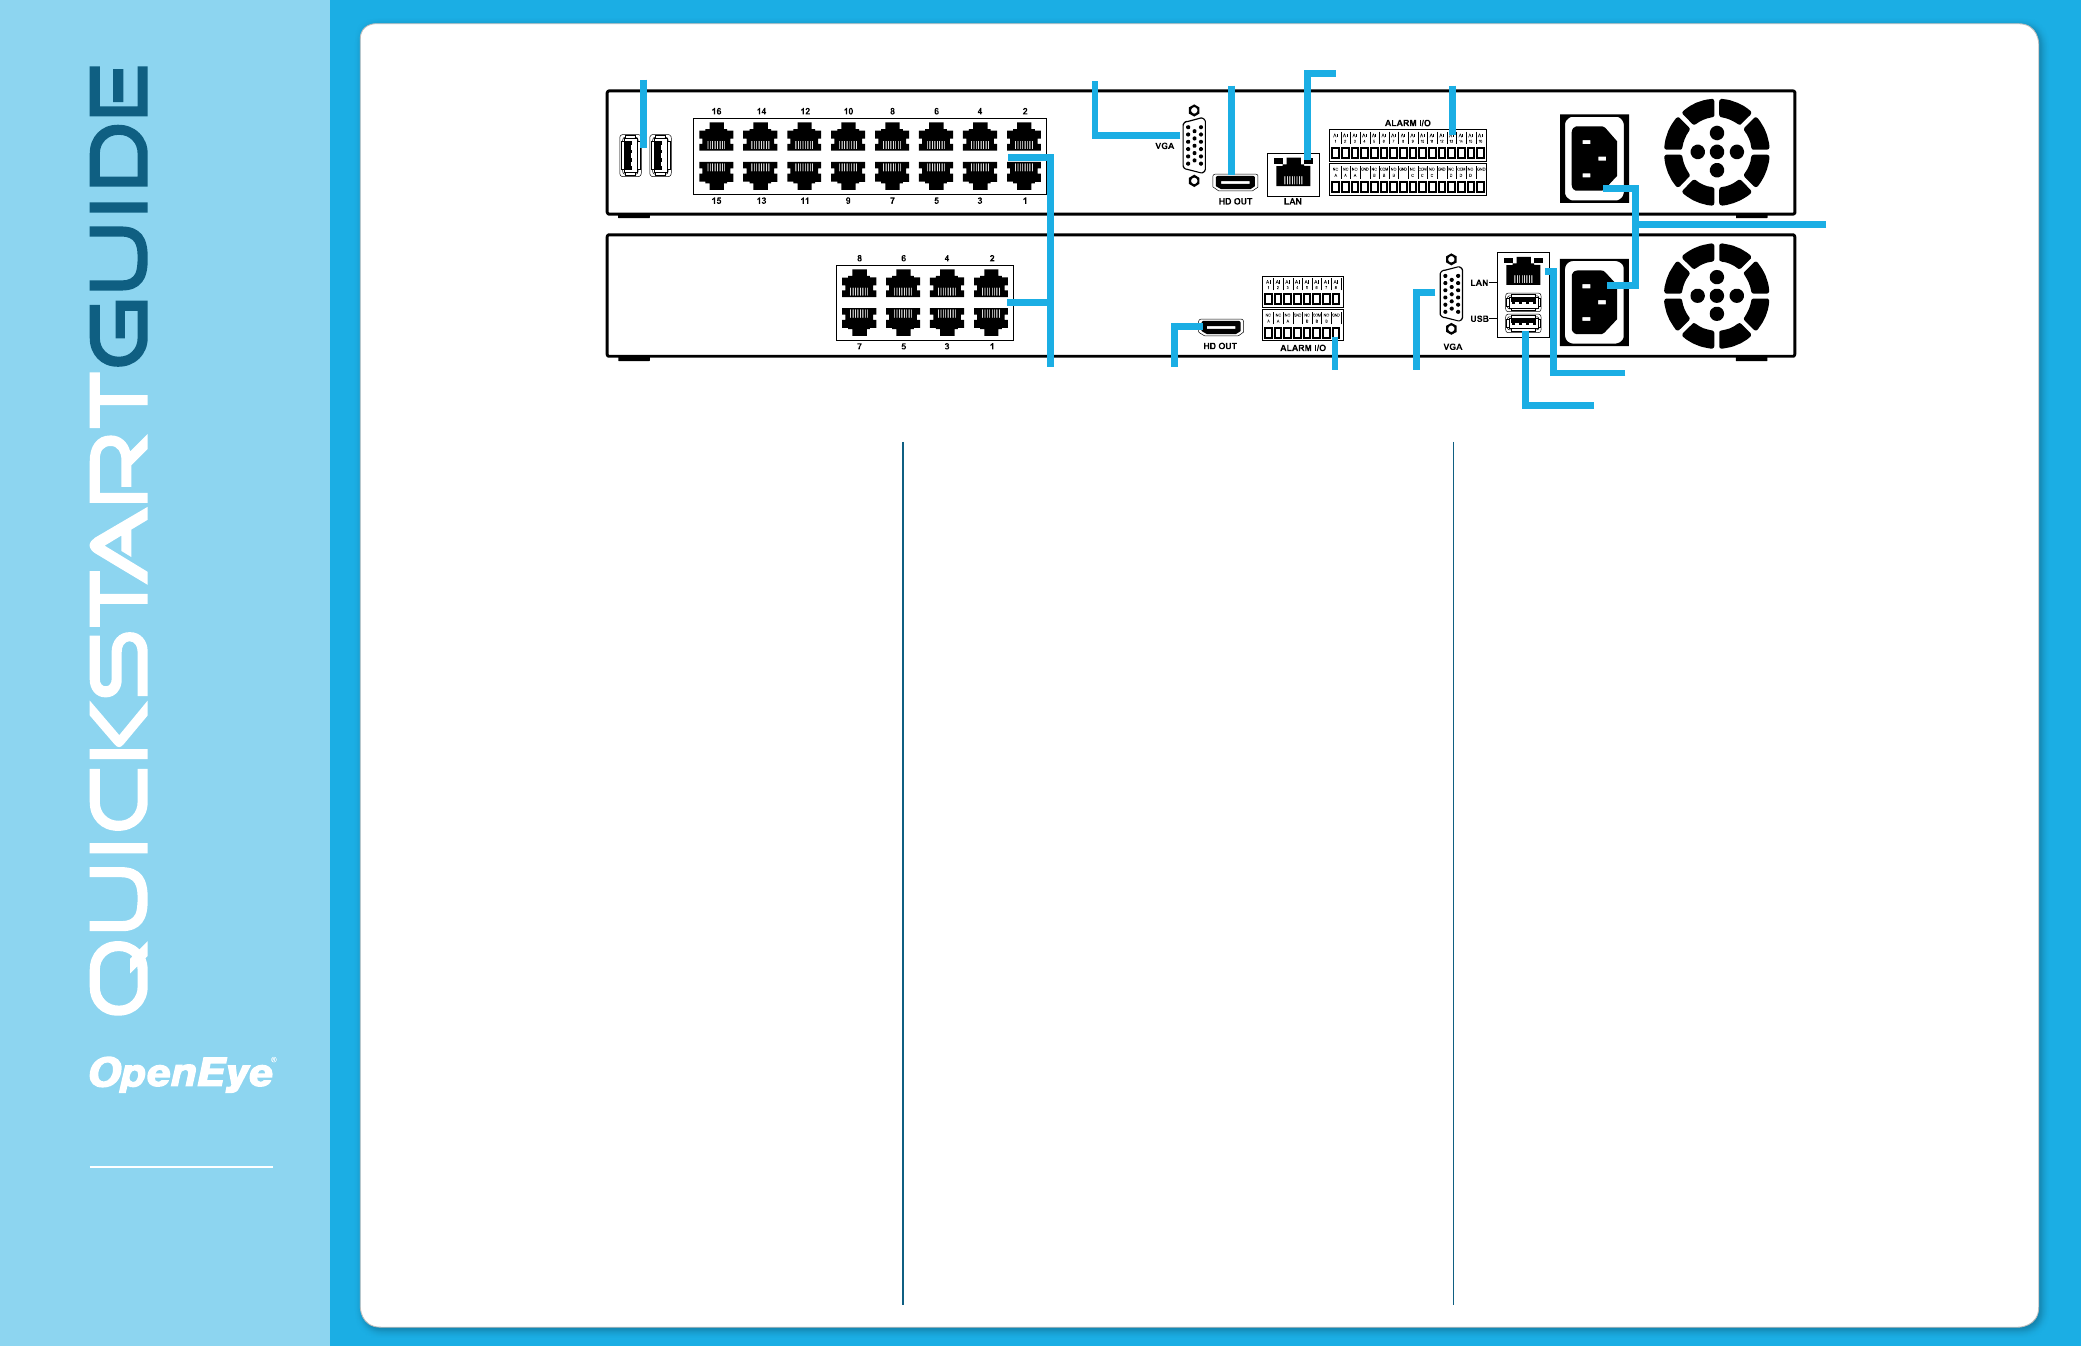
USB USB
USB Ports
For more information, visit OpenEye.net/products.
Network Camera
Inputs
VGA Output
HDMI
Output
HDMI
Output
LAN
Alarm
I / O
Alarm
I / O
VGA Output
Power
Source
LAN
USB Ports
Changing the Screen Display
Change the screen display of camera channels seen in Live display.
Full Screen Display:
Double-click the designated camera channel to display in full
screen.
Divide Screen Display:
Click the Display menu button on the hover menu, then
select Mode List and chose a screen division to display
camera channels.
Playing Back Recorded Video
1. Click the Playback menu button on the hover menu,
and then select Instant PB or Search.
•
Instant PB will playback recorded video from 30
minutes ago, 1 hour ago, 3 hours ago, or 1 day ago.
•
Search will open the Search window, offering
more advanced search options (see Searching for
Recorded Video).
Searching for Recorded Video
Date and Time Video Search
1. Click the Playback menu button on the hover menu,
and then select Search.
2. Select a calendar date to search for recorded video.
3. Designate a specific time during the selected date to
search.
•
Switch between the Overall, Motion, Alarm and
VLoss (video loss) tabs to view camera channels and
video under those circumstances.
•
Click the circular icon to cycle through 24, 12, 4, or 1
hour intervals to narrow the viewable video.
•
Click along the horizontal bar below the calendar
to designate a start time from all viewable video on
that calendar date.
4. Click Play.
Preview Search
1. Click the Preview Search tab.
2. Select a time to begin viewing video.
3. Click the Interval Select drop-down to designate the length
of time the video plays.
Event Search
1. Click the Event Search tab.
•
You can view a list of motion and alarm events listed by
date, time, and channel.
2. Select an event.
3. Click Play.
Enable Motion Recording
1. Click the Setup button on the hover menu.
2. Click Schedule Setup, and then click General Settings.
3. Click the Global Configuration drop-down and select
Motion / Event.
4. Select Alarms Setup, and then Per Channel Config.
5. Click the Motion Detection button so that the button is in
the green ‘ON’ position.
6. Select Motion Detection in the Setup menu and configure
the detection field, level and sensitivity for each camera.
Exporting Video
1. Connect a USB thumb drive or external USB hard drive to the
recorder.
2. Click the Export button on the hover menu, then select
Instant Export, Export, or Snapshot.
•
Instant Export will export recorded video beginning at
the selected interval.
•
Export opens the export window for more detailed
export options.
•
Snapshot captures the image currently on the screen
and saves it to the connected USB device.
3. Select a date on the calendar.
4. Select a device from the dropdown menu that recorded
video will be exported to.
5. Select a camera channel to display recorded video.
6. Click on the horizontal channel bar to mark the beginning and
end of the recorded video to be exported.
•
Left-click to place the orange line representing the begin-
ning of the recorded video to be exported.
•
Right-click to place the red line representing the end of
the recorded video to be exported.
7. Select the Export format.
•
AVI provides a compressed video file viewable in most
media player applications.
•
DRV provides a compressed video file viewable only with
the included proprietary player software.
•
Original provides a raw (uncompressed) video file view-
able only with the included proprietary player software.
8. Click Begin Export.
Playing a Backup File on a PC
1. Connect the USB thumb drive or external USB hard drive con-
taining the exported video to your PC.
2. Browse the USB drive and open the Player folder.
3. Double-click NVR_Player.
4. Click the Playback button near the bottom of the window.
Note:
Available video backups located on the USB drive will
be displayed.
5. Select the desired video timeframe, and then click Playback.
6. Select the camera channels to be displayed in playback, and
then click OK.
Viewing Video Files Remotely
1. Open Windows Internet Explorer.
2. Type the IP address or URL (DDNS) of the recorder into the
address bar and press Enter.
3. Confirm the prompts to install the ActiveX component.
4. When prompted, type a valid username and password, and
then click OK.
Note:
The default username is “admin,” and the default
password is “1234.”
5. Use the menu button on the bottom of the screen to access
additional options.
8 CHANNEL POE NVR 16 CHANNEL POE NVR
32980AC
Copyright ©2014 OpenEye. All Rights
Reserved. Information contained in this
document is subject to change without
prior notice. OpenEye does its best to
provide accurate information but cannot
be held responsible for typos or mistakes.
23221 E Knox Ave
Liberty Lake, WA 99019
1.888.542.1103