Installation using tension hooks, Cabling, Connecting to the ip camera – OpenEye OE-C6012-RW Quick Start User Manual
Page 2: Assigning an ip address, Reset network poe dc12v, Micro sd, Default username and password
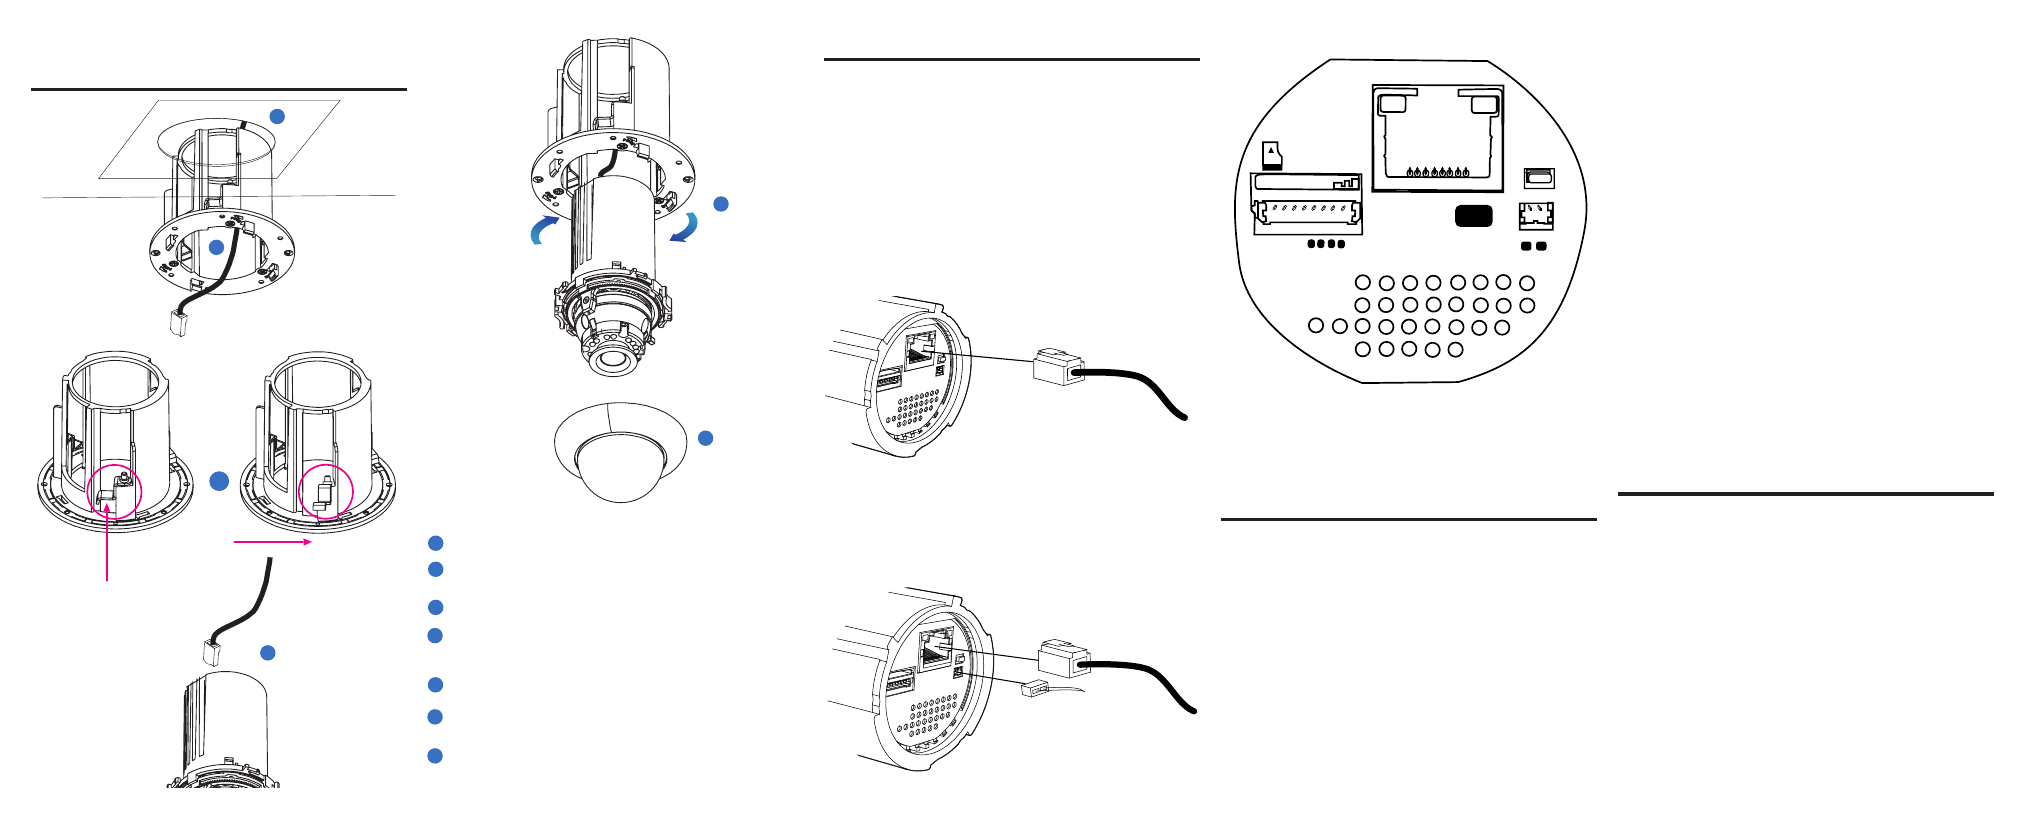
5. Installation Using
Tension Hooks
4
Connect the cables to the camera. See ‘6. Cabling.’
5
After inserting the body into the flush mount bracket, turn the
body clockwise to secure the body in the flush mount bracket.
1
Disassemble the camera. See ‘4. Before Installation.’
2
Using the template sheet provided, make a hole for the flush
mount bracket in the ceiling.
3
Pull the cable through the hole in the ceiling and through the
flush mount bracket.
2
3
4
6
Slide the upper dome onto the camera and the magnets will
connect to the flush mount bracket, securing the upper dome.
7
6. Cabling
This camera is compatible with 12vDC and Power over Ethernet
(PoE). Connect power to the camera using the provided power
connector lead or connect the camera to a PoE power source. If you
are connecting 12vDC power, verify the polarity of the power
connection. If you are using PoE, make sure the Power Sourcing
Equipment (PSE) is in use in the network.
PoE Power Source:
PoE allows for the transmission of power and date via a single
Ethernet cable. PoE eliminates the need for multiple cables to
support power and recording. Follow the installation below to
connect the camera to a PoE-enabled switch using an Ethernet
cable.
12vDC Power:
If PoE is not being used, a power adapter is needed for power
transmission. Follow the instructions below to connect the camera
without a PoE cable.
RESET
NETWORK
PoE
DC12V
+
-
Micro SD
+
+
-
-
AL
ARM O
UT
AL
ARM O
UT
AL
ARM IN
AL
ARM IN
GND
GND
AUD
IO O
UT
AUD
IO IN
7. Connecting to the IP
Camera
To access the camera setup menu, you need to install the OpenEye
Network Camera Manager on your PC or recorder. To install the
OpenEye Network Camera Manager application on your PC, insert
the included software CD, or download the program from
openeye.net, and follow the prompts.
1. Open
Network Camera Manager, and click Find Devices.
2. Locate your camera on the
Network Camera Manager list.
3. To open the viewer software in your web browser, double-click
the camera, and then click
Browse.
The first time you connect to the camera you will automatically be
prompted to install the ActiveX controller. If you internet browser
doesn’t install the viewer software, check the security settings or Ac-
tiveX controls and plug-in settings. If your internet browser asks for
permission to install the ActiveX control, you must allow the ActiveX
control to continue the installation.
8. Assigning an IP Address
OpenEye IP cameras are set to get an IP address automatically
using DHCP. If a DHCP server like a router is not part of your
network, all cameras will have the default IP address 192.168.0.250.
OpenEye recommends changing the IP address even if a DHCP
server has assigned the camera an address.
Network cable
Network cable
Using a screwdriver, push the tension hook upward, then to the
side. This will create tension against the flush mount bracket to
hold it in place.
7
To enable installation of ActiveX controls on Internet Explorer:
1. From the
Tools menu, click Internet Options.
2. Click the
Security tab and then click the Internet icon.
3. Click
Custom Level and ensure that all ActiveX controls and plug-
ins are set to Enable or Prompt.
To ad the camera to your trusted sites:
1. From the
Tools menu, click Internet Options.
2. Click the
Security tab and then click Trusted Sites icon.
3. Click
Sites.
4. Type the IP Address of the camera. Ensure that the
Require server
verification check box is cleared.
For additional information on adjusting the settings of your internet
browser, contact your system administrator or refer to the FAQs at
openeye.net.
Default Username and Password
The username and password are case sensitive. It is strongly recom-
mended that the password be changed after the initial setup to prevent
unauthorized access.
Username -
admin
Password -
1234
6
5
12vDC power