Radson Confort Pilot User Manual
Guide for installation and use confort pilot, Function buttons, Thermostat control
1
ENG
Guide for installation and use CONFORT PILOT
After connecting your appliance to the electrical installation,
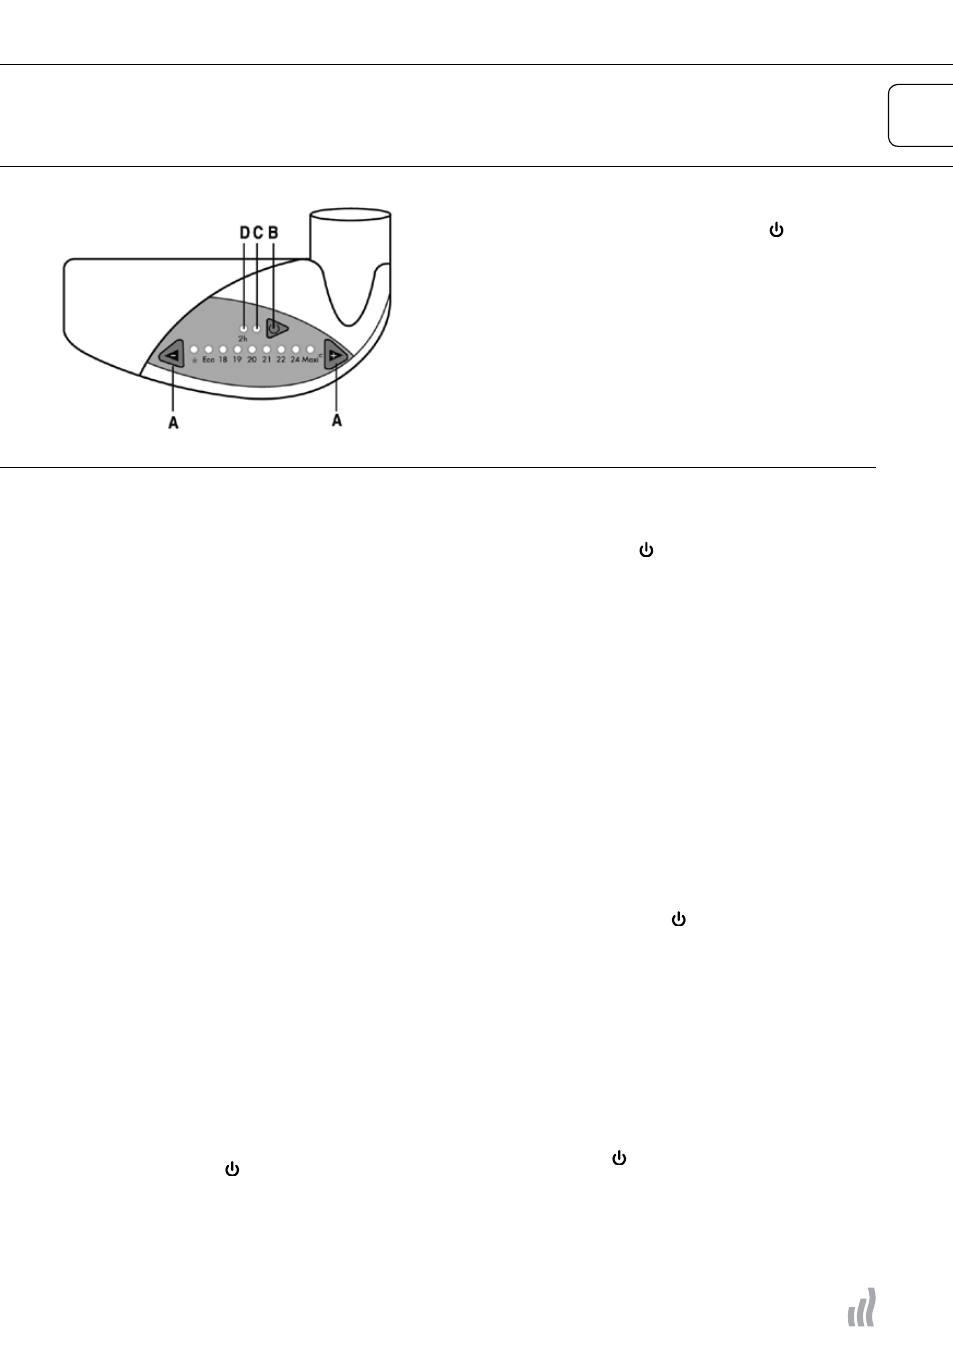
turn on the appliance by pressing the button [B].
The indicator light [C] will light up.
Function buttons:
A Temperature control [indicator light colours: frost
outside [*] - yellow; ECO - green; 18°C to max. - red].
Used to engage the “Confort Pilot” function.
B ON/stand-by button, thermostat and 2-hr. timer.
C Radiator control light [green indicator light].
D Indicator light for the 2-hr timer [red indicator light].
THERMOSTAT CONTROL
To select the desired [or recommended] temperature:
• Press the [+] or [-] button [A].
- The thermostat indicator light will begin to
flash if the room temperature is lower than the
desired temperature: the appliance will start.
- When the desired temperature has been
reached, the thermostat indicator light [C]
will stop flashing and will burn steadily: the
appliance will stop.
The appliance starts as soon as the room tempera-
ture is lower than the recommended temperature.
ELECTRICAL CONNECTION
Neutral : Grey wire • Phase : Brown wire
Attention: Pilot wire: Black wire with “FIL PILOTE”
label. The pilot wire can be used to reduce the
set temperature when connected to a suitable
programmer. The pilot wire should be insulated and
NOT connected to the earth if this function is not used.
USING THE TIMER TO ADJUST THE
TEMPERATURE
With this function, you can warm up a room or dry
laundry for 2 hours. The appliance thermostat does
not operate during that time [the recommended
temperature indicator light is off].
The timer indicator light will burn until the 2 hours
are over. The appliance will then return to normal
operation [thermostat-control of the room tempera-
ture] when the timer goes out.
To activate the timer:
• Press briefly on the button:
- The timer indicator light [D] will light up and the
2-hour heating cycle will start.
The timer indicator light will flash until the end
of the cycle.
Note
You can interrupt the timer at any time by pressing 2
times quickly on the button.
To activate the “Confort Pilot” function:
With this function, you can programme the timer to
repeat a specific heating function every day at the
same time.
• Activate the timer [as explained below].
• Press on the desired time by pressing the [+] but-
ton for 5 seconds to register that you are activating
it [the red indicator light will flash].
- The heating will start immediately for 2 hours
and will repeat after 23.15 hours and thereafter
every 24 hours.
Example: on the 1st morning, the user pushes the
[+] button for 5 seconds at 7.00 o’clock in timer
mode. The next day, and for every day thereafter, the
appliance will start at 6.15 a.m. and run for 2 hours.
Note:
• You can interrupt the timer at any time by pressing
2 times quickly on the button.
• To cancel the programme, press the [+] button in
timer mode for 5 seconds.
CALIBRATING THE THERMOSTAT
A difference of 1° C to 2° C between the reference
temperature on the housing and the temperature
that is measured by a thermometer is normal.
If you want those 2 values to be identical, you can do
the following:
• Measure the room temperature with a thermo-
meter;
• Press on the and [+] buttons for at least 5
seconds at the same time.
- The temperature indicator light and the ‘frost
outside’ indicator lights will both begin to flash.
• If the temperature on the display is not the same
as the temperature shown on the thermometer,