Smithy GN1300 User Manual
Page 117
For most work, the beginner will use the Unified National Standard, which is a V-form
thread slightly flat on top and at the root. Screw threads are usually referred to by pitch
numbers, such as 18 or 24, meaning 18 or 24 threads per inch (tpi). The Smithy Granite
Series machine cuts standard threads in pitches from 7 to 52 tpi and metric threads from
0.35 to 6.5 mm.
Because the lathe spindle, which carries the work, connects by gearing to the leadscrew,
which moves the cutting tool along the lathe bed, a ratio exist between spindle speed in
revolutions per minute and cutting tool movement in inches. When you change the
gearing, you change this ratio. For this reason you can cut screw threads of various
pitches by changing both the thread selection lever and the rate-of-feed selection lever
at the head of the lathe.
Thread charts on the machine show both inch and metric measures. The inch chart on
the headstock shows the tpi from 7 to 52. The metric chart show the distance from
thread crest to crest from 0.35 to 6.5 mm.
For right-hand threads, start the threading or chasing tool at the right end of the
workpiece and feed it toward the headstock. For left-hand threads, reverse the
leadscrew's rotation direction using the direction lever on the headstock and feed the
threading tool from left to right. (You actually have the choice of changing the spindle
rotation and/or cutting off the backside).
With practice, you can grind cutters to almost any profile. It is difficult, however, to
sharpen such cutters without altering the cutting form, and almost every resharpening
requires a complete regrinding of profile and clearance angles.
After turning the work to be threaded to the outside diameter of the thread and setting
the gears for the desired thread, put a threading tool in the toolpost. Set it exactly on the
dead center of the workpiece you'll be threading, using a center gauge as a guide.
To make sure your cutter is on dead center, place a credit card or shim between the
cutter point and workpiece. When the tool is on dead center, the credit card or shim will
remain vertical. With a credit card, there in no possibility of chipping the cutter as the
workpiece and cutter come together.
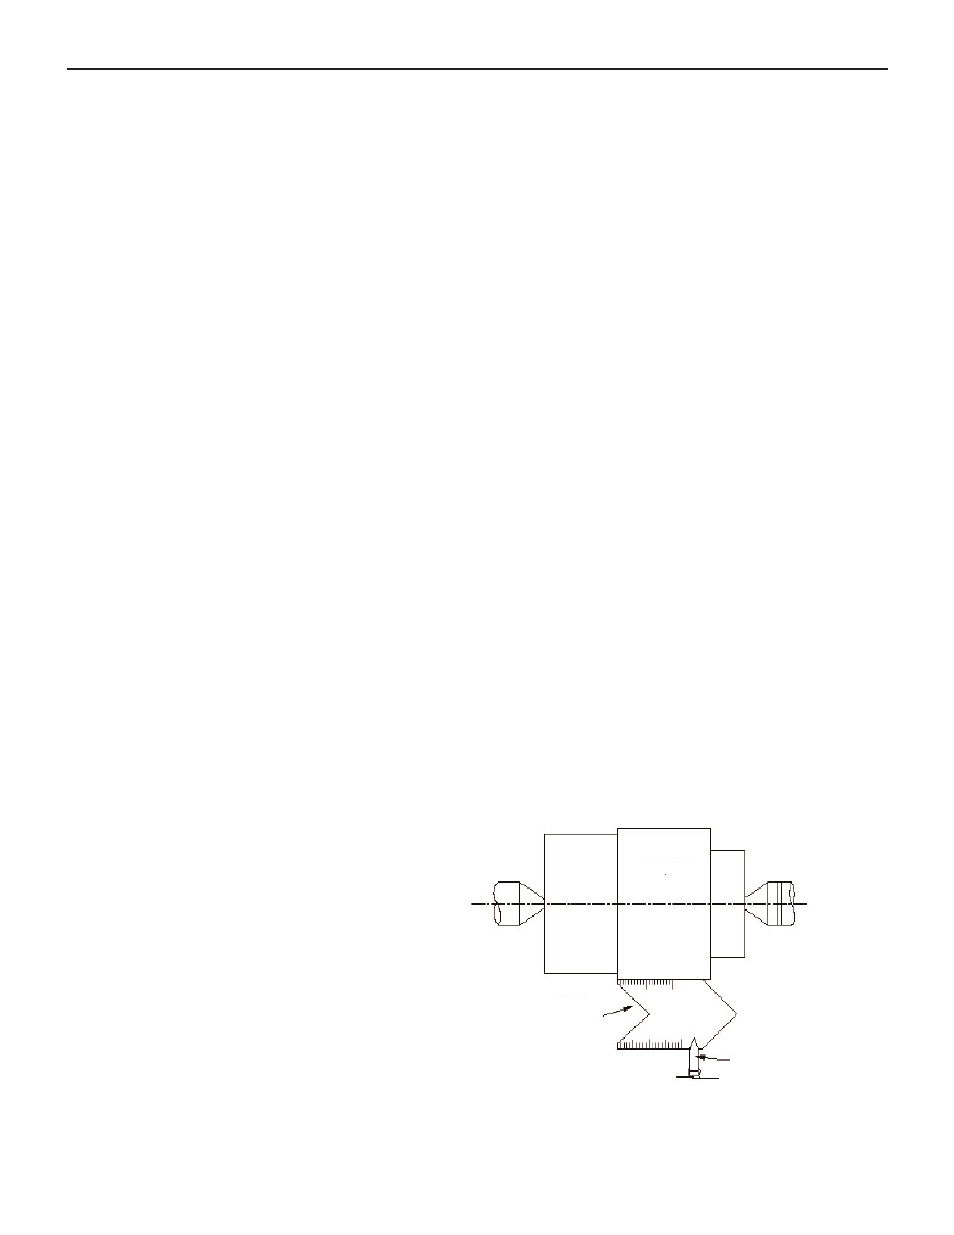
Set the compound perpendicular to
the line of centers and rotate it
29-1/2° to the right. Place the
thread gauge on the point of the
threading tool and feed the tool
toward the workpiece (Figure A.9).
Adjust the tool so the edge of the
gauge is exactly parallel to the
workpiece. A slip of white paper held
below the gauge will help check the
parallel of the gauge to the shaft and
the fit of the tool point in the V of
the gauge. Placing the threading tool
perpendicular to the surface of the
workpiece assures a true-form
thread.
Figure A.9 Using a center gauge, set the threading
tool at exactly dead center on the workpiece
Appendix A: Machining Reference Guide
A-15
Or Visit www.smithy.com
Workpiece
Toolbit
Center
Gauge