Tecfluid TR2420 User Manual
Page 8
8
To do any
programming
of the transmitter,
enter the password and
click the button
"Open."
The tab “Programming” will be added to the screen. Accessing this tab, the following
functions are available:
-
Configuration of
points P1 and
P2
that define
the range of the
current loop
by
moving
the float.
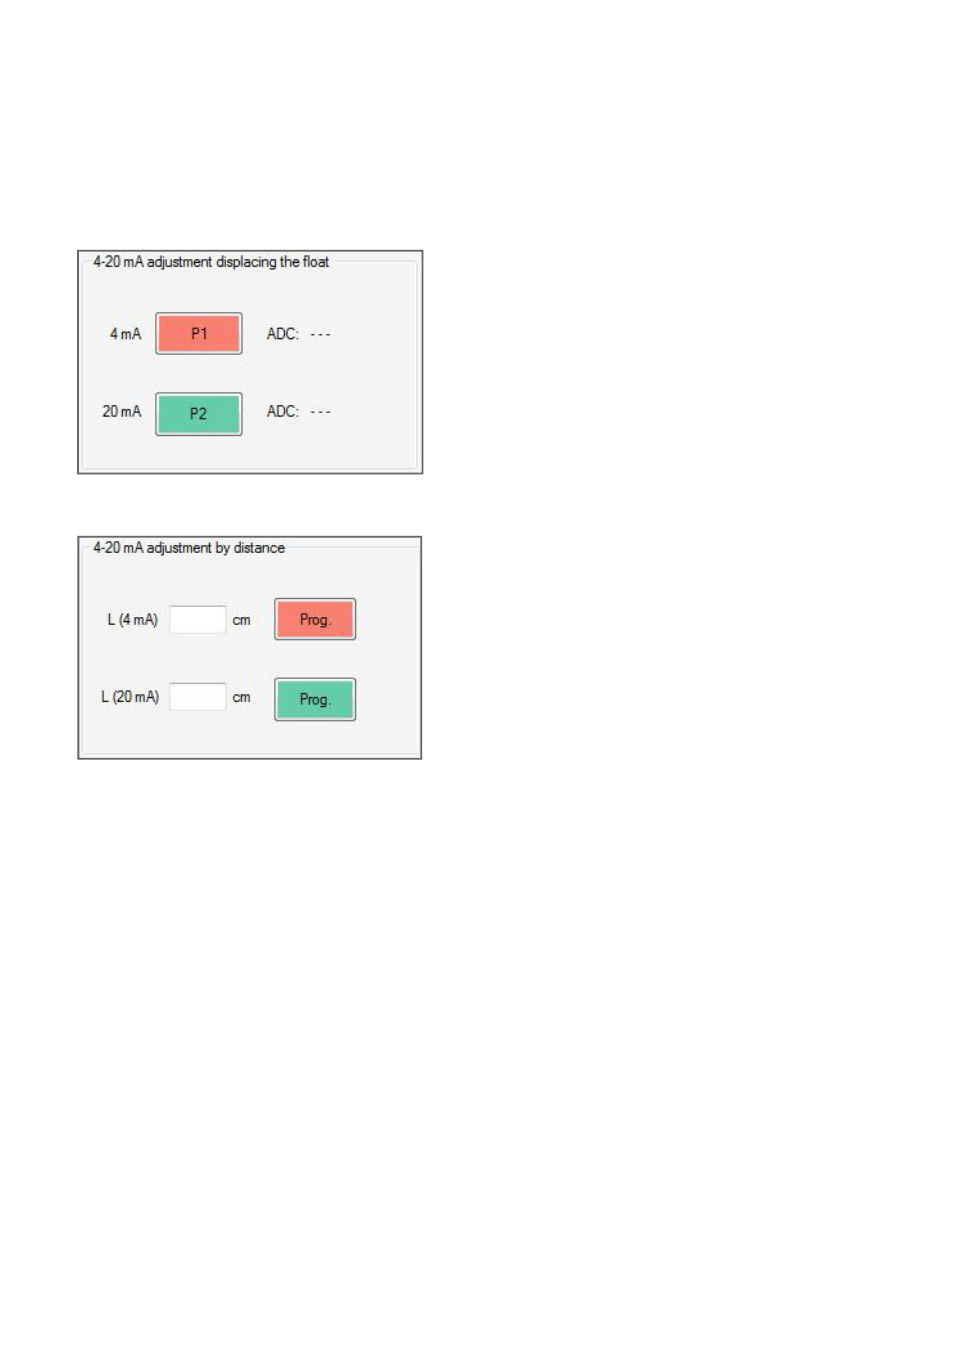
4-20 mA loop adjustment by moving the float.
Move the float to the position where 4 mA are
required. Press P1 on the computer screen.
Move the float to the position where 20 mA are
required. Press P2 on the computer screen.
Be sure that the LED corresponding to the button
lights steady for 2 seconds.
4-20 mA loop adjustment by distance.
Introduce the distance L, in centimeters, where 4 mA
are required in “L (4 mA)“ and press the red button.
Introduce the distance L, in centimeters, where 20
mA are required in “L (20 mA)“ and press the green
button.
Be sure that the LED corresponding to the button
lights steady for 2 seconds.
-
Configuration of
current range
defining
the distances
equivalent
to the level.
After configuring the
current
loop,
it is recommended to go to
the
tab
"Visualization" and
check
its operation.
This tab allows to
check the
current loop
and the distance
L.
If
the operation
is successful,
go
to the tab "TR2420",
close the port and
then
disconnect
the level transmitter from
the computer.
Verify that the
loop
current indicates
the current value
accordingly.
If it is necessary
to
change the
factory
settings
of the transmitter, it is recommended to
set
the current loop
values
directly with the
transmitter
or via PC, making the
4-20
mA
adjustment
by
moving the
float.
If the
instrument is a by-pass level gauge Series LT, it is possible
that
the float
can not
be
moved,
since it is
within the level.
If you
want to change the
4-20 mA
loop
factory settings
,
it is recommend the
4-20 mA loop adjustment by distance,
with
the
PC software.