Visara iCON-XT Quick Start User Manual
Icon-xt quick start guide
Initial setup of the ICON:
1.
Cable the unit (power, Ethernet, Twinax) (see Cabling the Unit below).
2.
Edit the TWINCON.INI file on the floppy (see Setting the Initial IP Address below).
3.
Power up the unit with the floppy in the drive.
4.
Using any web browser, connect to the ICON to complete the setup.
The Management Password is
case sensitive, and is set at the factory to admin.
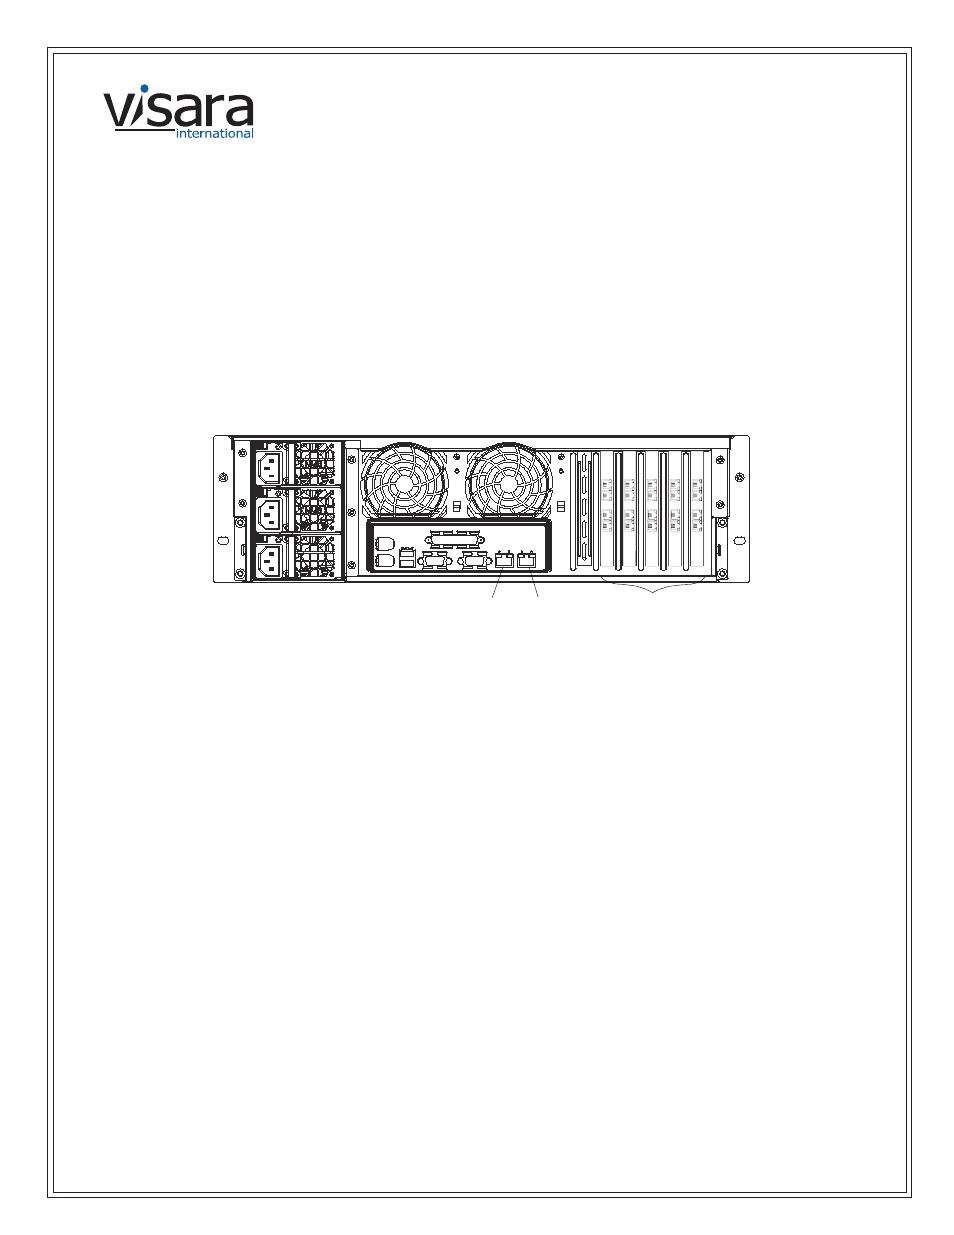
Cabling the Unit
Ethernet
Twinax
LAN1
LAN2
Ethernet
•
The RJ45 connectors at the bottom of the chassis are for Ethernet.
•
The RJ45 connector on the left (as facing the back of the unit) is LAN1.
•
Either LAN1 or LAN2 can be used to access all functions of the ICON.
Twinax
•
The ICON requires a special Twinax adapter cable (Visara part number 971908-009), and ships with
one for each port.
Setting the Initial IP Addresses
On the floppy disk included with the unit is a file called TWINCON.INI, which includes a section that looks like
this:
[Network]
IP=204.48.36.155
NetMask=255.255.255.0
DefaultGateway=204.48.36.254
1.
Using a plain-text editor (such as Windows’ Wordpad), change the IP addresses to the desired values. If
the original floppy cannot be located, just create TWINCON.INI on a floppy with the entries shown above.
Note: no whitespace (spaces or tabs) is allowed in these entries.
2.
Put the floppy disk back into the ICON, and turn it on. The values in the file on the floppy will be copied
to the permanent copy on the hard disk, and will take affect immediately. The floppy is not required for
future reboots.
Visara International • 2700 Gateway Centre Blvd., Suite 600 • Morrisville, NC • 27560 • 888 334 4380 • [email protected]
ICON-XT Quick Start Guide
7 0 7 0 9 8 - 0 0 2