Step-1, Step-2 step-3 step-4, Connection instructions – William Optics Zenithtar 80 FD User Manual
Page 5: Step-3 step-4 connection instructions, Step-2
P05
www.william-optics.com
P06
Step-1
Tighten lock screw.
Tighten lock screw.
Insert eyepiece for
visual observation.
Step-2
Step-3
Step-4
Crafting the Earth's Finest
Astronmical Instruments
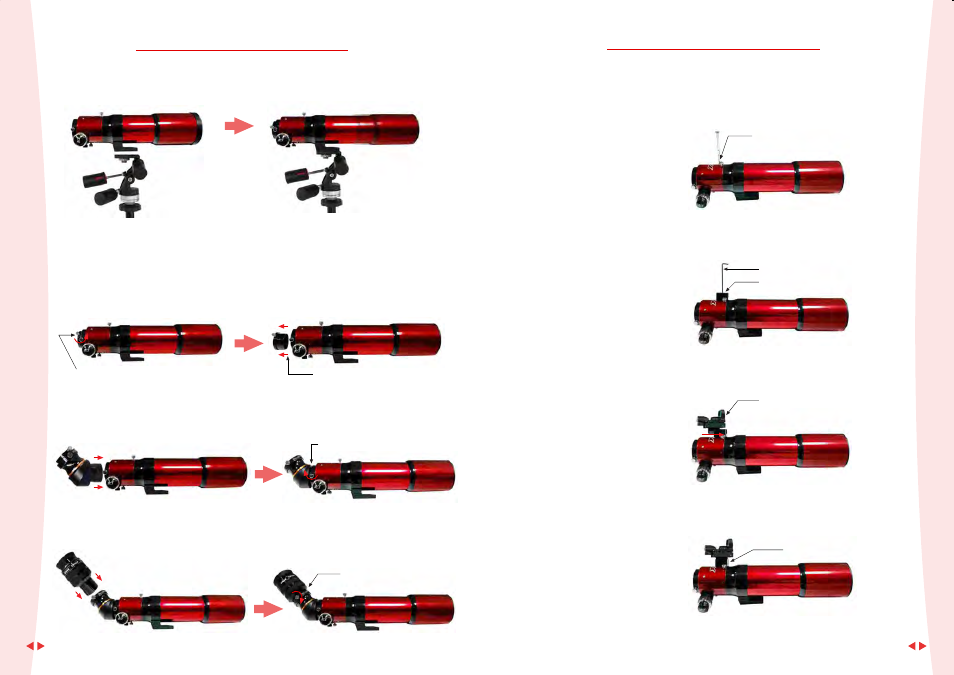
Connection Instructions
( 2" Erecting Prism )
Using the supplied L-Bracket, attach the
telescope to the tripod threaded with a standard
photographic 1/4-20 connection knob. Ensure
that the knob is tight or locked down before
proceeding.
After the telescope is firmly connected to the
tripod, extend the dew shield.
Loosen lock screw for release.
Remove 2" to 1.25" adapter.
Step-1
Take out the finderscope screw from
the drawtube top with a small flat
screwdriver. This is the larger black
screw at the left of the rotation lock
thumbscrew.
Step-3
Step-4
Connection Instructions
( Red Dot Finder )
R.D.F Base
Insert the quick release red-dot finder
bracket in the base.
Lock the bracket thumbscrew properly
and follow alignment instructions. Note
that this is an optional product available
for purchase from WO.
Base Lock Screw
Finderscope Screw
2.5mm
We suggest positioning the RDF base
with the thumbscrew facing towards
the left.
Step-2
R.D.F Base