Removing a fan tray, Ut 1 in, Figure 3 – H3C Technologies H3C S5800 Series Switches User Manual
Page 9
5
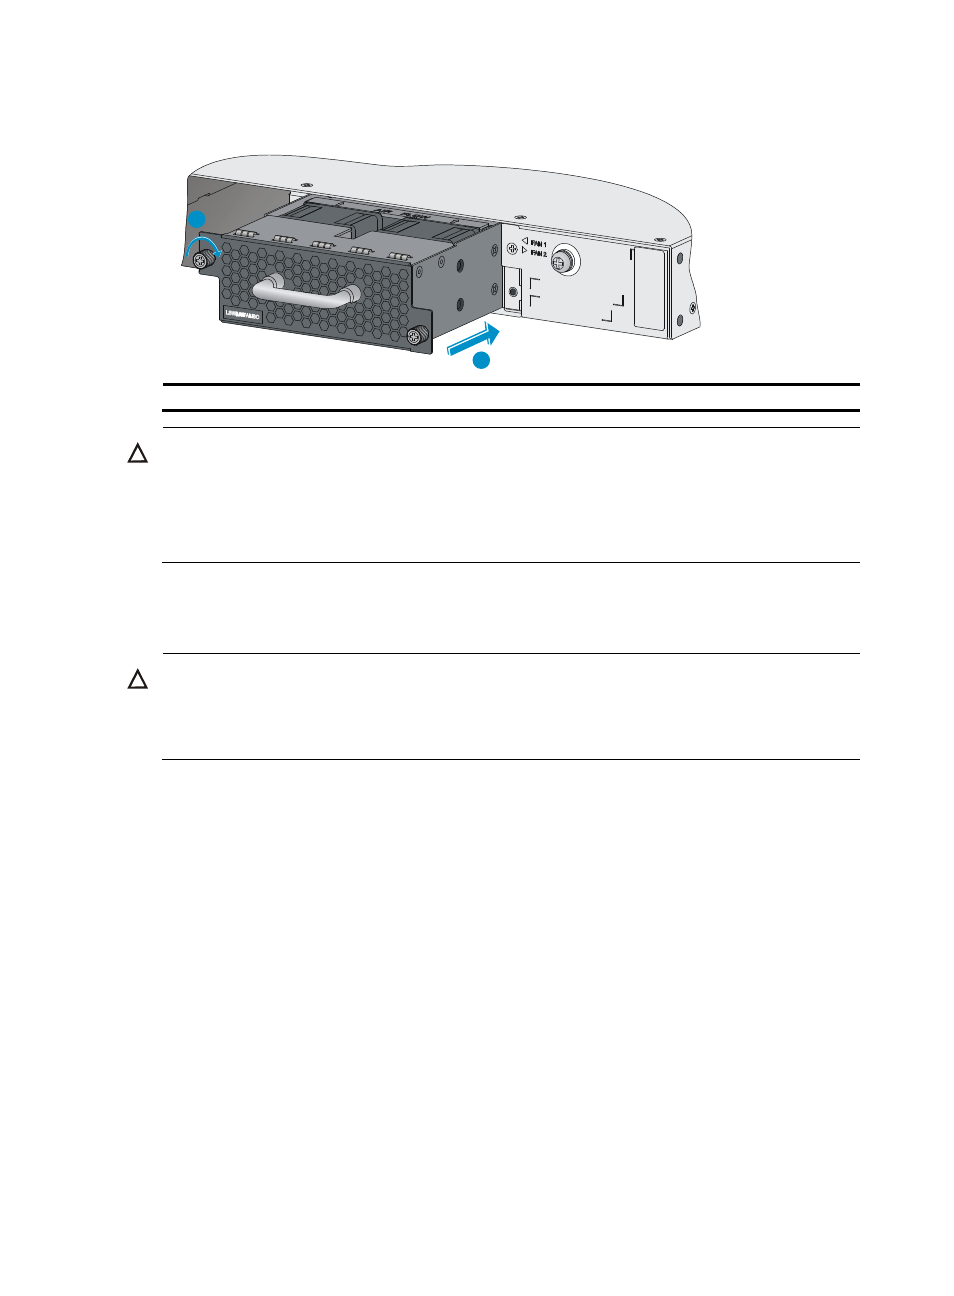
Figure 3 Install a fan tray
2
1
(1) Slide the fan tray into the slot
(2) Fasten the captive screws
CAUTION:
•
To prevent damage to the fan tray or the connector on the backplane, insert the fan tray gently. If you
encounter a hard resistance while inserting the fan tray, pull out the fan tray and then insert it again.
•
If the captive screws cannot be tightly fixed, check the installation of the fan tray.
Removing a fan tray
CAUTION:
•
When replacing a fan tray with the device running, note safety with electricity.
•
Do not touch rotating fans when replacing a fan tray with the device running.
Step1
Wear an ESD-preventive wrist strap and make sure it makes good skin contact and is well grounded.
Step2
Face the fan tray to be removed from the device. Loosen the captive screws on the fan tray with a Philips
screwdriver until the captive screws fall off the device, as shown in callout 1 in
.
Step3
Grasping the handle of the fan tray with one hand, pull the fan tray part way out the slot. Supporting the
fan tray bottom with the other hand, pull the fan tray slowly along the guide rails out of the slot, as shown
in callout 2 in
.
Step4
Put the removed fan tray on an anti-static mat or in its original package.