Magnum Energy AC Breaker (BR-AC) User Manual
Page 2
AC Load Breakers Instruction Sheet
2 © 2011 Magnum Energy, Inc.
Installation Steps:
1. Remove the MP’s breaker face plate cover only after all power has been
removed from the MP (Magnum Panel) system.
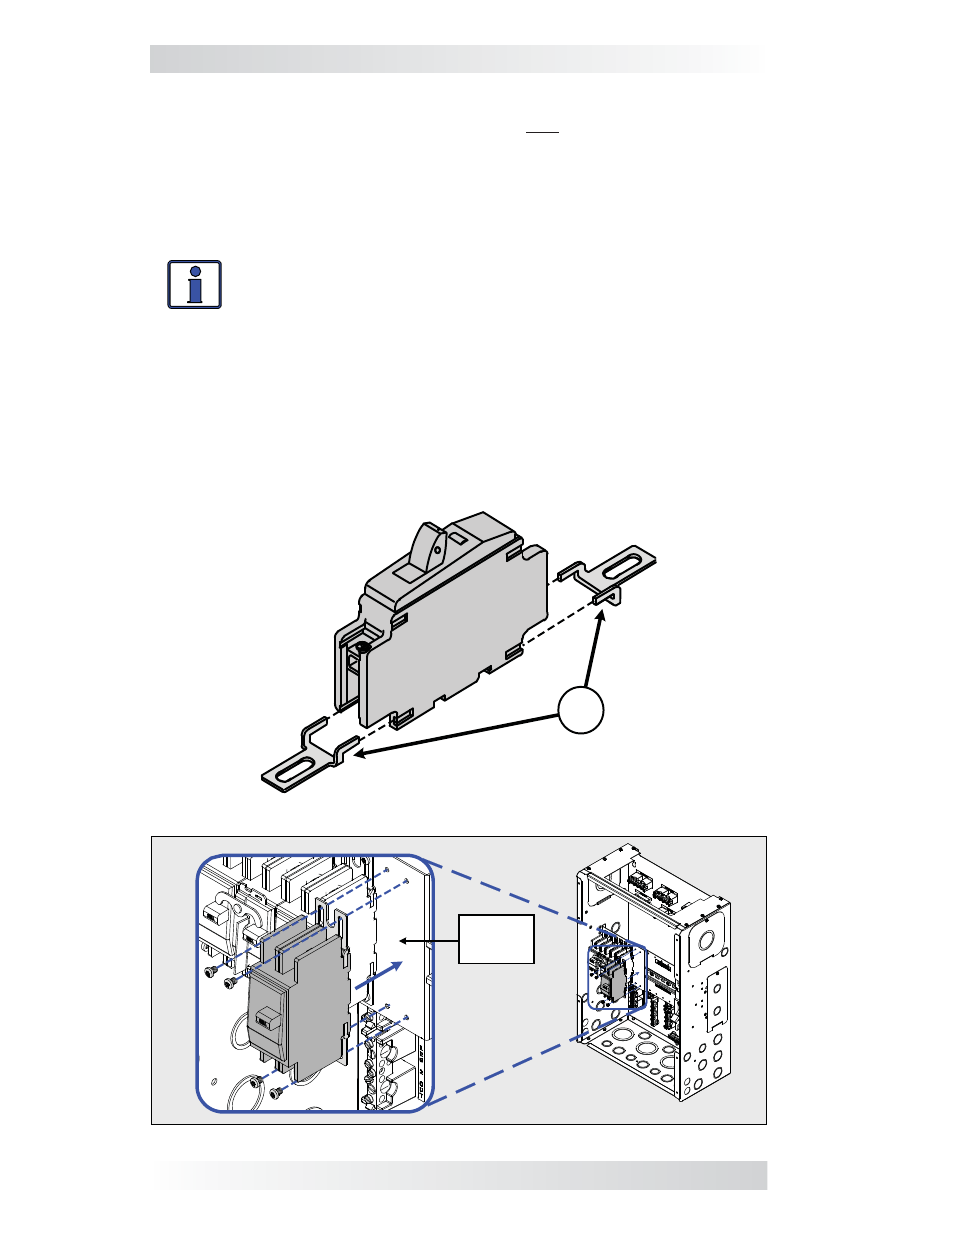
2. Install the mounting feet (A) on each end of the circuit breaker (Figure 2).
3. While holding the AC breaker against the MP’s mounting plate, align the
breaker’s mounting holes with the enclosure’s mounting holes (Figure 3).
Note: AC breakers are installed in the left enclosure of a MP dual enclosure.
Info: The holes in the mounting plate — for the Torx screws that
hold the breakers — are NOT pre-threaded. Prior to mounting the
breaker, pre-thread the holes using a power-driver and the self-
threading Torx screws (T20 drive) that are provided.
4. Use the supplied #8-32 x 1/4” T20 screws to hold the AC breaker in place.
Do not fully tighten the screws, that will be done in the next step after ensuring
proper alignment with the MP’s breaker face plate cover.
5. Place the MP’s face plate cover over the AC breakers to ensure each
breaker aligns correctly into the spaces (knockouts removed from the face
plate cover). If the fi t and alignment are correct, use a hand driver to tighten
the Torx screws to secure each AC breaker.
The AC breaker is now ready to be wired to the inverter and the AC loads.
Figure 3, Installing AC Load Breaker Within a MP Single Enclosure
Breaker
Mounting
Plate
Figure 2, Attaching Mounting Feet to AC Load Breaker
A
BR-AC60S
NOTE: The BR-AC60S
has single slotted mount-
ing feet (x2); BR-AC30D
has dual slotted mount-
ing feet (x2)