Fig.9 fig.10 – Sealey RB460A User Manual
Page 3
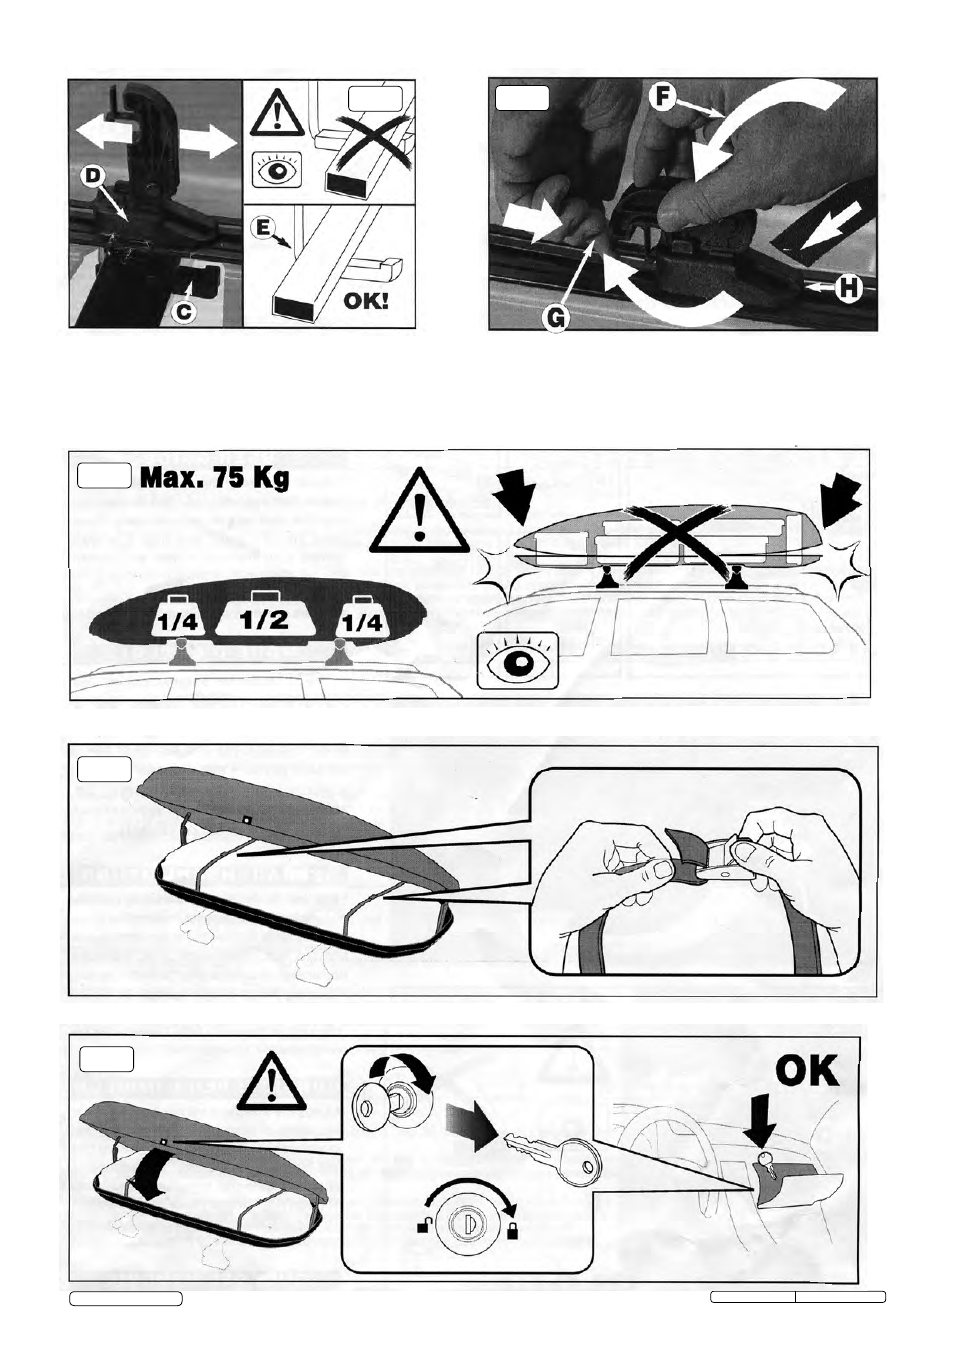
Fig.9
Fig.10
3.10.
Slide the fixing system (fig.9D) to the right or to the left (see fig.9C) in order to find the most suitable position of the metal hook on the
roof bars, (see figs 9C and 9E) .
3.11.
Screw the handle clockwise (see fig.10) in order to secure the metal hook onto the roof bar and push the handle down to lock the
system, see fig.10F. If the handle does not lock, lift the handle up, screw or unscrew (if the handle is too tight) and repeat the procedure
above. Lock the safety catch (see fig.10G).
Check carefully that the system is appropriately fixed and that the roof box does not
move on the roof bars.
After fixing all four hooks to the roof bars, insert the luggage straps through the loops placed on the body of the
fixing system, (see fig.10H).
Original Language Version
RB460A, RB500A Issue: 1 - 08/01/14
© Jack Sealey Limited
Fig.11
Fig.12
Fig.13
3.12.
Distribute the load evenly in the roofbox. dO NOT place tall objects in the roofbox which will prevent it from closing correctly
(see fig.11).
3.13.
Use the two straps provided, threaded through the body of the fixing system (refer to 3.11.), to secure the load within the roofbox.