Fig. 4 fig. 3 – Medal Sports FH1439021 User Manual
Page 7
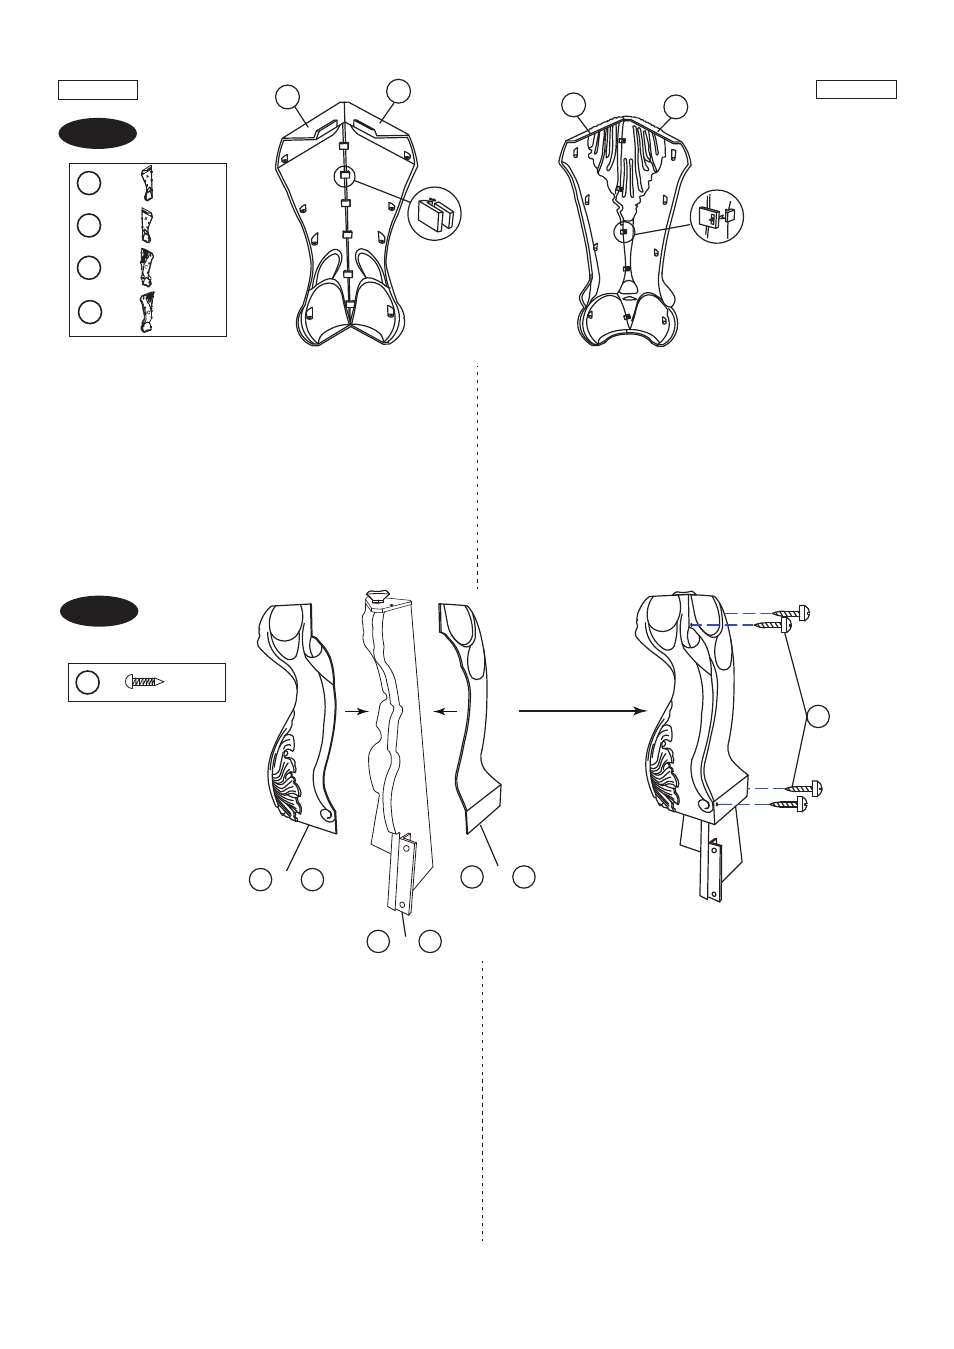
FIG.3
FIG.3
FIG.4
FIG.4
www.themdsports.com
6
(Continúe en la siguiente página.)
(Continued on the next page.)
Español
English
X 4
X 4
X 4
X 4
5
6
7
8
X 16
22
5
6
Locking piece
8
7
Locking piece
22
7. Carefully align the seams of the Plastic Legs - A (#5)
and Plastic Legs - B (#6), lock them using locking
pieces on the legs. Note: Listen to the sound of
“click” when locking the legs together to ensure
the legs are locked firmly.
8. Next, lock the Plastic Legs - C (#7) and Plastic Legs -
D (#8) together in the same way. See FIG.3.
9. Attach the Plastic Legs (#5 & #6) to the Inside Legs (#2
& #3) and then place another Plastic Legs (#7 & #8)
around the other side. See FIG.4.
10. Align the holes of the Plastic Legs (#5 & #6, #7 & #8),
then attach legs together using four Screws (#22) per
Leg.
Note: it is not recommended to use a power screwdriver
when assembling the Plastic Legs. Over - tightening of
the screw can cause damage to the leg.
9. Adjunte las Piernas Plástica (#5 & #6) a las Piernas
Interna (#2 & #3) y luego coloque otras Piernas
Plástica (#7 & #8) alrededor del otro lado. Vea la
FIG.4.
10. Alinee los agujeros de las Piernas Plástica (#5 &
#6, #7 & #8), luego adjunte las piernas juntos
usandos 4 Tornillos (#22) por Pierna.
Nota:No recomendamos de usar un destornillador
eléctrico para ensamblar las Piernas Plásticas. El
apretamiento excesivo de tornillo podría causar
daño a la pierna.
7. Alinee con cuidado la juntura de Piernas Plástica –A
(#5) y Piernas Plástica-B (#6), las cerrando con
pedazos de cierre sobre las piernas. Nota:Escuche
un sonido de “Clic” cuando está cerrando juntos
las piernas para asegurar que las piernas están
cerrados firmemente.
8. Siguiente, de la misma manera cierre juntos las
Piernas Plásticas-C (#7) y Piernas Plástica-D (#8).
Vea la FIG.3.
FIG. 4
FIG. 3
7
8
and
2
3
and
5
6
and
1439021