4 hardware installation – PLANET KVM-1610 User Manual
Page 9
9
LEDs
Color
Description
Power
Blue
An blue light indicates that the KVM is operating
Port
Green
The PC or KVM connected to the corresponding port is on and
operating
Red
The situation of being connected to the port.
Button
Description
OSD
OSD Control Mode
Console-Reconfirmed
The keyboard and mouse will be reconnected, and the
EDID in the screen will be read again.
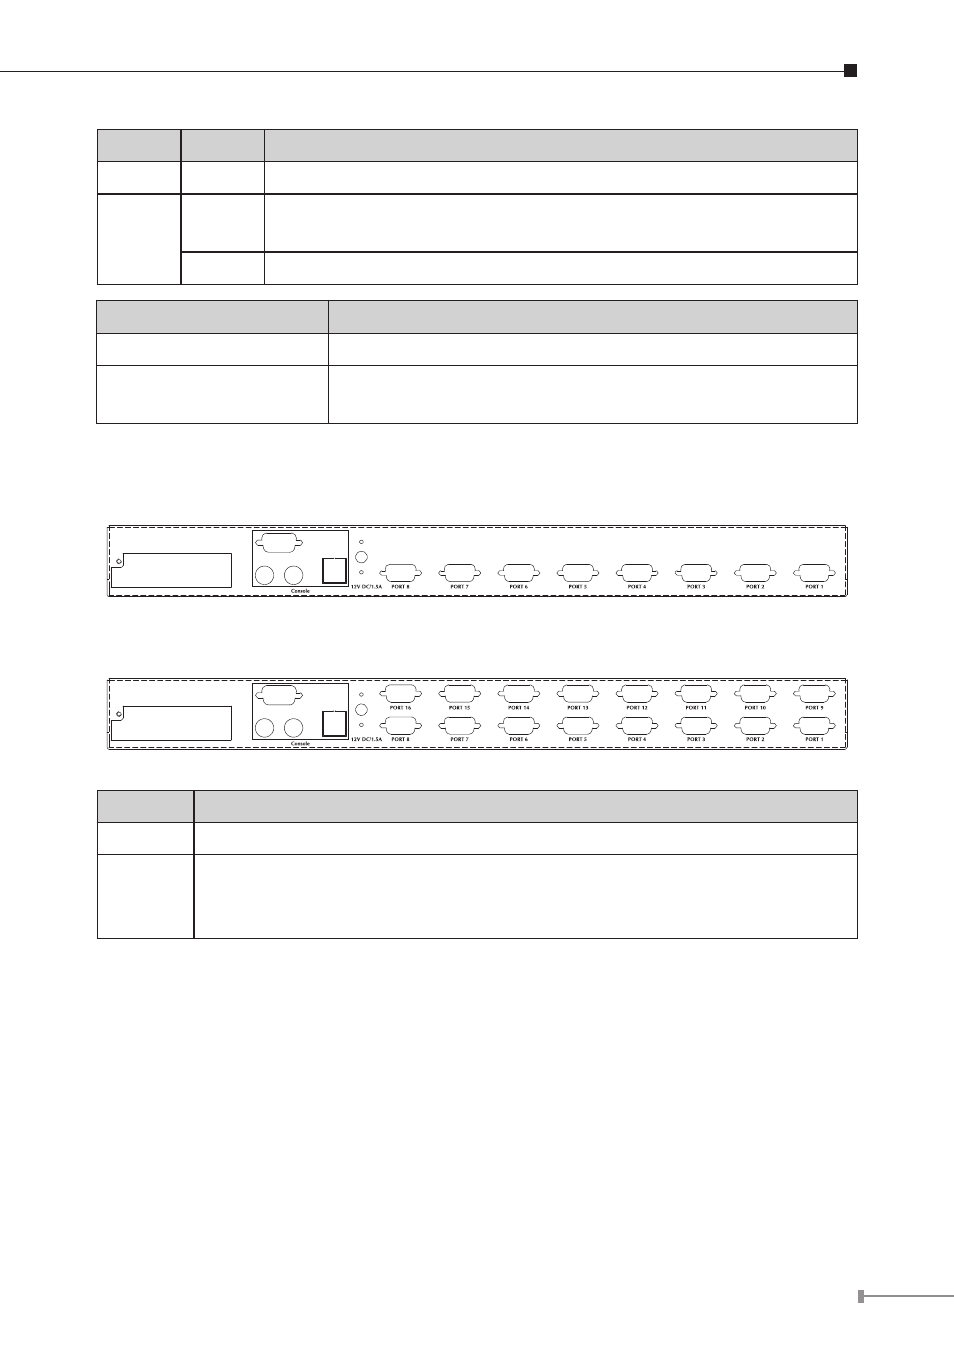
Real panel
8-port KVM Switch
16-port KVM Switch
Port
Description
CPU
Install the cable connected to a PC here
Console
In the Master KVM, connect the monitor, keyboard and mouse here.
In the Slave KVM, connect the cable come from the Master CPU port
here
2.4 Hardware Installation
Before installation, please make sure all of peripherals and computers have been
turned off.
Step 1: Rack Installation
Find a convenient place to put your KVM Switch. Its 19” rack mount form factor
makes it ideal stackable on 19” rack. When stacking to a rack, attach the included
brackets to the sides of the KVM Switch. Take note of the length of your cables
so that your computers, KVM Switch, keyboard, mouse and monitor are distanced
properly.