Before using the print release function, Settings required on the machine, System settings – Sharp MX-6070N User Manual
Page 4: Print release settings guide
4
Print Release Settings Guide
BEFORE USING THE PRINT RELEASE
FUNCTION
This section explains settings that must be configured before you can use the Print Release function.
Settings required on the machine
The following settings must be configured on the machine in order to use the print release function. (Administrator rights
are required.)
System settings
Tap the [Settings] key on the touch panel of the machine and log in with administrator rights. Tap [System Settings] >
[Printer Settings] > [Print Release Settings], and configure the settings.
For the system settings, refer to the User's Manual.
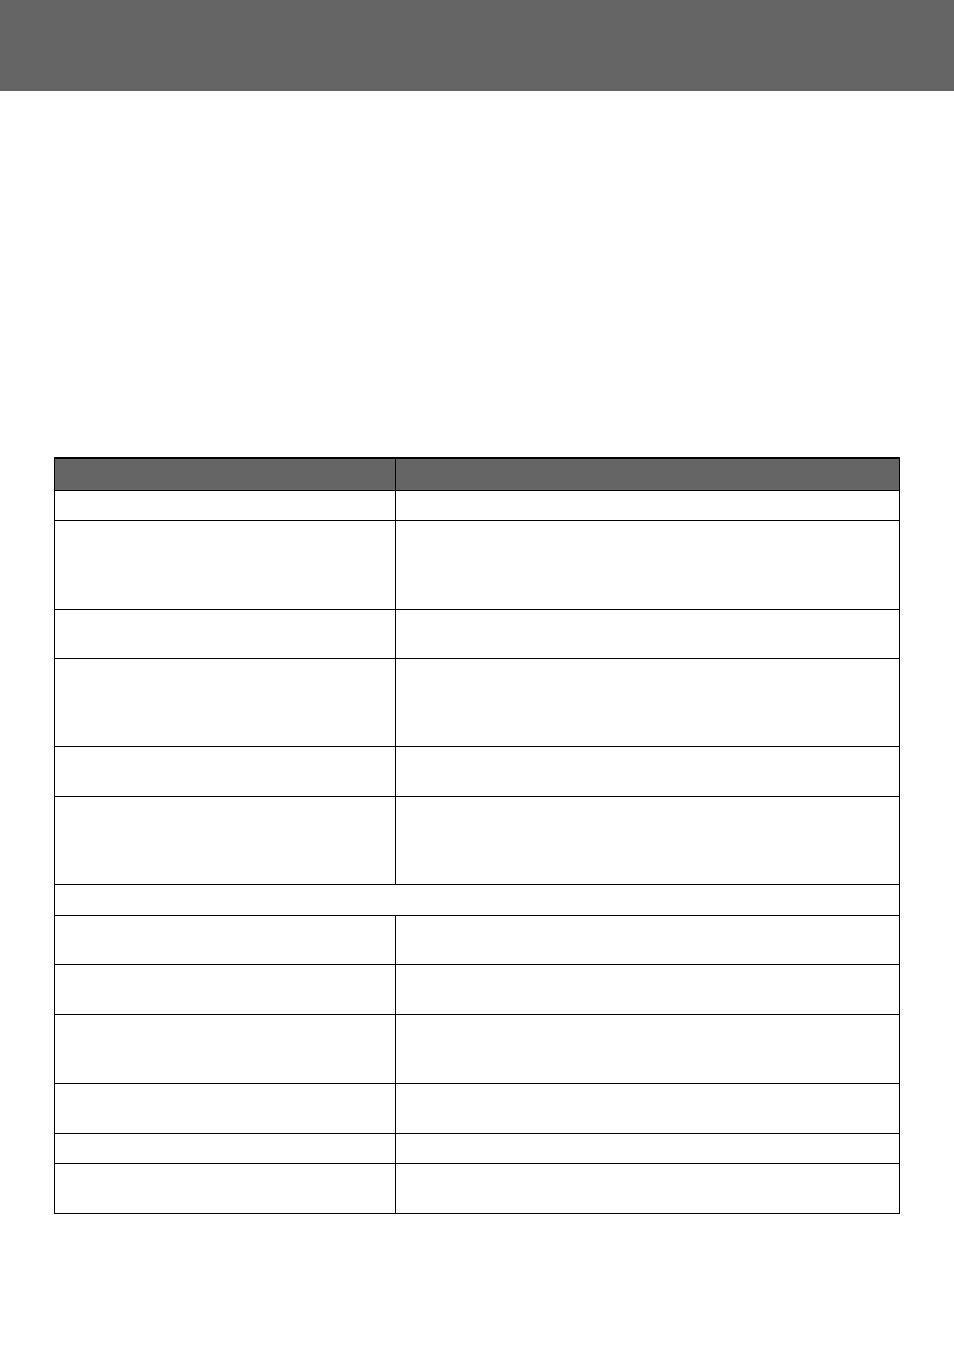
Item
Settings
• Print Release
Select [Enable].
• Connecting Code
Enter a code for authentication between the primary unit and secondary
unit. Maximum of 32 alphanumeric characters. Be sure to enter the same
code in both the primary unit and secondary unit.
Entry of a code can be omitted.
• Primary Unit/Secondary Unit Setting
Select the machine in which print release jobs will be saved in [Primary
Unit]. Select the machine that will be used for printing in [Secondary Unit].
• Require Authentication when Storing (When
[Primary Unit] is selected)
Select whether or not authentication is required to store a print release job
in the machine that is functioning as the primary unit. If the user
authentication setting of the primary unit is disabled, jobs will be saved
without authentication even if [Enable] is selected.
• Address of Primary Unit (When [Secondary
Unit] is selected)
Enter the IP address or host name of the primary unit.
• Port Number
Set the port number used for print release in the primary unit and in the
secondary unit. Be sure to set the same number in both the primary unit
and the secondary unit. (The default port number is "53000", and there is
no particular need to change this.)
• Default Settings
• Print B/W
When [Enable] is selected, [Print B/W] is enabled in the print screen of the
print release job.
• Print and Delete the Data
When [Enable] is selected, [Print and Delete the Data] is enabled in the
print screen of the print release job.
• Delete Stored Data after Specified Time
Select whether or not stored print release jobs are automatically deleted
after a set time elapses. If you select [Enable], jobs that have been stored
the number of days set in “Days” will be automatically deleted.
• Days
When “Delete Stored Data after Specified Time” is enabled, set the number
of days jobs are stored.
• HDD Status
Displays the usage status of the hard disk drive.
• Delete All (When [Primary Unit] is selected)
When the machine functions as the primary unit, select this to delete all
stored print release jobs.