Video input/output settings, Setting the video input/output format, Adjusting output video – Roland V-1HD+ Compact 4 x HDMI Video Switcher & UVC-01 USB Capture Device Kit User Manual
Page 14: P. 14, About frame rates
14
Video Input/Output Settings
Setting the Video Input/Output
Format
You set the input/output format to match the
incoming video signal.
* Before setting the input/output format, first be sure to turn
off the power to the V-1HD.
1.
Slide the [FORMAT] switch on the rear panel to
set the input/output format.
[FORMAT] switch Inputtable formats Output format
1080p
1080p, 1080i
1080p
1080i
1080p, 1080i
1080i
720p
720p
720p
MEMO
5
The V-1HD’s internal processing is progressive. Interlaced
input video is automatically converted to a progressive
signal.
The picture might appear jagged at this time, or the
picture in a PinP inset screen or preview four-way
split screen might waver. This is due to progressive
conversion, and is not a malfunction.
5
The methods for converting an interlaced signal to a
progressive signal are of two types: “BOB” and “WEAVE.”
BOB
Interpolates the top field and bottom field,
and unites them in a single frame. This
is optimal for video that contains much
movement.
WEAVE
Joins the top field and bottom field in a
single frame. This is optimal for video that
contains little movement.
To set the conversion method, press and hold the [(TAP)
BPM] button
g
use “DEINTERLACE MODE” at the SETUP
menu.
About frame rates
Frame rates that can be input are “59.94” and “50.”
Inputting video at a frame rate other than these
might result in no output or dropped frames.
To change the frame rate, press and hold the [(TAP)
BPM] button
g
select “FRAME RATE” at the SETUP
menu
g
select “59.94” or “50”
g
press the [ ] button.
Adjusting Output Video
You can adjust the main output video or preview
output video to match the equipment receiving
output from the V-1HD.
MEMO
5
You can output a color bar, useful for adjusting the
image quality of a display. Press and hold the [(TAP) BPM]
button
g
set “COLOR BAR OUTPUT” at the SETUP menu
to “ON.”
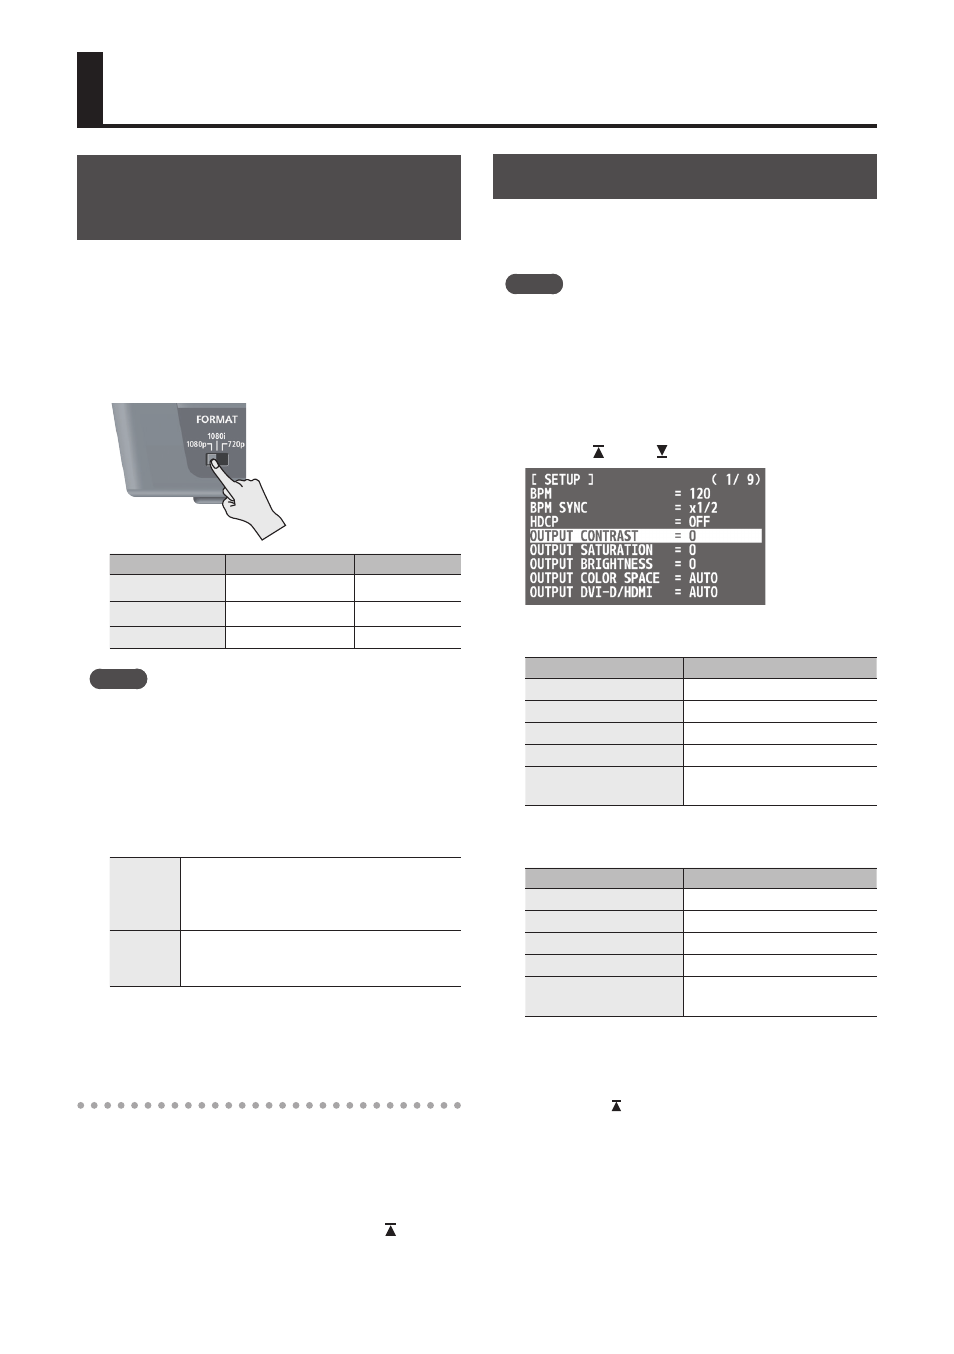
1.
Press and hold the [(TAP) BPM] button (for 2
seconds or longer) to display the SETUP menu.
2.
Use the [ ] and [ ] buttons to select an item.
You use the following items to adjust the main
output video.
Menu item
Explanation
OUTPUT CONTRAST
Adjusts the contrast.
OUTPUT SATURATION
Adjusts the saturation.
OUTPUT BRIGHTNESS
Adjusts the brightness.
OUTPUT COLOR SPACE
Specifies the color space.
OUTPUT DVI-D/HDMI
Specifies the type of output
signal.
You use the following items to adjust the preview
output video.
Menu item
Explanation
PREVIEW CONTRAST
Adjusts the contrast.
PREVIEW SATURATION
Adjusts the saturation.
PREVIEW BRIGHTNESS
Adjusts the brightness.
PREVIEW COLOR SPACE
Specifies the color space.
PREVIEW DVI-D/HDMI
Specifies the type of output
signal.
3.
Use the A/B fader to adjust the main output
video or preview output video.
* The settings for the following menu items are applied by
pressing the [ ] button. If 10 seconds elapse without
applying the setting, the setting returns to its original
value, with no change applied.
5
OUTPUT COLOR SPACE
5
OUTPUT DVI-D/HDMI
5
PREVIEW COLOR SPACE
5
PREVIEW DVI-D/HDMI
4.
Press the [(TAP) BPM] button to quit the menu.