Epson Surecolor T3170 24" Wireless Inkjet Printer User Manual
Start here, Epson, Surecolor
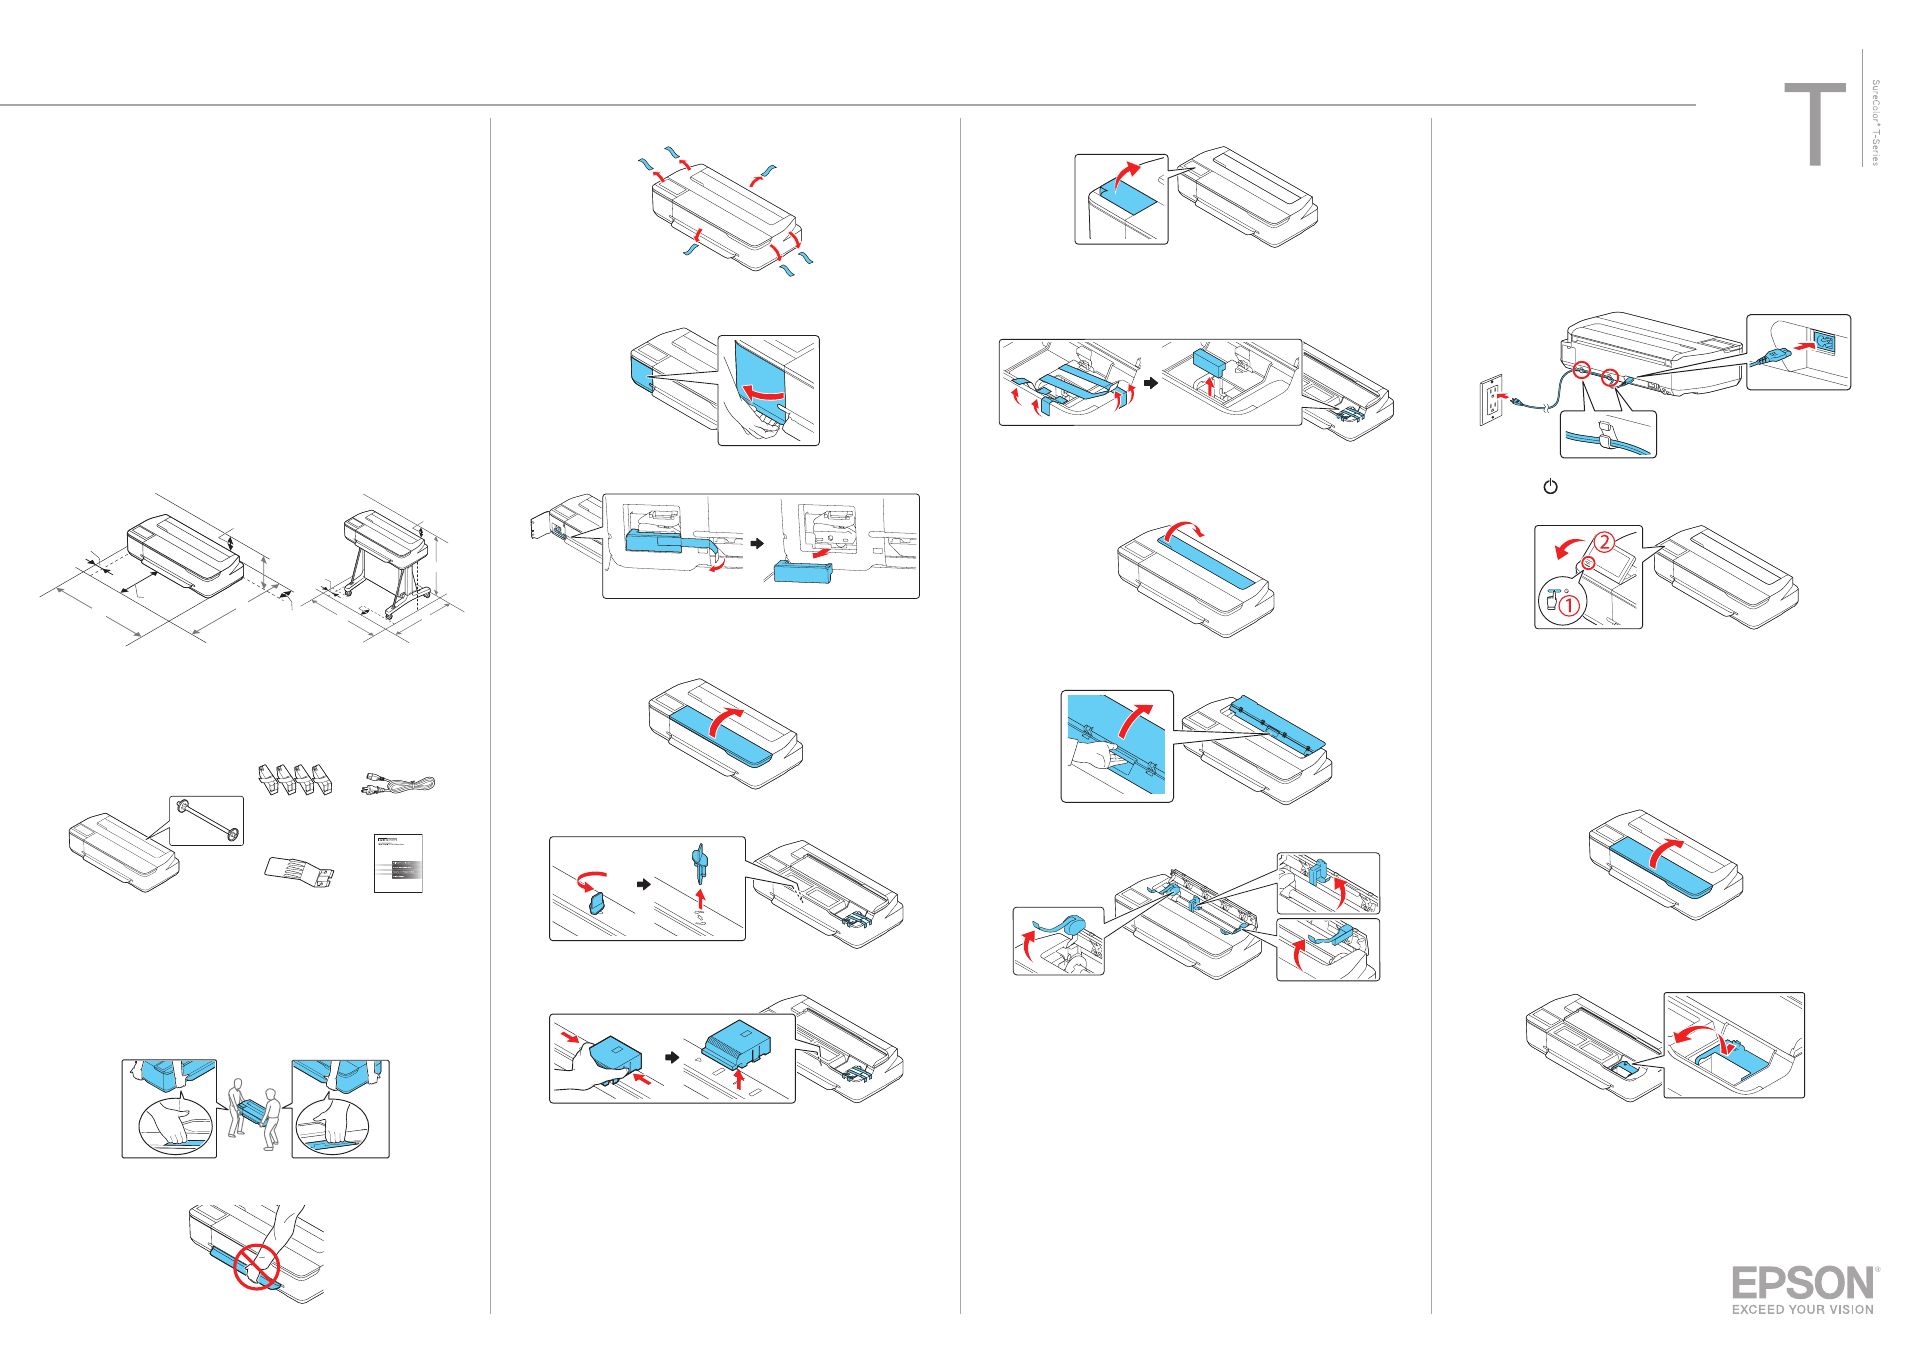
9
Remove the protective film from the control panel.
Note:
The touchscreen will not operate if you do not remove the
protective film.
10
Remove the tape and the protective piece.
11
Close the front cover.
12
Open the cut sheet cover and remove the tape inside the printer.
13
Open and fold back the roll paper cover.
14
Remove the tape and the protective pieces.
15
Close the roll paper cover and the cut sheet cover.
16
Dispose of all the tape and the protective pieces.
Epson
®
SureColor
®
T3170/T5170
Start Here
IMPORTANT: Before using this product, make sure you read these instructions
and the safety instructions in the online User’s Guide.
Choose a Location for the Printer
Choose a location for the printer that is near a wall outlet where the power cord
can be easily unplugged. Avoid places subject to rapid changes in temperature
and humidity. Also keep the printer away from direct sunlight, strong light, or
heat sources.
Make sure to place the printer on a flat, stable surface with enough space on
all sides (see illustrations below). The surface supporting the printer should be
wider than the space between the rubber feet on the bottom of the printer and
capable of supporting the weights shown below.
5.9 in.
(150 mm)
5.9 in.
(150 mm)
SureColor T3170
Weight: 83.78 lbs (38 kg)
SureColor T5170
Weight: 101.41 lbs (46 kg)
1.97 in.
(50 mm)
1.97 in.
(50 mm)
14.57 in.
(370 mm)
1.57 in.
(40 mm)
H
H
D
D
W
W
12.2 in.
(310 mm)
Unpack
1
Make sure you have these items:
Printer and roll spindle
Output tray
Ink cartridges (4)
Limited warranty
Power cord
Note:
• See the online
User’s Guide
for instructions on using the output tray.
• The SureColor T5170 comes with a stand and paper basket. See the
online
User’s Guide
for instructions on assembling these parts.
WARNING:
The printer requires two people to lift and move it. Make sure to
grip the printer as shown in the illustration.
Note:
Do not hold the printer by its paper support.
2
Remove the plastic sheet and all tape from the outside of the printer.
3
Open the left cover.
4
Remove the tape and the protective piece.
5
Close the left cover.
6
Open the front cover.
7
Turn and remove the protective piece.
8
Press the sides of the protective piece, and then lift and remove it.
Install Ink Cartridges
Note:
• The printer is designed for use with Epson
®
cartridges only, not third-party
cartridges or ink.
• The cartridges included with the printer are designed for printer setup and not for
resale. After some ink is used for initializing, the rest is available for printing.
1
Connect the power cord to the printer. Route the cord through the
hooks on the back of the printer and plug the other end of the power
cord into an outlet.
2
Press the
power button on the control panel to turn on the printer.
Raise the control panel if necessary.
3
Select your language on the LCD screen.
4
When you see a message about removing protective parts, select
Done
.
5
Select the date and time.
Note:
Select
See Guide
to view additional instructions.
6
Follow the prompts to begin ink initialization.
7
Open the front cover.
8
Pull and lift the tab on the ink cartridge cover to open the cover.
Remove the protective paper covering the ink ports.