Installing projector mount, Attaching universal interface to projector – Epson Universal Projector Mount with 3" Extension Column User Manual
Page 8
ELPMBPJG
Installation Instructions
8
Installing Projector Mount
WARNING:
IMPROPER INSTALLATION CAN RESULT IN
SERIOUS PERSONAL INJURY OR DAMAGE TO
EQUIPMENT! Structural members
MUST
be capable of
supporting five times the combined weight of all equipment
being mounted.
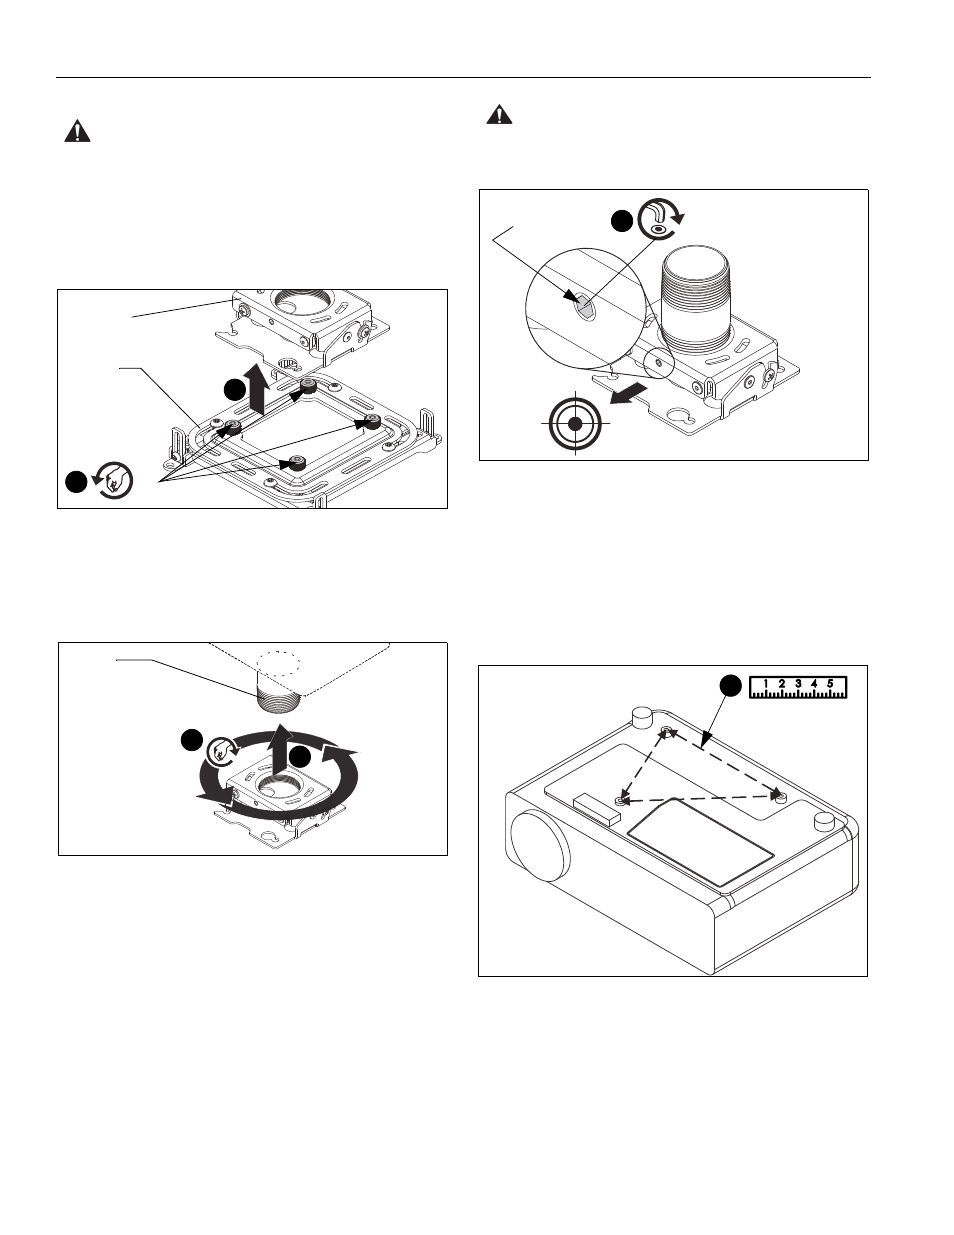
1.
Loosen (but do NOT remove) four thumb nuts on universal
interface, and remove projector mount from universal
interface. (See Figure 8)
Figure 8
2.
Align projector mount with end of 3" fixed pipe (A), and
thread projector mount up onto pipe by turning counter-
clockwise until hand tight, with a minimum of four threads
engaged. (See Figure 9)
Figure 9
Rough Alignment of Projector Mount
3.
Turn projector mount clockwise or counter-clockwise until
front of mount is facing target.
IMPORTANT ! :
When projector mount is properly
positioned, the set screw access hole should be pointing
directly at target. (See Figure 10)
4.
Secure projector mount to pipe by
one
of the following
methods:
•
Turn set screw (shipped installed in projector mount)
with the 5/32" hex key until tight.
•
OPTIONAL:
Remove existing set screw (shipped
installed in projector mount) with the 5/32" hex key
(G2), and install the 5/16" x 1/2" security set screw (F1)
using the 5/32" hex key (G2).
CAUTION:
DO NOT OVERTIGHTEN! Overtightening set
screw can damage pipe threads.
Figure 10
Attaching Universal Interface to Projector
1.
Determine the distance between the mounting holes on the
projector. (See Figure 11)
NOTE:
There is not a standard mounting hole configuration
pattern for projectors.The universal interface legs can
be configured to match the mounting holes on the
projector.
Figure 11
1
1
x 4
Projector
mount
Universal
interface
2
2
(A)
Set screw
Projector target
access hole
4
x 1
(Example projector
with 3 mounting holes)
1