Other applications, Bounce flash, Creating a catchlight – Godox V350F Flash for Select Cameras User Manual
Page 11: Auto focus assist beam
MODE
ZOOM
SYNC
SLAVE
SET
Other Applications
●
When not attaching to the camera, the auto focus assist
beam of V350F does not light up.
●
When attaching to the camera, the auto focus assist beam
of TT350F can only be lighted by setting its focus mode
(M/C/S) to S mode. The other two modes cannot light up its
auto focus assist beam.
Position
Center
Periphery
Effective Range
0.6~4m
0.6~2.5m
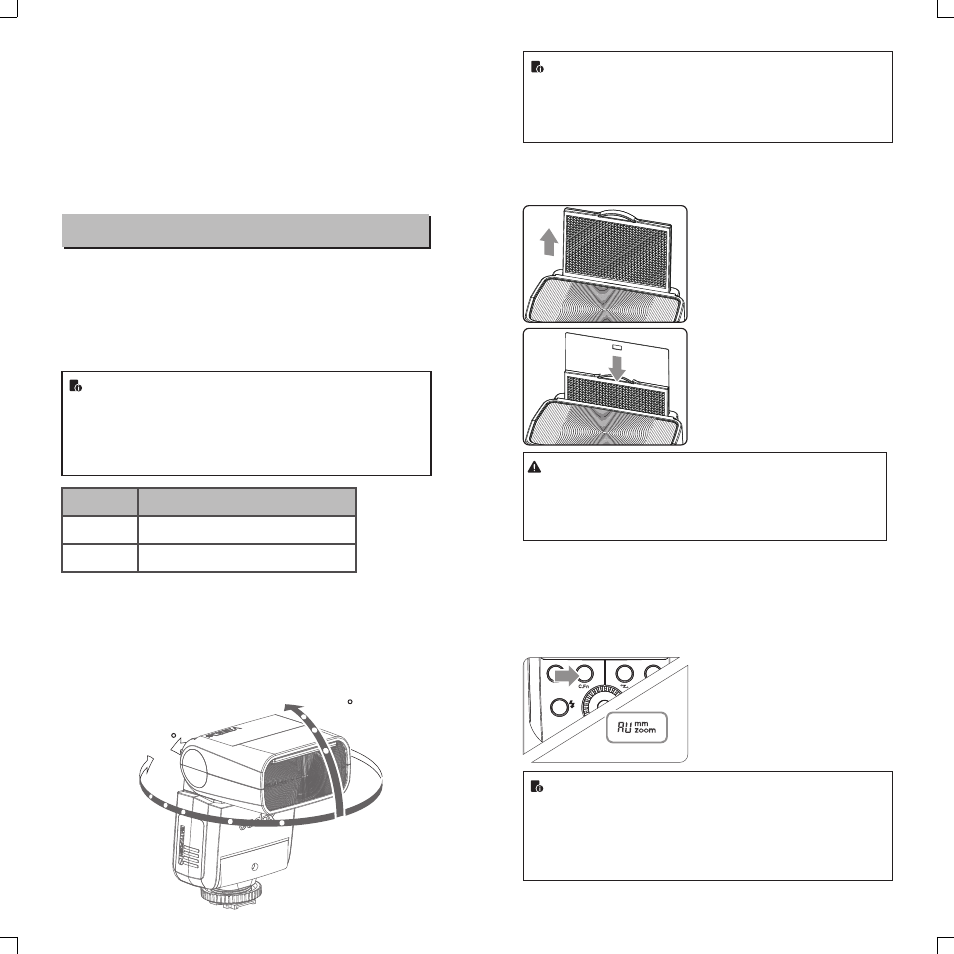
Bounce Flash
By pointing the flash head toward a wall or ceiling, the flash will
bounce off the surface before illuminating the subject. This can
soften shadows behind the subject for a more natural-looking shot.
This is called bounce flash.
To set the bounce direction, hold the flash head and turn it to a
satisfying angle.
●
If the wall or ceiling is too far away, the bounced flash might
be too weak and result in underexposure.
●
The wall or ceiling should be a plain, white color for high
reflectance. If the bounce surface is not white, a color cast
may appear in the picture.
Creating a Catchlight
With the catchlight panel, you can create a catchlight in the subject’s
eyes to add life to the facial expression.
Point the flash head upward by
1
90°.
Pull out the wide panel. The
2
catchlight panel will come out
at the same time.
Push the wide panel back in.
3
●
Push in only the wide panel.
●
Follow the same procedures
as for bounce flash.
●
Point the flash head straight ahead and then upward by 90°.
The catchlight will not appear if you swing the flash head left
or right.
●
For best catchlight effect, stay 1.5m/4.9ft away from the
subject.
ZOOM: Setting the Flash Coverage and Using
the Wide Panel
The flash coverage can be set automatically or manually. It can be
set to match the lens focal length from 24-105mm(135 format)/16-
56mm(APS). Also, with the built-in wide panel, the flash coverage
can be expanded for 14mm wide-angle lenses.
In Manual Zoom mode, press the
<ZOOM> button.
●
Turn the Select Dial to change
the flash coverage.
●
AU
If <
> is displayed, the flash
coverage will be set
automatically.
●
If you set the flash coverage manually, make sure it covers
the lens focal length so that the picture will not have a dark
periphery.
●
When the low battery indicator is displayed, the ZOOM can
not be adjusted, it will constantly be 16mm.
●
Choose 135 format or APS in the C.Fn-AP.
- 45 -
- 46 -
3. Whether the distance between the flash trigger and the flash
is too close or not
→
Please turn on the “close distance wireless mode” on the flash trigger
(
<
0.5m):
X1 series: press the test button and hold on, then turning it on until the flash
ready indicator blinks for 2 times.
XPro series: Set the C.Fn-DIST to 0-30m.
4. Whether the flash trigger and the receiver end equipment are in the low
battery states or not
→
Please replace the battery(the flash trigger is recommended to use 1.5V
disposable alkaline battery).
270
-7-90
Auto Focus Assist Beam
Long press the C.Fn to enter C.Fn custom settings and press SET
button: choose “ON” or “OFF” to turn on or off the to the AF-assist
beam function . When turning on the AF-assist beam function: the
red AF-assist lamp will light when it’s hard to focus while
automatically off when getting correct focus.