页 23, Flash mode—e-ttl autoflash – Godox V1 Flash for Canon User Manual
Page 7
Flash Mode—E-TTL Autoflash
This flash has three flash modes:
E-TTL
, Manual (
M
), and
Multi
(Stroboscopic). In
E-TTL
mode, the camera and the flash will work
together to calculate the correct exposure for the subject and the
background. In this mode, multiple TTL functions are available:
FEC, FEB, FEL, HSS, second curtain sync, modeling flash, control
with the camera’s menu screen.
* Press <
MODE
> Mode Selection Button and three flash modes
will display on the LCD panel one by one with each pressing.
ETTL Mode
Press <
MODE
> Mode Selection Button to enter E-TTL mode. The
LCD panel will display.
●
Press the camera release button halfway to focus. The aperture
and effective flash range will be displayed in the viewfinder.
●
When the shutter button is fully pressed, the flash will fire a pre-
flash that the camera will use to calculate exposure and flash
output the instant before the photo is taken.
FEC: Flash Exposure Compensation
With FEC function, this flash can adjust from -3 to +3 in 1/3rd stops.
It is useful in situations where minor adjusting of the TTL system is
needed based on the environment.
Setting FEC:
Set the flash exposure
2
compensation amount.
●
Turn the Select Dial to set
the amount.
●
“0.3”means 1/3 step,
“0.7”means 2/3 step.
●
To cancel the flash
exposure compensation,
set the amount to “+0”.
Press Set Button again to
3
confirm the setting.
Press Function Button 2
1
Press the <+/-> button. The
icon <
> and flash
exposure compensation
amount will be highlighted on
the LCD panel.
C.Fn
C.Fn
Disabling Auto Power Off function is recommended when
the flash is used off camera. (C.Fn-
STBY
, Page 55)
Slave Auto Power Off Timer is set to 60 minutes by
default. Another option “30 minutes” is available. (C.Fn-
Sv STBY, Page 55)
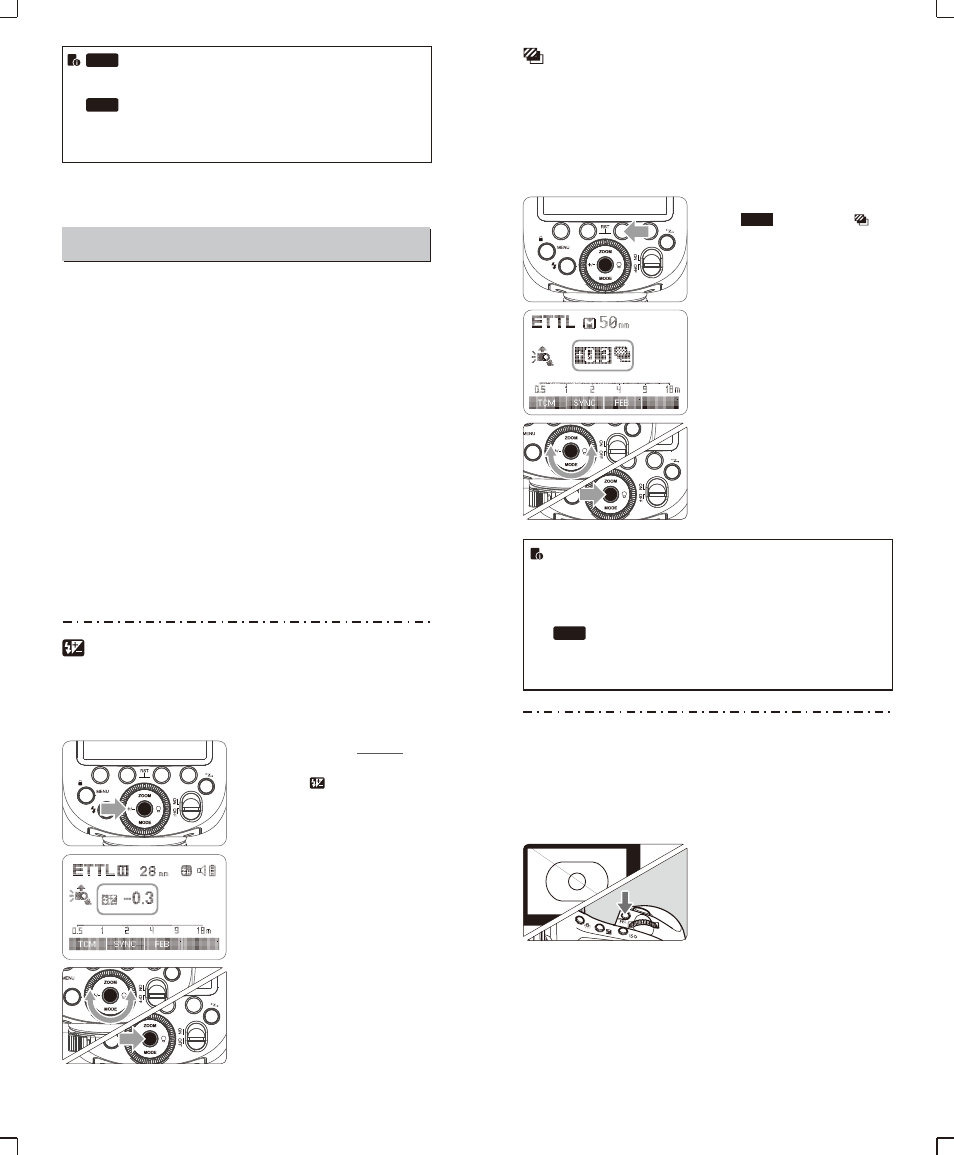
FEB: Flash Exposure Bracketing
You can take three flash shots while automatically changing the
flash output for each shot from -3 to +3 in 1/3rd stops. The camera
will record three images with different exposures: one exposed
according to camera calculations, one over-exposed and another
under-exposed. Over and under exposure amount is user
adjustable. This function helps get correct exposure especially in
shooting moving objects or when environmental lights are complex.
Press function button 3
1
<
>. The icon <
>
and the exposure bracketing
amount will be highlighted on
the LCD panel.
Press Set Button again to
3
confirm the setting. Then
your
FEC
and
FEB
settings
are displayed on the LCD
panel.
●
FEB will be cancelled after three photos are taken.
●
For best results, set the camera drive mode to “single” and
ensure the flash is ready before shooting.
●
FEB can be used with FEC and FEL.
You can prevent the FEB from being cancelled
automatically after three photos are taken. (C.Fn-
FEB ACL , Page 55)
C.Fn
FEB
Set the flash exposure
2
compensation amount.
●
Turn the Select Dial to set
the amount.
●
“0.3”means 1/3 step,
“0.7”means 2/3 step.
FEL: Flash Exposure Lock
FEL
can lock the correct flash exposure setting for any part of the
scene.
With <
ETTL
> displayed on the LCD panel, press the camera’s
<
FEL
> button. If the camera does not have the <
FEL
> button,
press the <
*
> button.
Focus the subject.
1
Press the <
FEL
> button.
2
●
Aim the subject at the center of
the viewfinder and press <
FEL
>
button.
●
The camera flash will fire a
preflash and the required flash
output for the subject is retained
in memory.
●
Each time the <
FEL
> button is
pressed, a preflash will be fired
and a new flash exposure
setting will be locked.
- 41 -
- 42 -