Tannoy Variball Multi-Angle Accessory Bracket for AMS 5(Pair) User Manual
Unpacking, Installation, Product dimensions
AMS VariBall Multi Angle Accessory Bracket
Mounting and Installation Guide
1. Safety Instructions
Installation safety notice
1. The user is responsible for fixing the hardware to the surface to ensure
safe operation. The fixings must support the weight of the product.
Please consult the manual’s specification page for the appropriate
weights. Please consult the relevant construction codes in your region or
further information on suitable hardware fixing methods.
2. Some regional construction codes require the use of a secondary method
of securing loudspeakers to surfaces to provide security of a back-up
support. A secondary support line should be attached from the safety loop
on the rear of the product to a source point on the wall. Please consult the
relevant construction codes in your region.
3. Tannoy will not be held accountable for any damage caused by
incorrect installation.
2. Unpacking
Every Tannoy product is carefully inspected before shipment. After unpacking,
please inspect your product to ensure no damage has occurred in transit. In the
unlikely event of damage, please notify your dealer and retain all shipping
materials as your dealer may require return shipment.
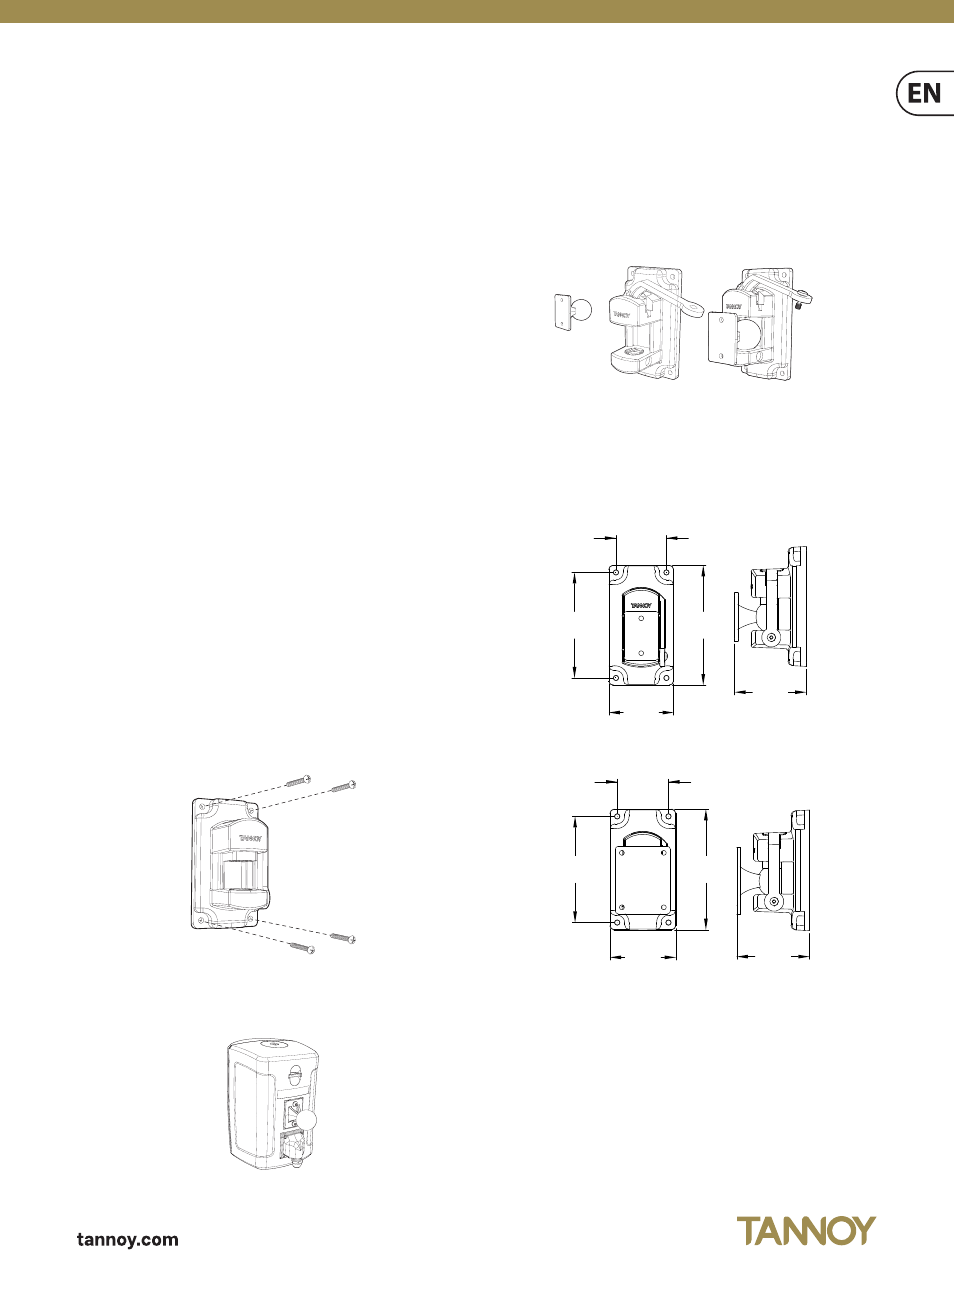
The optional multi-angle accessory bracket utilizes a ball-in-socket design
to enable free orientation of the loudspeaker at any angle on either the
horizontal or vertical axis. If desired, the loudspeaker orientation can be easily
changed within minutes.
3. Installation
1. Fix the wall bracket to the wall surface using suitable fixing method for
supporting the loudspeaker with ample safety margins.
2. Fix the ball bracket to the rear of the loudspeaker using the supplied
screws and a 3 mm Allen key. Two screws are used for AMS 5 models;
four screws are used for AMS 6 and AMS 8 models.
3. Raise the lever to open the wall bracket. Insert the ball into the wall
bracket, then lower the lever to lock the ball into place. Raise the lever if
any readjustment is necessary then lock the lever down using the screw.
Once in final position, tighten the grub screw at the bottom of the wall
bracket to secure in place.
For details of audio connections and setting transformer taps please refer to
the product’s Quick Start Guide or online manual.
4. Product Dimensions
Optional multi-angle accessory bracket AMS 5 model
Optional multi-angle accessory bracket AMS 6 and 8 models
115.0
[4.53"]
55.0
[2.17"]
70.6
[2.78"]
130.6
[5.14"]
78.0
[3.07"]
115.0
[4.53"]
55.0
[2.17"]
70.6
[2.78"]
130.6
[5.14"]
78.0
[3.07"]