Bushnell Prime Low-Glow Trail Camera Kit (Gray) User Manual
Page 6
6
INSTALLING THE BATTERIES AND SD CARD
Before you begin learning how to use your
Prime Trail Camera
, you will first need
to install a set of batteries and insert an SD card. Although that may only take you a
minute, there are some important notes about both batteries and SD cards you
should be aware of, so please take the time to read the following directions and
cautions:
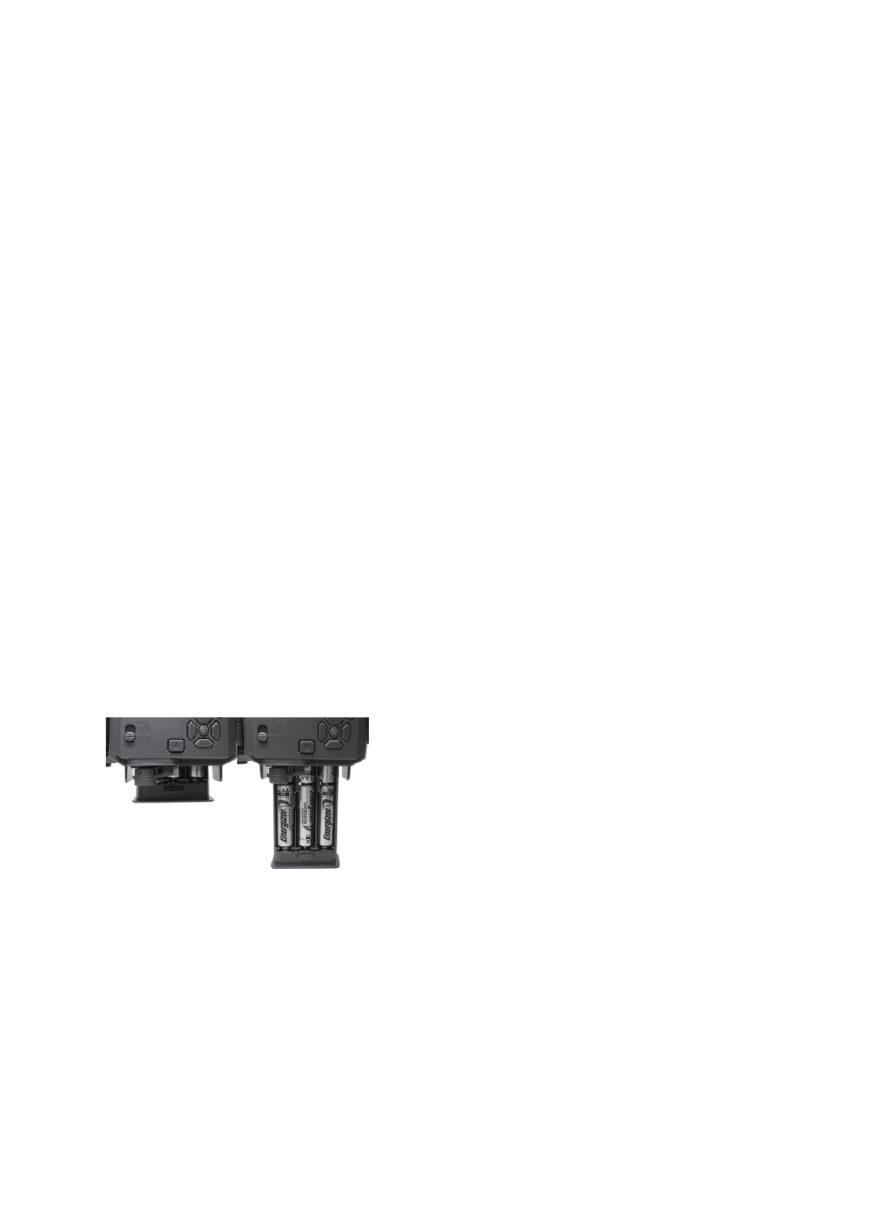
Loading Batteries
After opening the latch on the right side of the Prime Trail Camera, you will see that
the
Prime Trail Camera
has a battery release button. Depress this button and a
battery tray will drop out of the bottom of the camera. The battery tray will stop about
½ inch out of the device, this is a latch system to prevent the tray from dropping onto
the ground. Just apply a little pressure when pulling and the tray will release. The
battery tray has six battery slots. Install a full set of 6 batteries. Be sure to insert
each battery with correct polarity (negative or “flat” end against the long spring of
each battery slot).
Bushnell recommends using a full set of new lithium AA (Energizer® brand) or
alkaline AA batteries. NiMh Rechargeable batteries are not recommended, as the
lower voltage they produce can cause operational issues.
You can also connect an optional Solar Panel accessory (model# 119756C –please
visit www.bushnell.com for more information) to the “DC In” jack at the bottom of the
Prime Trail Camera
(other external power supplies should not be used, as the
camera and/or display may not function correctly). If the solar panel is connected
and AA batteries are installed, the
Prime Trail Camera
will be powered by the solar
panel's rechargeable lith-ion battery, as long as it provides adequate voltage (if not,
the camera will switch to battery power). The solar panel's battery will power the
camera at night.