Led light, How to use the belt hook, Additional power control functions – Panasonic EY7202GQW User Manual
Page 5
- 5 -
CAUTION:
• To eliminate excessive temperature
increase of the tool surface, do not oper-
ate the tool continuously using two or
more battery packs. Tool needs cool off
time before switching to another pack.
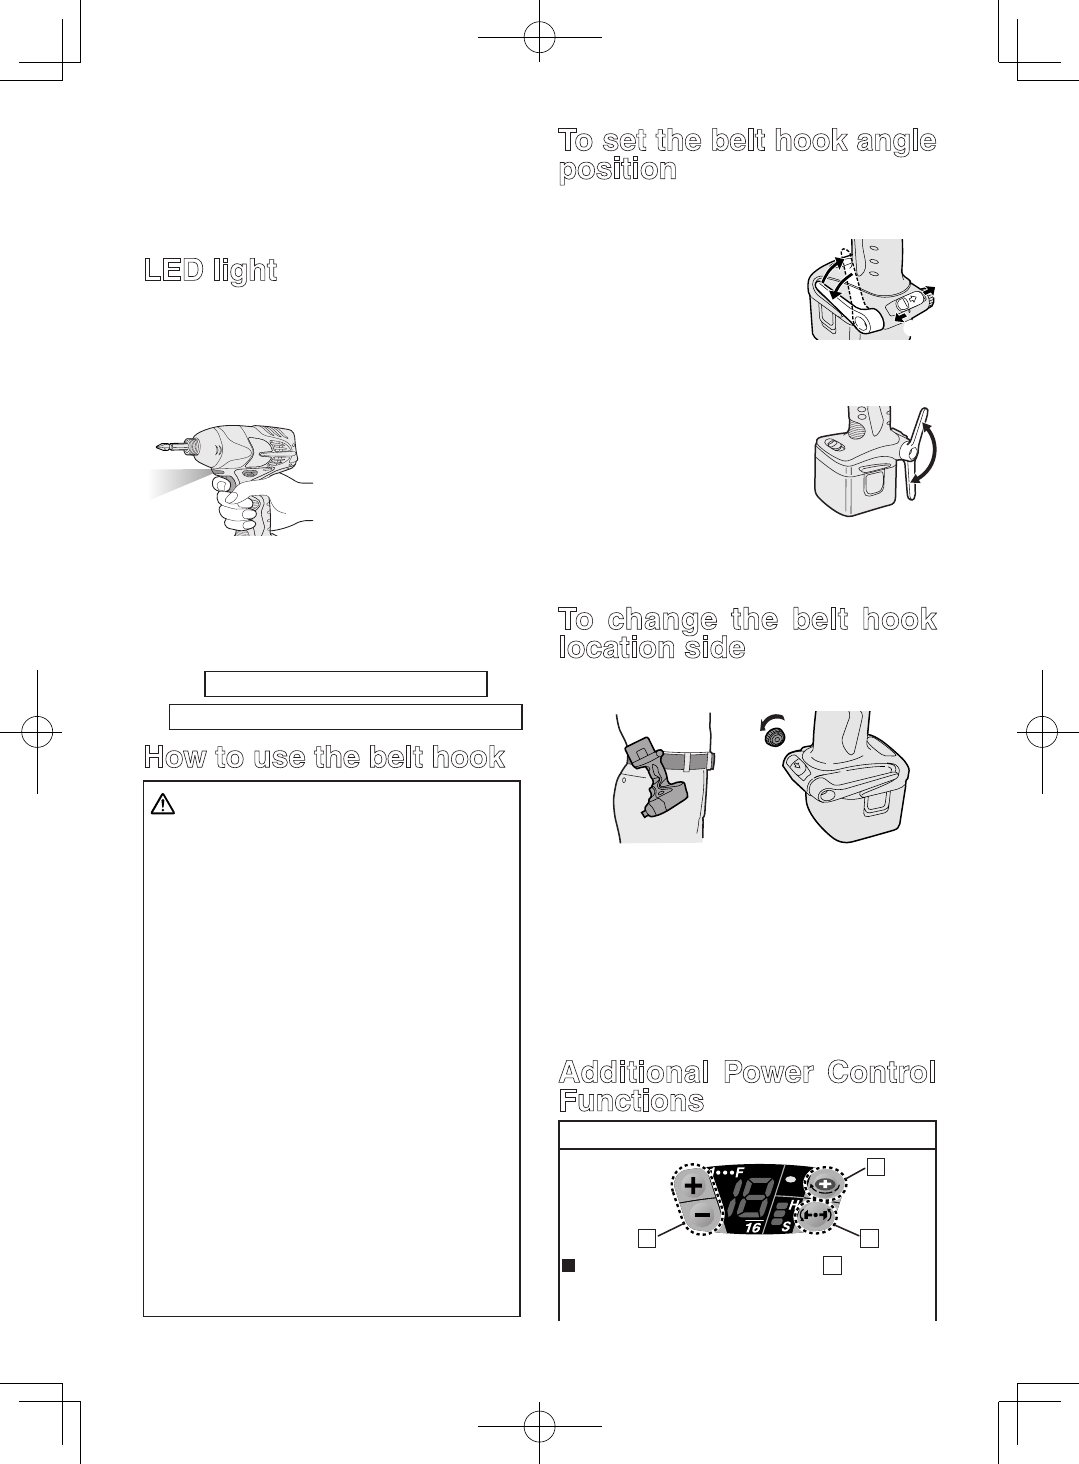
LED light
CAUTION:
• The built-in LED light is designed to illu-
minate the small work area temporarily.
• Do not use it as a substitute for a regular
flashlight, since it does not have enough
brightness.
Depress the trigger switch,
then LED light turns on.
When the trigger switch
is released, the light
turns off automatically.
The light illuminates with
very low current, and it does not adversely
affect the performance of the driver during
use or its battery capacity.
This product has the built-in LED light.
This product is classfied into “Class 1 LED
Product” to EN 60825-1
Class 1 LED Product
Caution
: DO NOT STARE INTO BEAM.
How to use the belt hook
WARNING!
• Be sure to attach the belt hook securely
to the main unit with the screw firmly fas-
tened. When the belt hook is not firmly
attached to the main unit, the hook may
depart and the main unit may fall.
This may result in an accident or injury.
• Periodically check screw for tightness. If
found to be loose, tighten firmly.
• Be sure to attach the belt hook firmly and
securely onto a waist belt or other belt. Pay
attention to the unit not slipping off from the
belt. This may result in an accident or injury.
• When the main unit is held by the belt
hook, avoid jumping or running with it.
Doing so may cause the hook to slip and
the main unit may fall.
This may result in an accident or injury.
• When the belt hook is not used, be sure
to return it to the storing position. The belt
hook may catch on something.
This may result in an accident or injury.
• When the unit is hooked onto the waist belt
by the belt hook, do not attach driver bits
to the unit. A sharp edge object, such as a
drill bit, may cause injury or an accident.
To set the belt hook angle
position
1. Slide the belt hook lock lever
1
and hold
it to unlock the belt hook.
2
1
3
2. Pull the belt hook from
storing position
2
and
set it as desired angle.
3. Release the belt hook
lock lever to lock the
angle of belt hook.
4. Make sure the belt hook is firmly locked
3
. Also make sure the belt hook is firmly
locked into position.
• The belt hook cannot
be locked in this posi-
tion. Firmly lock it into
position before use.
To return the belt hook to the storing position,
Follow step 1. and 2. above, then lower the
belt hook.
To secure the lock, follow 3 and 4 above.
To change the belt hook
location side
The belt hook can be attached to either
side of the unit.
1. Set the belt hook at storing position.
2. Loosen the screw turning it counter-
clockwise, using a coin or a flat blade
screw driver.
3. Take out the belt hook and insert into the
other side of the slot on the main unit.
4. Fasten the screw firmly, turning it clock-
wise.
The belt hook can be taken out from the
main unit only when it is at storing position.
Additional Power Control
Functions
Quick Reference for Features and Functions
A
B
C
Impact power mode select : A (See p.6.)
→
This unit is equipped with impact power
mode button.By pressing impact power mode