Troubleshooting – Ryobi P650 User Manual
Page 11
11 — English
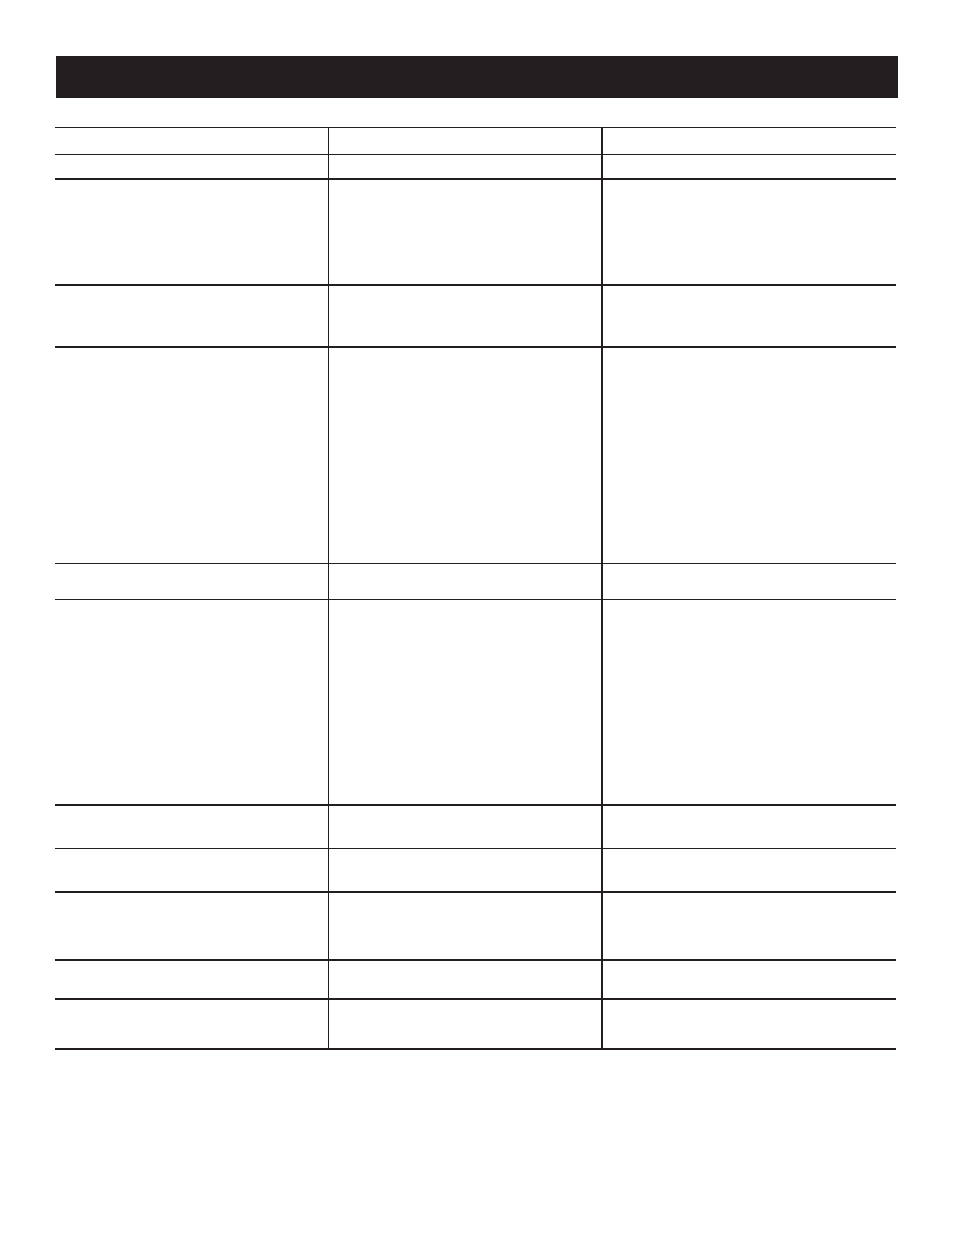
TROUBLESHOOTING
PROBLEM
CAUSE
POSSIBLE SOLUTION
Motor does not run.
Battery is not charged.
Charge battery.
Motor overheats.
Piston has seized up.
Continuous spray operation.
Thoroughly clean the sprayer using long-
term storage cleaning instructions in the
Maintenance section of this manual.
Release trigger at the end of each pass to
allow the motor to cool.
Motor has a low hum but does not
spray.
Piston has seized up.
Thoroughly clean the sprayer using long-
term storage cleaning instructions in the
Maintenance section of this manual.
Motor seems to be running properly
but doesn’t spray.
Suction tube and filter are loose or
damaged.
Atomizer valve is clogged or worn
out.
Material being sprayed is too thick.
Plugged spray tip or intake filter;
worn piston.
Reinstall or replace suction tube and filter
as needed.
Clean or replace atomizer valve assembly.
Follow material manufacturer’s directions
and thin material as needed.
Thoroughly clean the sprayer and, if
necessary, replace piston*, using storage
cleaning instructions in the Maintenance
section of this manual.
Paint will not spray through the tip
Spray tip is clogged
Reverse the spray tip and press trigger
Sprayed material is spitting or globbing
up.
Paint container volume is getting low.
Material being sprayed is too thick.
Suction tube is loose.
Atomizer valve is clogged or worn
out.
Worn spray tip or piston.
Paint has been shaken and has air
pockets.
Refill paint container.
Follow material manufacturer’s directions
to thin material as needed.
Reinstall suction tube securely.
Clean or replace atomizer valve assembly.
Clean or replace spray tip or piston*.
Allow paint to sit for appoximately 1 hour
to settle, then try again.
Paint/stain spray overspray is
excessive.
Spray tip is too far from the surface
being sprayed.
Hold sprayer closer to the surface being
sprayed.
Paint/stain runs or sags on the work
surface.
Proper paint methods not being
observed.
Refer to
Operating the Sprayer earlier in
this manual.
Paint/stain is leaking behind the spray
tip.
Spray tip is loose.
Atomizer valve is worn or not positioned
properly.
Tighten spray tip.
Replace or reposition atomizer valve as
needed.
Unit will not prime
Atomizer valve assembly is worn
Replace the atomizer valve assembly
Small bead in spray pattern
Moving the sprayer too fast
Tip is clogged
Slow arm speed down
Reverse the spray tip to clear the clog
* Although unlikely, a worn piston is possible. A replacement piston can be purchased by calling customer service at
1-800-525-2579. Follow the instructions in Cleaning the Sprayer for Storage to access the piston for replacement.
NOTE: FIGURES (ILLUSTRATIONS) START ON PAGE 13
AFTER FRENCH AND SPANISH LANGUAGE SECTIONS.