Downloading a hardware image to the fpga – Altera Nios II User Manual
Page 16
1–8
Altera Corporation
Nios II Development Kit Getting Started User Guide
May 2007
Starting the Nios II Development Tools
2.
When the Quartus II window appears, on the File menu, click Open
Project
.
1
Be sure to choose Open Project and not Open.
3.
Browse to the directory <Nios II EDS install path>\examples\
verilog\niosII_
<board type>\standard for your board. Replace
niosII_
<board type> with a directory name shown in
Table 1–1
.
4.
Select the file <directory name>_standard.qpf and click Open. The
<directory name>_standard.qpf file contains project definitions for
the example design used in this getting started user guide.
For example, the Nios II Development Kit, Stratix Edition, Quartus II
project file is located at <Nios II EDS install path>\examples\verilog\
niosII_cyclone_2c35\standard\NiosII_cyclone_2c35_standard.qpf
.
1
You can use the vhdl directory instead of the verilog directory,
if you prefer the VHDL language.
Downloading a Hardware Image to the FPGA
To download the Nios II SRAM Object File (.sof) image to the Nios
development board, follow these steps:
1.
On the Tools menu, click Programmer.
2.
Click Hardware Setup.
3.
Select USB-Blaster in the Currently selected hardware list and click
Close
.
4.
Turn on Program/Configure, located on the same row as <directory
name>_standard.sof.
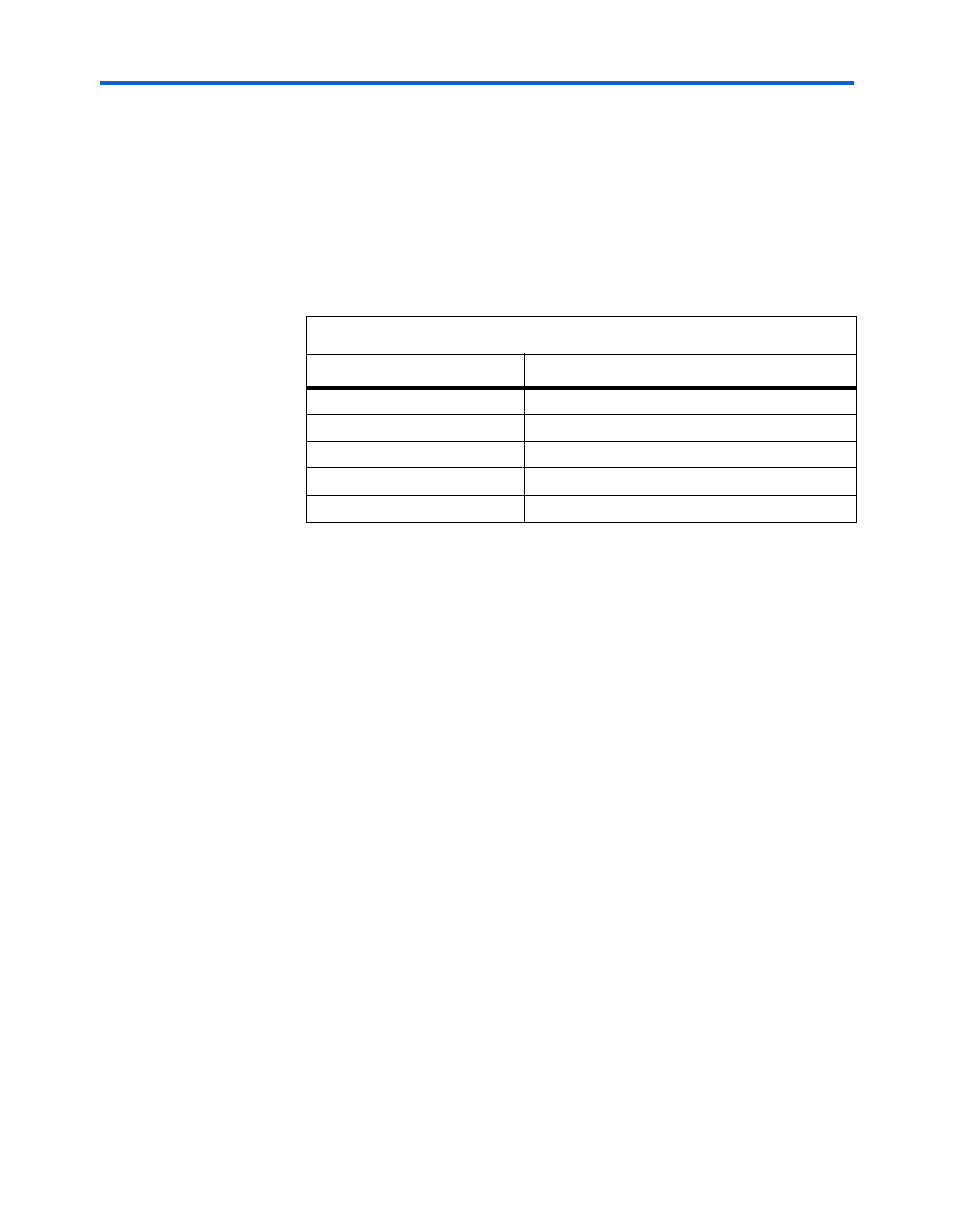
Table 1–1. Design File Directory Names
Nios Development Board
Directory Name
Stratix II Edition
niosII_stratixII_2s60 or niosII_stratixII_2s60_es
Stratix Edition
niosII_stratix_1s10 or niosII_stratix_1s10_es
Cyclone II Edition
niosII_cycloneII_2c35
Cyclone
Edition
niosII_cyclone_1c20
Stratix Professional Edition
niosII_stratix_1s40