Atlona AT LINE PRO3 User Manual
Page 6
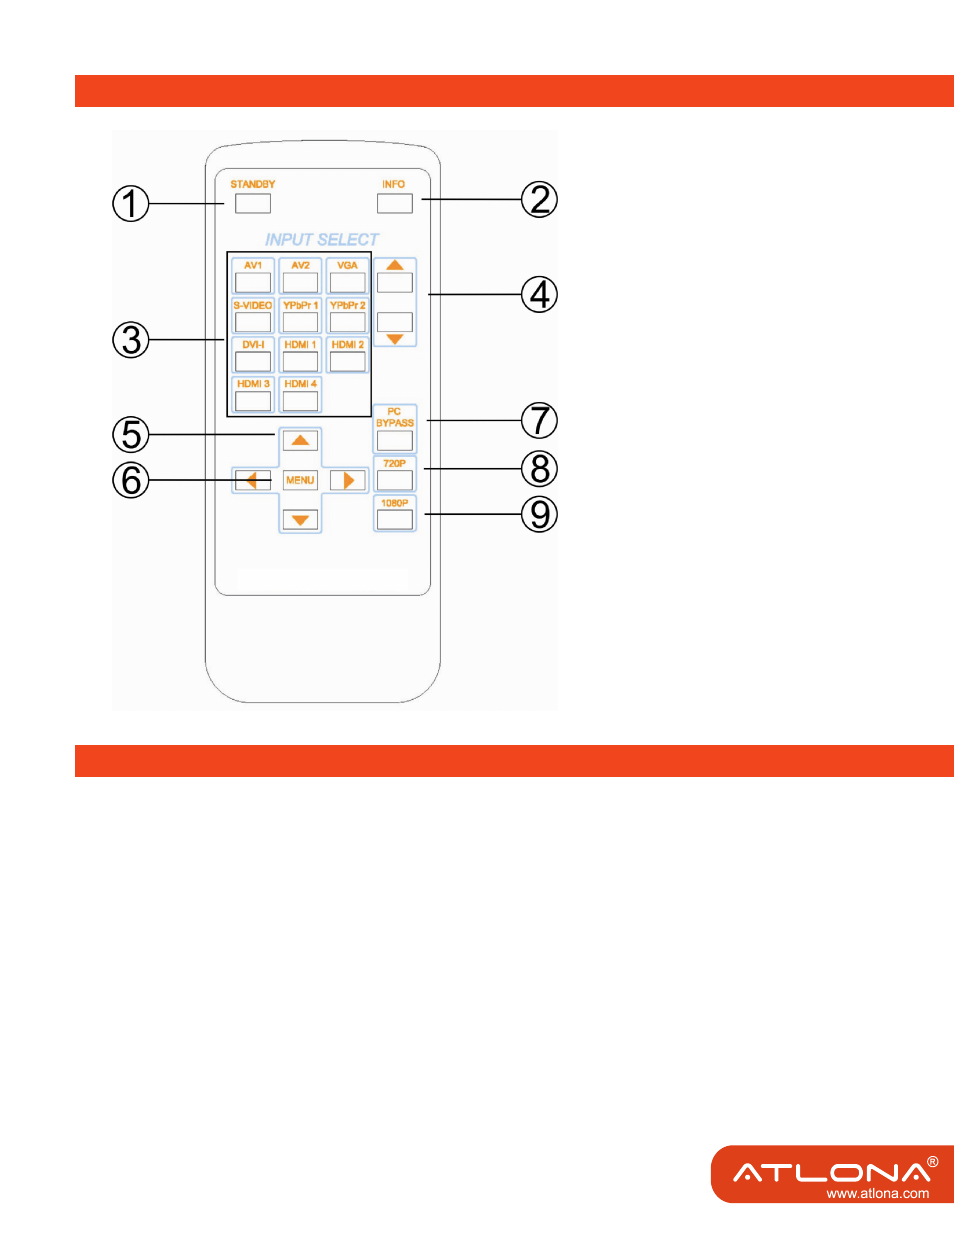
1. STANDBY: Press the button once to en-
ter standby mode; press again to power
the unit on
2. INFO: Press the button to view the input
and output message.
3. INPUT SOURCE: Press any of the button
to directly select desired Input source.
4. UP/DOWN: Select between the input
sources one by one.
5. UP/DOWN/LEFT/RIGHT: Press
UP/DOWN button to move the
highlighter bar to the desired parameter
in OSD menu. Press LEFT/RIGHT to
increase/decrease the setting value of a
selected parameter.
6. MENU: Press the button to activate an
on screen menu page.
7. PC BYPASS: Press the button to enter
bypass mode.
8. 720P: Press the button to directly output
720P.
9. 1080P: Press the button to directly output
1080P.
SYSTEM CODE : 00FF
1) Connect the inputs of the AT-LINE-PRO3 into desired sources (such as AppleTV, Blu-Ray Player,
PS3, Set Top Box etc)
2) Connect the AT-LINE-PRO3 Outputs to desired HD Displays (such as LCD, DLP or any other stan-
dard).
3) Power on the desired input source you want to show.
4) Connect the 5V DC power supply into the unit and turn on the display you want to watch.
5) Use IR remote or manually roll the Knob on the front panel to choose desired input source.
NOTE: VGA and AV2 share the same Stereo audio input, S-video and YPBPR2 share the same Stereo audio.
Atlona’s AT-LINE-PRO3 accepts AV, SV, VGA, YPBPR, DVI-I and HDMI inputs.
4
IR REMOTE
OPERATION
0x14
0x19 0x1B 0x11
0x15
0x08
0x17
0x50
0x5E 0x06
0x07
0x44
0x18
0x0F 0x51
0x1A
0x1E
0x02
0x55 0x48
0x12 0x59
0x46