Installation – Audio Solutions FM3260 User Manual
Page 5
5
SteP 1
Read and understand all of the enclosed instructions and verify that all parts are present and appear in
good working order before you begin.
SteP 2
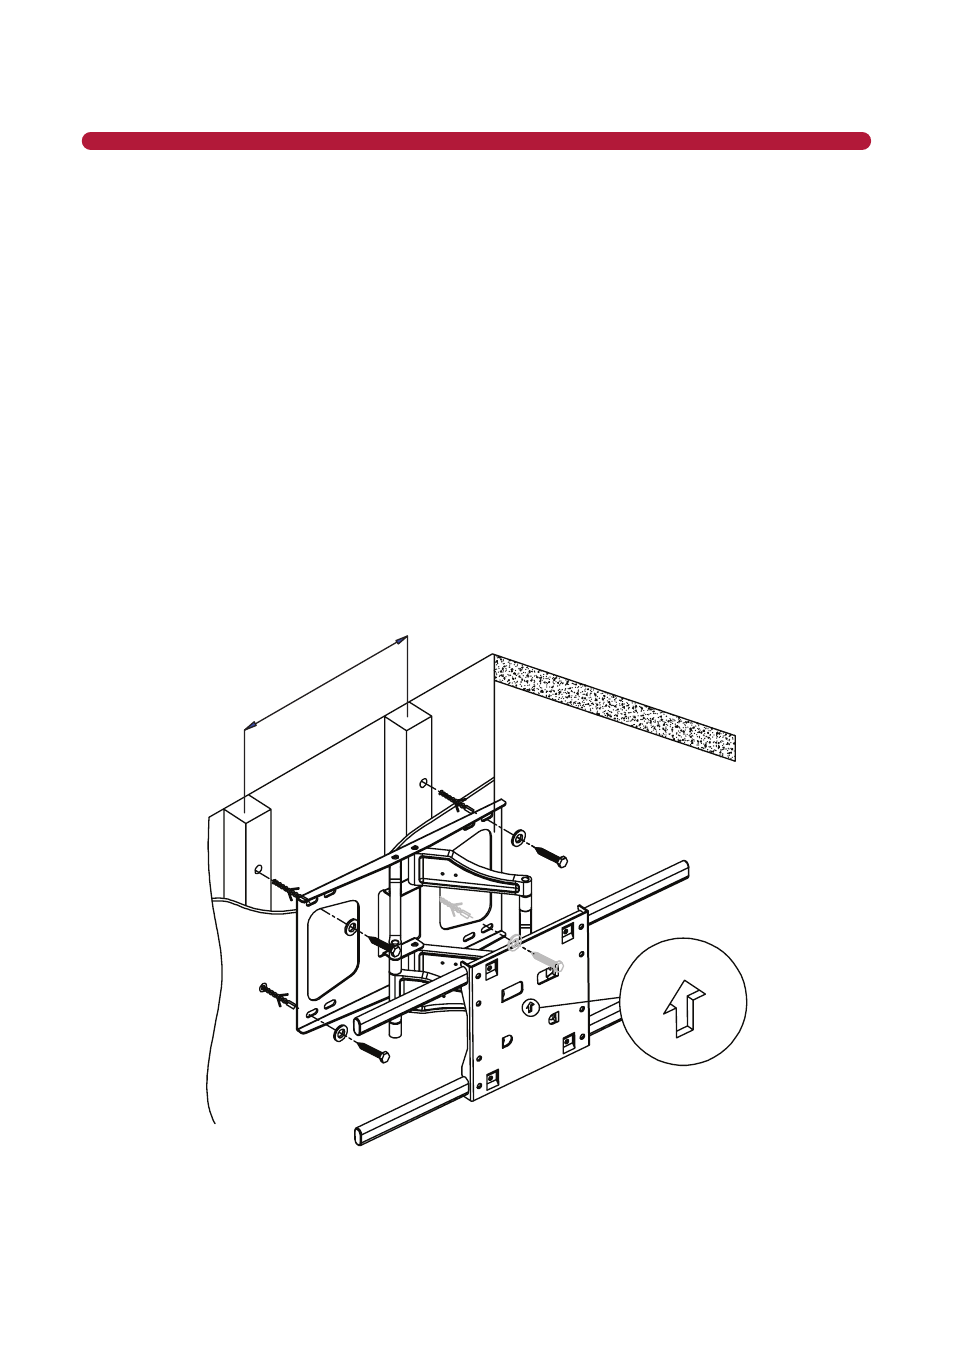
Attach the Wall Plate to the wall. Use the included leveling tool to make sure the wall plate is level.
Wood Stud Mounting
The Wall Plate must be mounted, at the top and bottom, to at least 2 wooden studs, spaced a minimum of
16” apart. Locate two wooden studs and mark the center and edge locations. Position the Wall Plate over
the marked wooden studs and mark for drilling. Using the correct size drill bit, pre-drill a 2.5” deep hole
in each marked location. Attach the Wall Plate to the wall using the included square head screws and M8
washers (Figure 2).
NOTE: Do not use the concrete anchors illustrated in Figure 2 for wood stud mounting.
Concrete Wall Mounting
Choose a solid wall area (avoid securing the mount to mortar joints between concrete blocks or bricks).
Using the correct size drill bit, pre-drill a 2.5” hole in each marked location. Insert the concrete anchor into
the hole and then attach the Wall Plate to the wall using the included square head screws and M8 washers
(Figure 2).
16"
UP
Figure 2 - Wood Stud/Concrete Mounting
INStAllAtION