D9250_en tc jan_p13_p14_v01_070507.pdf, Installation process ขࠅઃߌᚻ㗅 ขࠅઃߌᚻ㗅 – Aavara D9250+EF6540*2 User Manual
Page 9
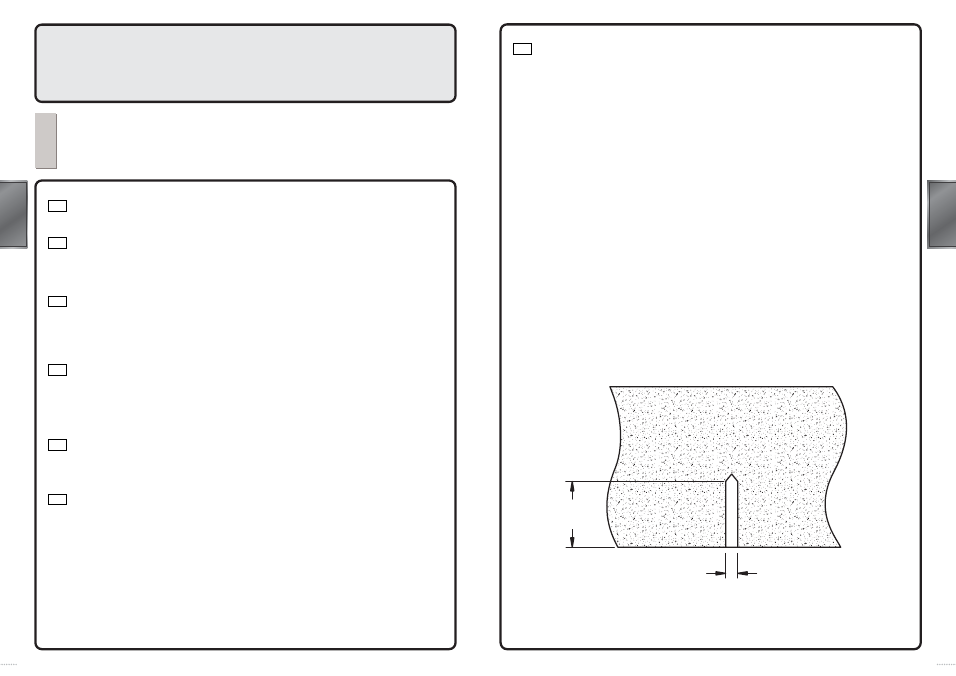
For a cement ceiling, use an electrical drill (and a drill bit) to drill ij10mm
holes with a 55mm depth.
Note: Before the installation, you need to find out the type of the ceiling and choose
appropriate screws. Screws (B) attached in the accessory pack are for cement
ceiling only.
For wooden ceiling installation, the ceiling must have sufficient strength and the
installation must be carried out by specialists with the right choice of screws.
㔚䉶䊜䊮䊃ᄤ᧼䈱႐ว䈲䇮㔚᳇䊄䊥䊦䈶䊄䊥䊦䉕↪䈚䈩⸥ภ䉕ઃ䈚䈩䈇䉎ᄤ
᧼䈮⋥ᓘ㪈㪇㫄㫄ᷓ䈘㪌㪌㫄㫄䈱ሹ䉕䈦䈩䈒䈣䈘䈇䇯
ᵈᗧ
ᵈᗧ
ขઃᤨ䈮䈲వ䈮ᄤ᧼䈱⒳㘃䉕⏕䈚䇮ㆡᒰ䈭䊈䉳䉕ㆬᛯ䈚䈩䈒䈣䈘䈇䇯ᧄㇱຠᪿ
൮ਛ䈱䊈䉳㩿㪙㪀䈲䉶䊜䊮䊃ოኾ↪ຠ䈪䈜䇯
ᧁ᧼ᄤ᧼䈮ขઃ䈔䉎႐ว䈲లಽ䈭ᒝᐲ䈏ᔅⷐ䈪䈜䇯䉁䈢ኾ㐷䈱ᬺ⠪䈏ㆡᒰ䈭䊈
䉳䉕ㆬᛯ䈜䉎䈖䈫䈏ᔅⷐ䈪䈜䇯
1-3
Cement walls
Installation Process
ขࠅઃߌᚻ㗅
ขࠅઃߌᚻ㗅
1
Install the Hanger onto the ceiling
䊊䊮䉧䊷䉕ᄤ᧼䈮࿕ቯ
䊊䊮䉧䊷䉕ᄤ᧼䈮࿕ቯ
Before the installation, you need to find out the type of ceiling at the installing
position, whether it is a cement ceiling or a wooden ceiling.
Note: For installation on a wooden ceiling, do not fix the bracket onto a decorative
beam or a gypsum board.
Decide the position on the ceiling for the installation, press the Ceiling Mount
Bracket (A) against the ceiling and mark the oval holes of the bracket (onto
the ceiling) with a pencil.
ขઃ೨䈮ขઃ䈔䉎⟎䈱ᄤ᧼䈱⒳㘃䉕⏕䈚䈩䈒䈣䈘䈇䋺䉶䊜䊮䊃ᚗ䈲ᧁ᧼䇯
ᵈᗧ䋺
ᵈᗧ䋺
ᧁ᧼ო䈮ขઃ䈔䉎ᤨ䈲䇮䊊䊮䉧䊷ᧄ䉕㘼䉍䈱䈅䉎ᩇᚗ䈲⍹⤉᧼䈮࿕ቯ䈚䈭䈇䈪䈒䈣
䈘䈇䇯
ᄤ᧼䈱ขઃ⟎䉕ቯ䈚䇮䊊䊮䉧䊷㩿㪘㪀䉕ᄤ᧼䈮ㄭઃ䈔䇮㋦╩䈪䊊䊮䉧䊷
䈮ᬦሹ䈱⸥ภ䉕ઃ䈚䈩䈒䈣䈘䈇䇯
1-1
1-2
1-1
1-2
1-1
1-2
Ø10
55
14
13
ENG
ᣣᧄ⺆
ᣣᧄ⺆
ENG
ᣣᧄ⺆
ᣣᧄ⺆