Brennenstuhl Solar LED Light SOL 80 plus IP44 with PIR sensor 8xLED 0,5W 350lm Cable length 4,75m Colour white User Manual
Page 8
8
Solar LED lamp SOL 80 PLUS
Charging via Main Line:
Charging can also be affected using a commercially available, stabilised main power
supply with the following specifications: 12V DC, min. 400 mA, hollow plug 5.5/2.1
(inside positive). The AUTO / OFF-switch on the main unit must be set to OFF. Remove the
protective cap on the charger and attach the power supply. Plug the power supply into the
main. The charge level display glow red. Leave the power supply plugged in until the
charge level display turns green. Depending on the condition of the rechargeable battery,
this can take up to 16 hours. Remove the power supply after a maximum of 16 hours and
put the protective cap back on the charger.
Important: Do not interrupt the power feed while charging since the rechargeable battery
then might not have a complete charge.
SUITABLE MOUNTING LOCATIONS FOR THE SOLAR LIGHT
AND SOLAR MODULE
Main Unit:
The main unit contains the light, the motion detector and the battery (sealed lead-gel-
battery 6V, 4 Ah). When mounting the main unit, keep in mind that the motion sensor‘s
monitoring area, depending on the mounting height, covers a maximum of 180° with a
range a maximum of 12 metres.
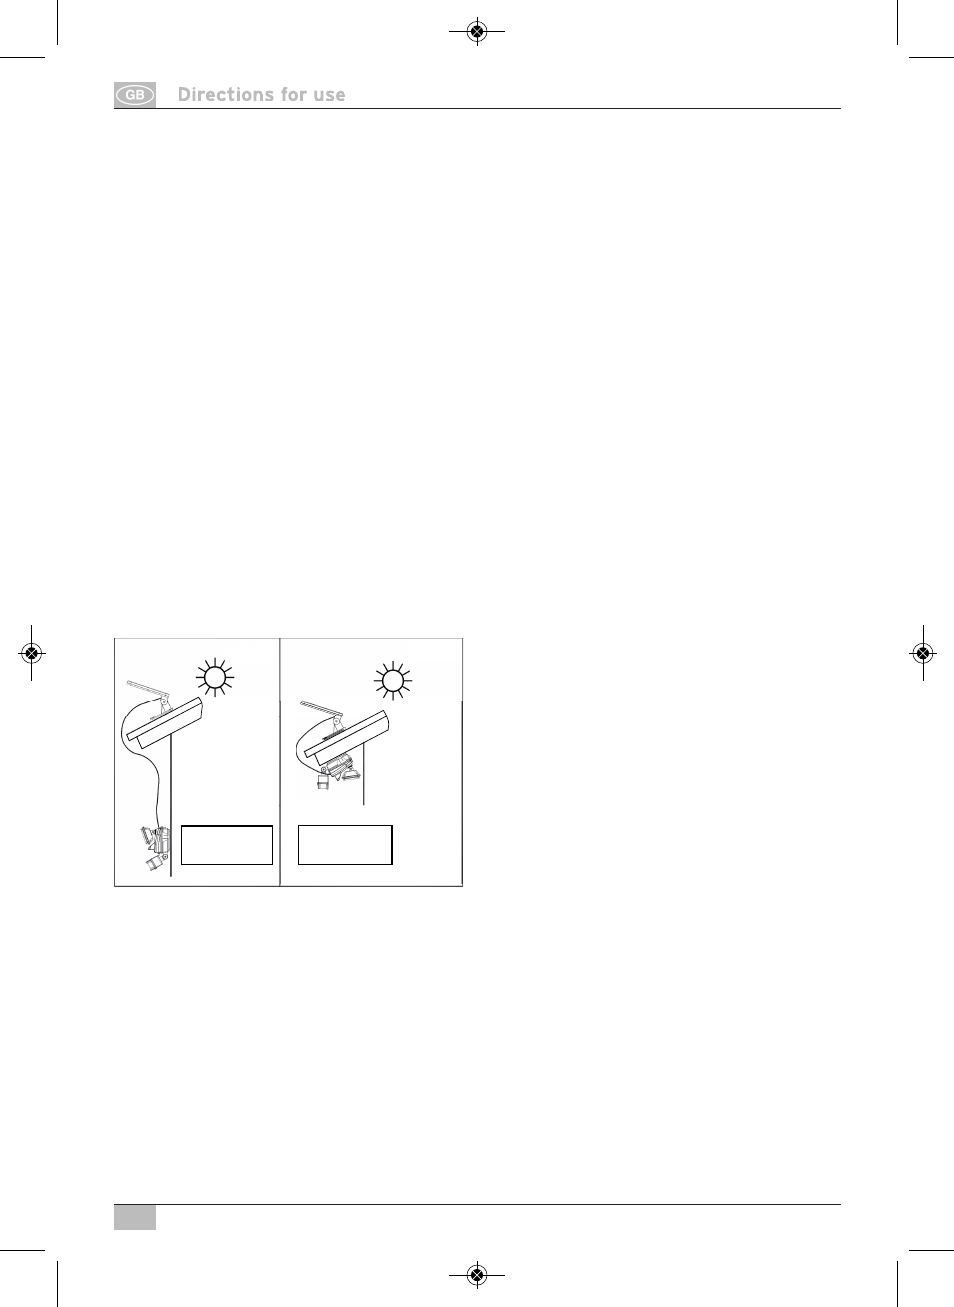
Mount the device as shown in Figures A or B. Use the two screws included in the packet
(Item 10 in the parts list).
Attention: In the mounting procedure depicted in Figure B make absolutely sure that no
water can get into the lighting unit. Make sure that you mount the unit in a location
protected from rain.
Solar module:
The solar module is the main power source for the solar lights. It converts sunlight in to
electricity and charges the battery. Please keep in mind when mounting the solar module
that the solar cell requires as much DIRECT SUNLIGHT as possible. The longer the solar
cell is exposed to direct sunlight, the longer the light can stay on.
To the greatest extent possible, the solar module should be aimed to the southern sky in
order to maximize exposure to direct sunlight. In central Europe, an angle of inclination
approximately 30° to 40°is recommended.
Use the four screws included in the packet (item 3 in the parts list) to mount the solar
module on a very stable, solid supporting surface.
SETTINGS AND START-UP
After successfully installing the solar light, you can set-up the device in a few easy steps.
Abb. A
Abb. B
South
South
Fig. A
Fig. B
012109 Solar LED-Strahler SOL 80_012109 Solar LED-Strahler SOL 80 BA 12.12.12 12:37 Seite 8