Casella CEL Thermohygrograph deluxe model User Manual
Page 6
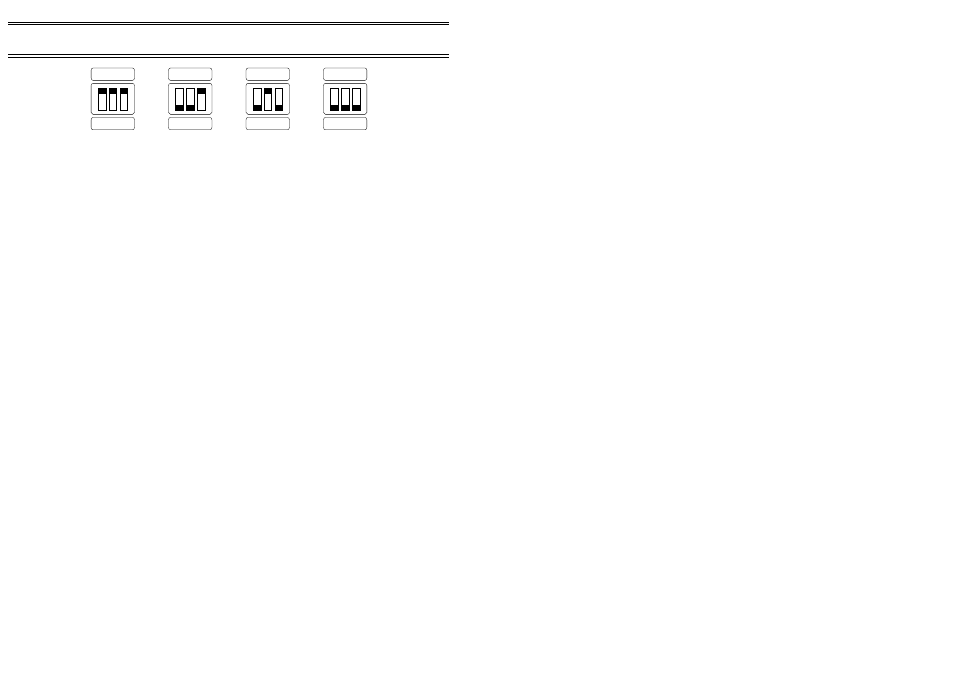
Refer to the diagram supplied (or the one above) for the required
switch positions.
3.4
Fitting/Replacing the Chart
1.
Remove the chart drum and its lid as described earlier.
2.
Slide the chart retaining clip upwards and remove any existing chart.
3.
Wrap a new chart around the drum, ensuring that its ends overlap at
the point where the clip fits.
Make sure the paper is a low as possible on the drum so that the
baseline on the chart aligns at the overlap.
Failure to observe these points will cause an error in the recording.
4.
Carefully replace the clip, making sure the chart does not move.
5.
Rotate the pen lifter outwards, moving the pens away from the
spindle.
6.
Lower the clock drum on to the spindle, this is a push fit.
7.
Replace the chart drum lid, aligning the slot in the lid with the chart
clip.
3.5
Fitting/Replacing the Pens
1.
Take one pen out of each sachet.
The short-reach pen with black ink (M118004) fits the short arm and
records relative humidity.
The long-reach pen with red ink (M119003) fits the long arm and is
for recording temperature.
Leave the other pens sealed for future use.
2.
Steady the short relative humidity pen arm between the fingers of
the right hand.
Preparation
OFF
1 DAY
7 DAY
31 DAY
1
1
1
1
2
2
2
2
3
3
3
3
990015
Page 6 of 12
THERMOHYGROGRAPH deluxe
User Manual