Installation – CP Electronics MWS5 User Manual
Page 4
4
Ø19.5m
Ø3.5m
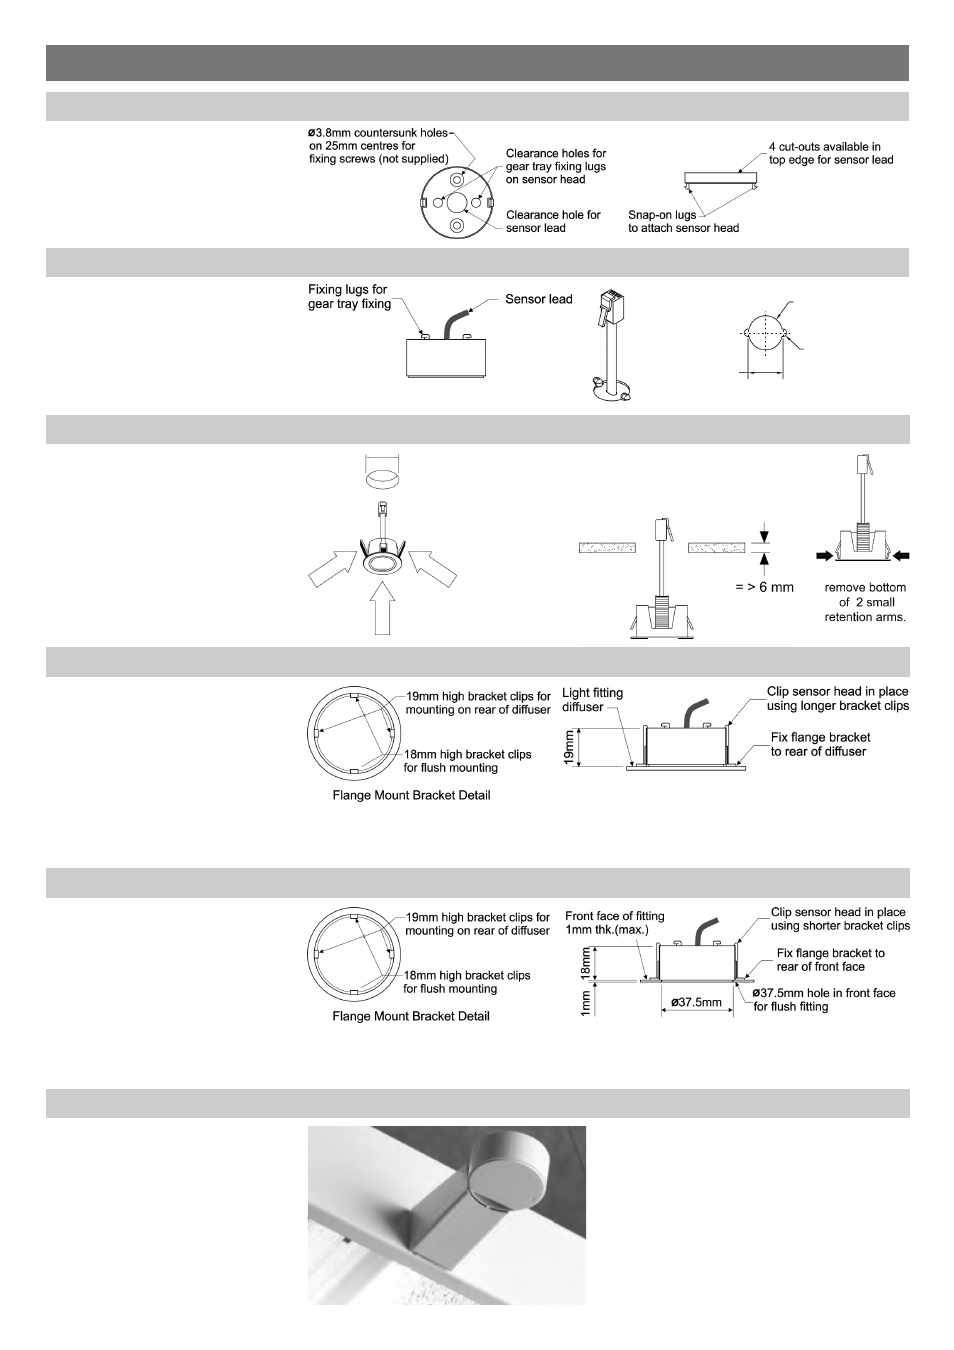
19mm
Panel mounting using lugs
Flush mounting
The product can be mounted into
a flat panel of a luminaire using
the flush mount ring as shown.
Flush fitting behind light fitting diffuser using the flange mount bracket
Use the lugs on rear of detector to
secure into thin sheet metal (1mm
max.).
Glue the flange mount bracket on
to the rear of the diffuser, and
fasten the sensor head in place
using the two longer (19mm high)
bracket clips.
Before gluing, please ensure that
the glue used is compatible with
both the acrylic flange mount
bracket and the diffuser material.
Flush fitting through gear tray or metal bulkhead using the flange mount bracket
Cut a 37.5mm diameter hole in
the bulkhead plate (max. 1mm
thick) to allow the front face of the
sensor head to pass through.
Glue the flange mount bracket on
to the rear of the plate, and fasten
the sensor head in place using
the two shorter (18mm high)
bracket clips.
Surface mounting using the base plate
Use the base plate for surface
mounting.
Installation
Side mounting with extender
Use the extender for side
mounting on a luminaire.
0.8mm - 4mm material
Ø43mm (+0, -0.2)
>4mm material
Ø44mm
If flush mounting in a panel that is
greater than 6mm thick, remove bottom
of retention arms with side cutters