Screen – Crimson JKR3 User Manual
Page 8
8
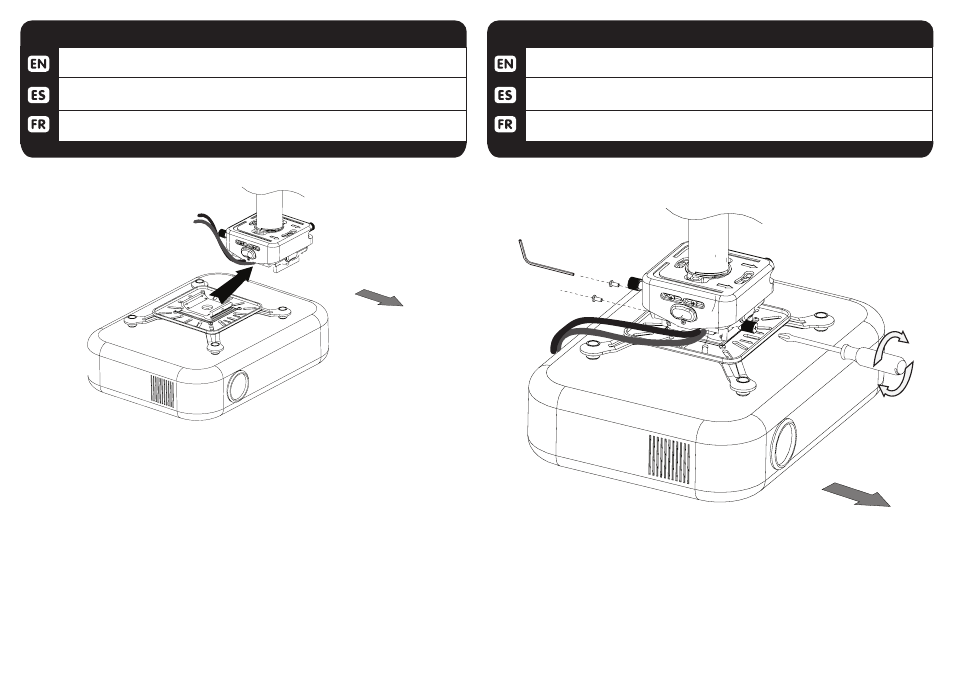
Slide the universal plate into the JR3 body from right to left (while facing screen). Hold
the wires up to prevent interference.
Deslizar la placa universal en el cuerpo JR3 de derecha a izquierda (mientras se
enfrenta a la pantalla). Mantenga los cables para prevenir interferencias.
Glisser la plaque universelle dans le corps JR3 de droite à gauche (en faisant face
écran). Maintenir les fils en place pour éviter les interférences.
5-1
INSTALL PROJECTOR
Screen
Tighten pre-installed thumb screw and attach at least one of two retaining screws (J)
on the opposite side of the housing.
Apretar pre-instalado tornillo de mariposa y adjuntar al menos uno de los dos tornil-
los de fijación (J) En el lado opuesto de la carcasa.
Serrer la vis à oreilles pré-installé et fixer au moins une des deux vis de fixation (J) Sur
le côté opposé du boîtier.
5-2
INSTALL PROJECTOR
Screen
(J)
(K)
JKR311824-0001