One Systems U Bracket User Manual
Page 2
2
INSTALLATION INSTRUCTIONS
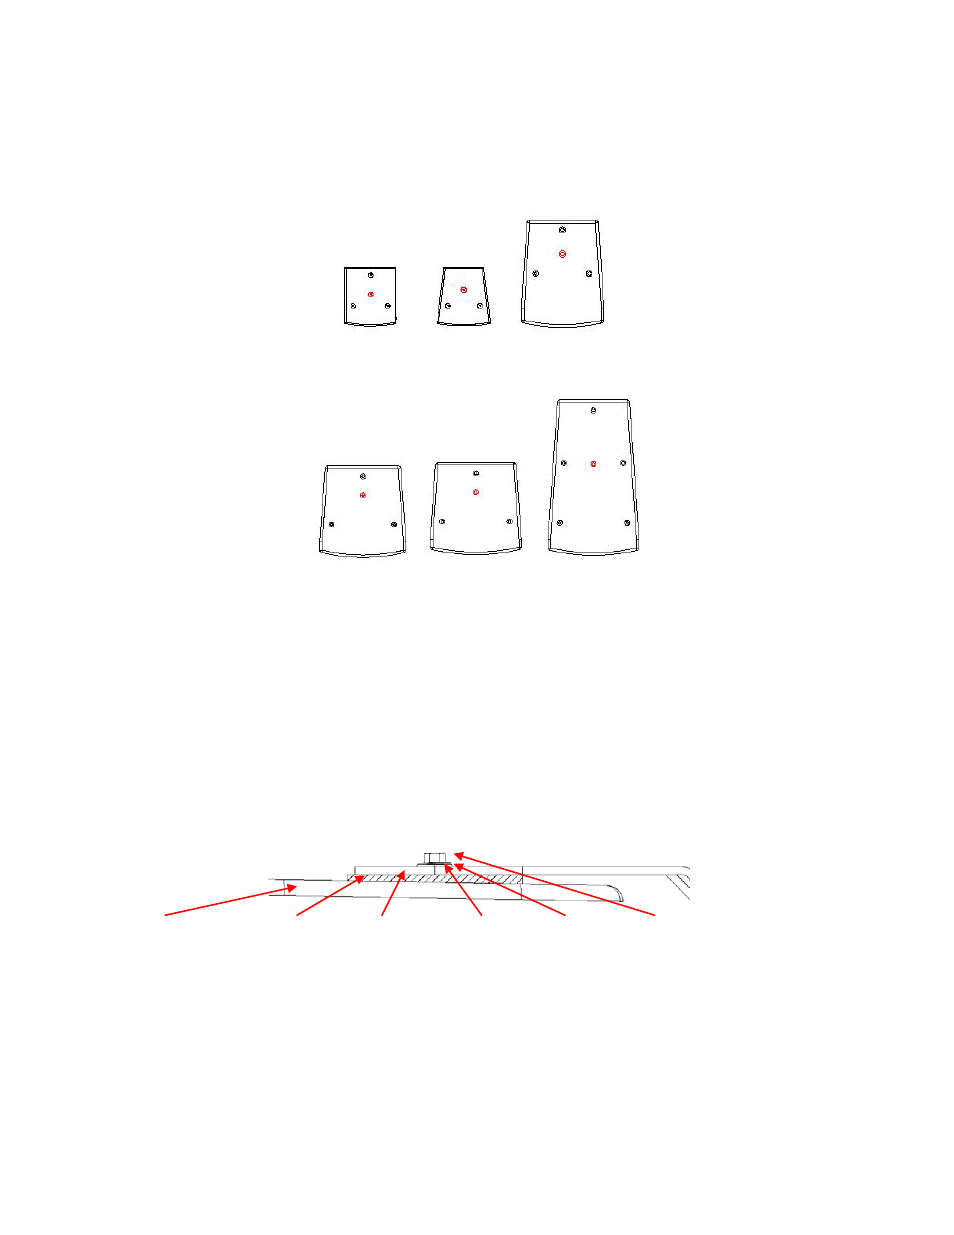
1. See the product views below.
2. Remove the two counter sunk recessed bolts from the positions as shown in red, one top and one
bottom.
OPA-8-NP OPA-28-NP OPA-10-Active
OPA-12 OPA-15-YNP OPA-15-NP
3. Mount the U-bracket to the wall or ceiling surface. Insure that the bracket is properly and securely
mounted. The mounting surface must be capable of supporting the necessary weight to achieve a safe
working load. This must be done by a professional rigger or structural engineer familiar with all local and
national codes. All associated rigging is the responsibility of others.
4. Attach the rubber washers (1 each) over each mounting hole.
5. Position the enclosure between the U-bracket ends. Install the two bolts, flat washer and lock washers,
one set on each side. This operation should be performed by at least two people. Once the enclosure is
safely mounted, adjust to the desired angle and tighten the bolts. DO NOT SUBSTITUTE ANY PARTS!
Enclosure Rubber washer U-bracket Flat washer Lock washer Bolt
WARNING: Do not hang or otherwise suspend any other objects from the loudspeaker and U-Bracket
assembly!
6. A secondary safety cable (not supplied) is always recommended.
The products referenced in this manual are in conformity with the following standards or other
normative documents: Machinery Directive 2006/42/EC
© On Point Audio, subsidiary of One Systems, Inc. * One Systems, Inc. * Nashville, TN U.S.A.