TabletKiosk eo TufTab a7230X User Manual
Page 3
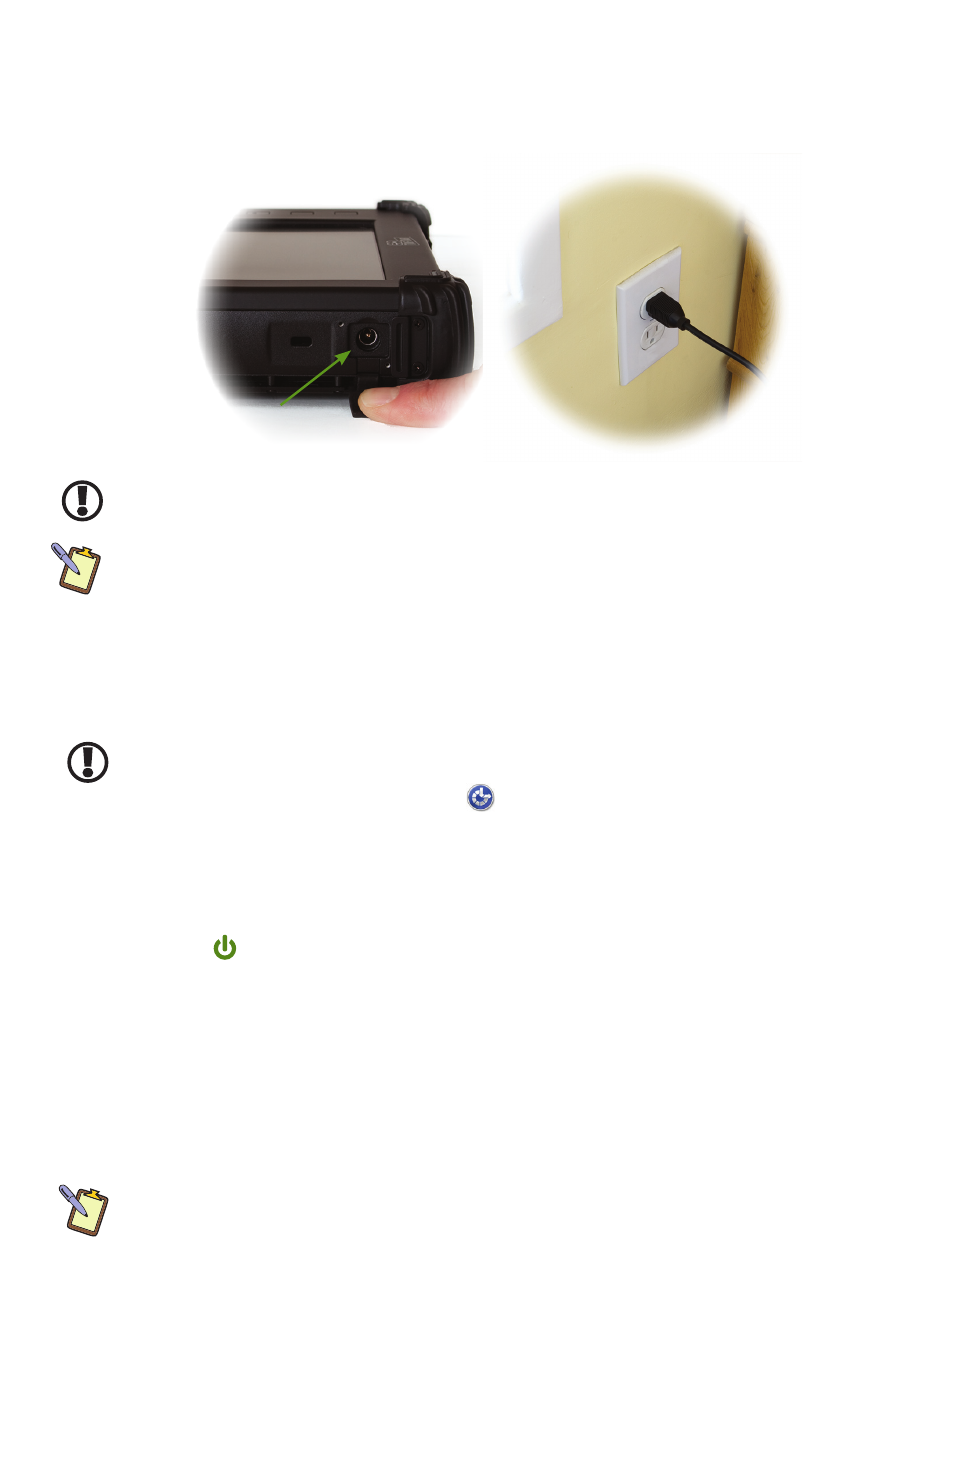
Step 2: Connect the eo TufTab to an External Power Source
Locate the AC adapter and the power cord. Plug the power cord securely into the AC adapter.
Plug the AC adapter’s connection cable into the “DC Power In” port on the left side of the
tablet. Once the adapter plug is securely in place, plug the power cord into an external power
socket.
IMPORTANT: You should allow the batteries to charge fully before disconnecting the eo TufTab
and running it on battery power for the first time.
NOTE: When you first connect the eo TufTab into an external power source, the battery charge
indicators will begin to glow orange. When each battery is fully charged its indicator will turn
green. See the section entitled Battery Care in the PDF User’s Guide for tips on maximizing
battery life and performance.
Step 3: Connect Applicable Peripherals
If you would like to use any external peripherals with your eo TufTab (i.e. USB mouse, USB
keyboard, etc.), you can connect them now.
IMPORTANT: When you power on the eo TufTab for the first time, you will need to have an
external USB keyboard connected in order to complete the Windows XP Professional welcome
screens. In Windows 7, you can tap on the
icon and check “Type without the keyboard” to
open the on-screen keyboard. The eo TufTab a7230XD can answer questions using the stylus
and the on-screen keyboard in Windows XP Tablet PC Edition.
Step 4: Power on the eo TufTab Ultra-Mobile PC
Locate the four function buttons on the front face of the eo TufTab to the right of the
LCD screen. The
button is the computer’s main power toggle. Press and hold it for
approximately four to five (4-5) seconds until the green power indicator on the front face
above the LCD screen lights up. The eo TufTab should now boot up..
Step 5: Complete the Operating System Installation
Windows (all versions) will then have a few questions for you to answer in order to localize
and finish your installation. Refer to your operating system’s manual for information on any of
the questions you are unsure how to answer. If your system came installed with Windows 7, it
may prompt you to enter your Product Key (you wrote down in Step 1) and activate Windows.
NOTE: If you are unable to activate Windows 7 online via the Internet, simply choose the
telephone option and follow the on-screen instructions to activate Windows 7.
Attaching the Handle and Stylus to the eo TufTab
Your eo TufTab a7230X comes with an included carrying handle that also doubles as a stylus
garage. The handle may be attached to any side (top, bottom, left, right) of the system using
the attached loops. Please see the section entitled Attaching the Carrying Handle in the
Getting Started chapter of the PDF User’s Guide located on your Windows desktop for an
illustrated walk-through of how to attach the handle and stylus tether.