TEKVOX 71021-Drop-In User Manual
Page 2
Contact us for additional information or to find an Authorized TEKVOX Dealer in your area.
11831 Radium Street, San Antonio, TX 78216 | 210.348.6565 o | 713.490.3135 f | [email protected] | www.TEKVOX.com
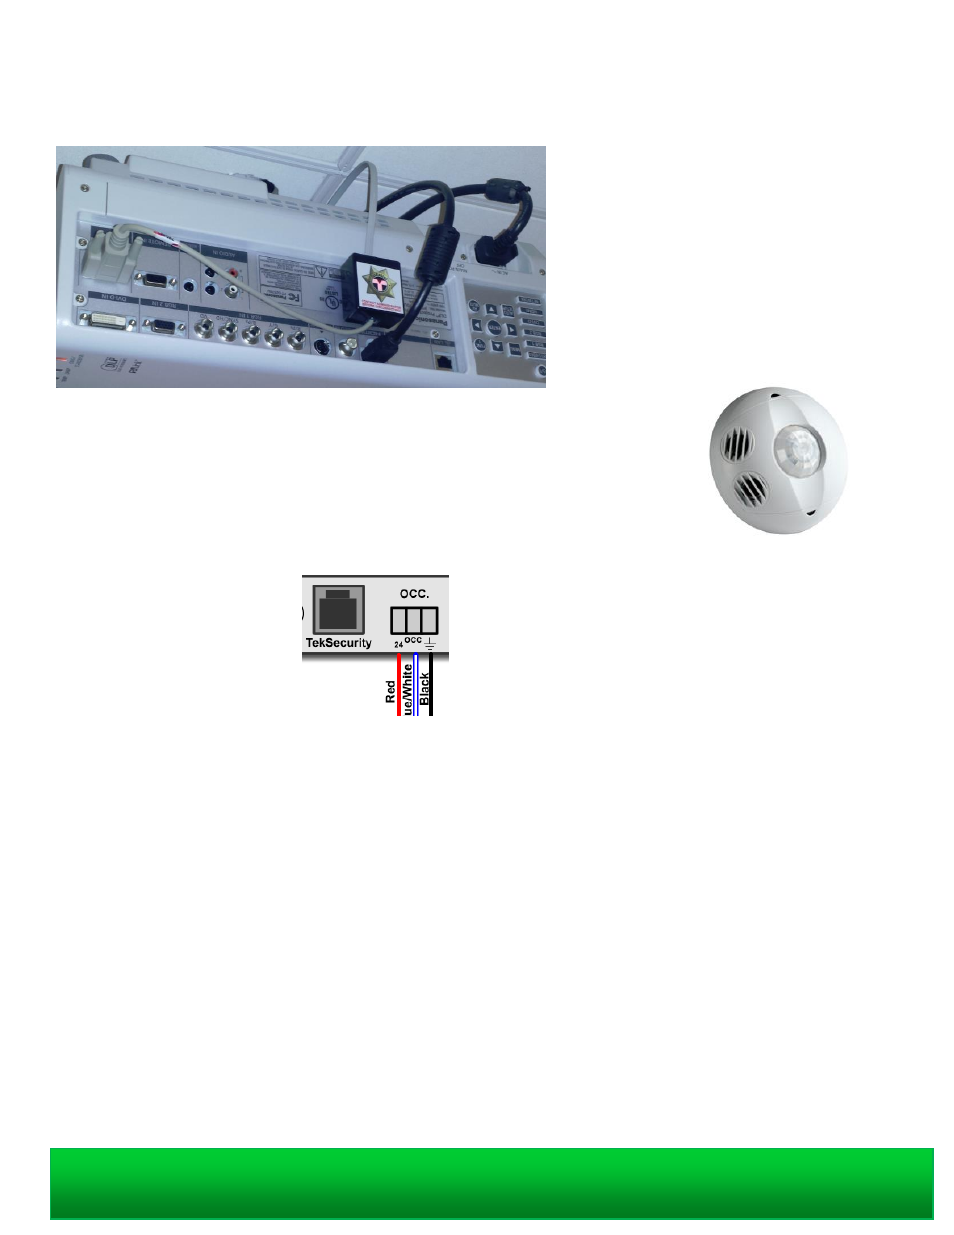
The TekSecurity module should be mounted to the side of the projector using the supplied Velcro.
When installing the occupancy sensor it is best to place it behind or above the
instructor’s and face the vents towards the students. Make certain there are no air vents
within 4 feet or air is blowing across the sensor.
It is best to use a three conductor 22 AWG plenum cable to wire the occupancy sensor.
We recommend the West Penn 25231B.
Wire connections
Red ------- TEK 2 +24V
Blue ------ TEK 2 OCC
Black ----- TEK 2 GND
TekTouchPad Installation
When installing the Wedge, use the 4 supplied #6 screws. The wedge hole template below can be used as a drill guide.
On the 80014 cable there are three breakout cables extruding from the DB-9 male connector. The RJ-12 cable is to be
connected to the back of the TekTouchPad. Make certain you leave enough slack to remove the TekTouchPad once it is
installed. Connect the female 2.1 mm power cable to the supplied 12 volt power supply. The other cable is a 3.5 mm
mono connector that can be used with the old CMC-3 systems. Connect the DB-9 male to the supplied DB-9 female
cable for the TEK 1201.
Once the wedge is installed, place the TekTouchPad Sub base on the wedge and use the two #6 chrome plated
mounting screws to secure it. Insert the RJ-12 connector into the back of the TekTouchPad, if the power supply is
connected, an LED on the circuit board will flash and the touchscreen will start to display a loading screen. Carefully
press the TekTouchPad on to the Sub base, without pressing on the glass, until it is firmly inserted.