Infovueqsgbackv2, Install the infovue stick, Requirements – TelVue InfoVue User Manual
Page 2: Reboot the system, Creating content, Configure the infovue stick, Getting started, Set up the infovue stick
Getting Started
TelVue
®
InfoVue™
1
2
Install the InfoVue Stick
3
QSG_InfoVue_08_15_V2
a. Monitor with HDMI input (not included)
b. USB mouse and keyboard (not included)
c. USB hub (included)
d. WiFi Network Access
Requirements
16000 Horizon Way
Mount Laurel, NJ 08054
800.885.8886
Email:
Online Resources:
www.telvue.com/products/infovue
We share your vision™
The InfoVue Stick is a miniature InfoVue player with WiFi that can be used to display your InfoVue signage on a single HDMI monitor. The InfoVue Stick is a convenient
way to preview InfoVue playlists before pushing them to your InfoVue Pro Player. The InfoVue Stick is also a great, ultra-small signage player solution for traditional
signage that requires one player per TV.
Set up the InfoVue Stick
Additional Resources
For more detailed instructions on using the InfoVue Digital Signage system, please refer to our
online resources at:
http://www.telvue.com/products/infovue/
to view the InfoVue User
Manual, Beginner’s Guide, and How-To Videos.
a. Connect USB keyboard and mouse to Stick via USB hub. You should see the InfoVue
“Channel Loading” screen.
b. To recognize your WiFi:
i. Press Ctl+Alt+Del
ii. Choose Sign Out (Note: Click on the words “Sign Out”. Do not click the arrow, which
only cancels.) You’ll see a blank InfoVue screen.
iii. Hit any key to see the following three login options: config, infovue, teveadmin. Click
on the config icon on the left. Login using password: config.
iv. On the desktop double click the icon labeled ”Connect to WiFi”. A bar will slide out
from the right side of the screen displaying available wireless networks.
v. Click on your desired wireless network.
4
Reboot the System
To get back to the InfoVue Player, Reboot the system.
There are two ways to do this:
• Ctl+Alt+Del and click the power icon in the lower right of your screen.
• Double click on the Restart InfoVue Player icon on the desktop.
Creating Content
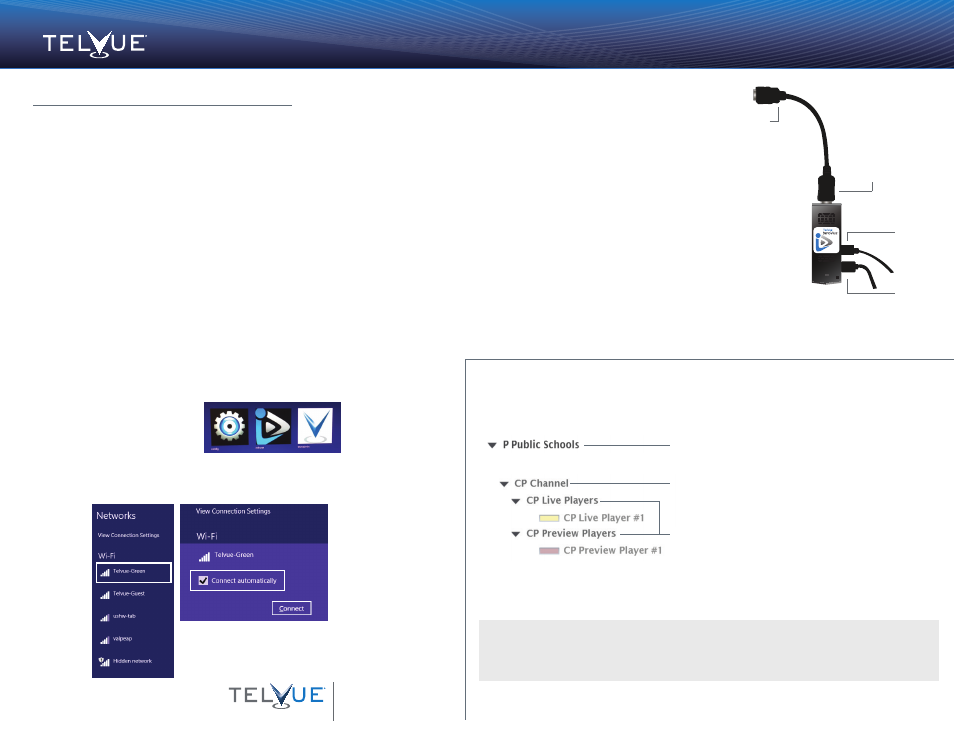
Your InfoVue Stick Player is now ready to receive content. To create content, go back to the computer from
which you login to the InfoVue management interface (
https://infovue.telvue.com
). Here is a typical setup
for an organization with several channels, using the Pro (“Live”) Player for broadcast and an InfoVue Stick
as a “Preview” Player:
Recommended workflow: • For preview purposes, create and schedule a Test playlist at the
Preview
Player level
. • Templates can be created at the
Channel level
, then dragged into that Test playlist.
Update your Preview Player to view • When you’re satisfied with your design, that template is ready to
be added to a playlist at the
Live Player level
. • Schedule and update your Live Player.
vi. Check “Connect
automatically” and
click “Connect”. It will
ask for a network
security key. Enter your
key and click Next.
When it asks if you
want to connect to
other devices, Click
“NO”.
vii. Now it should say “Connected” under your chosen network.
(If you want to delete a connection from the list, right-click on
the network name and and choose “forget this network”.)
Configure the InfoVue Stick
a. Connect Stick HDMI port to monitor. HDMI extension cable is provided if needed.
b. Connect power to Stick using provided power adapter plugged into the micro USB port on
the Stick.
An Organization can manage several Channels.
Content at the Organization level can be SHARED
among Channels.
A Channel can manage several Players. This is the
best level at which to CREATE Channel-specific content
and playlists.
Players can be SCHEDULED and UPDATED
individually, allowing you to update your LIVE Player
separately from your PREVIEW Player.
TelVue InfoVue™
STICK
HDMI In
HDMI Out
Power
USB
(Plugs into an
HDMI monitor)