Front panel layout – Aesthetix Atlas User Manual
Page 6
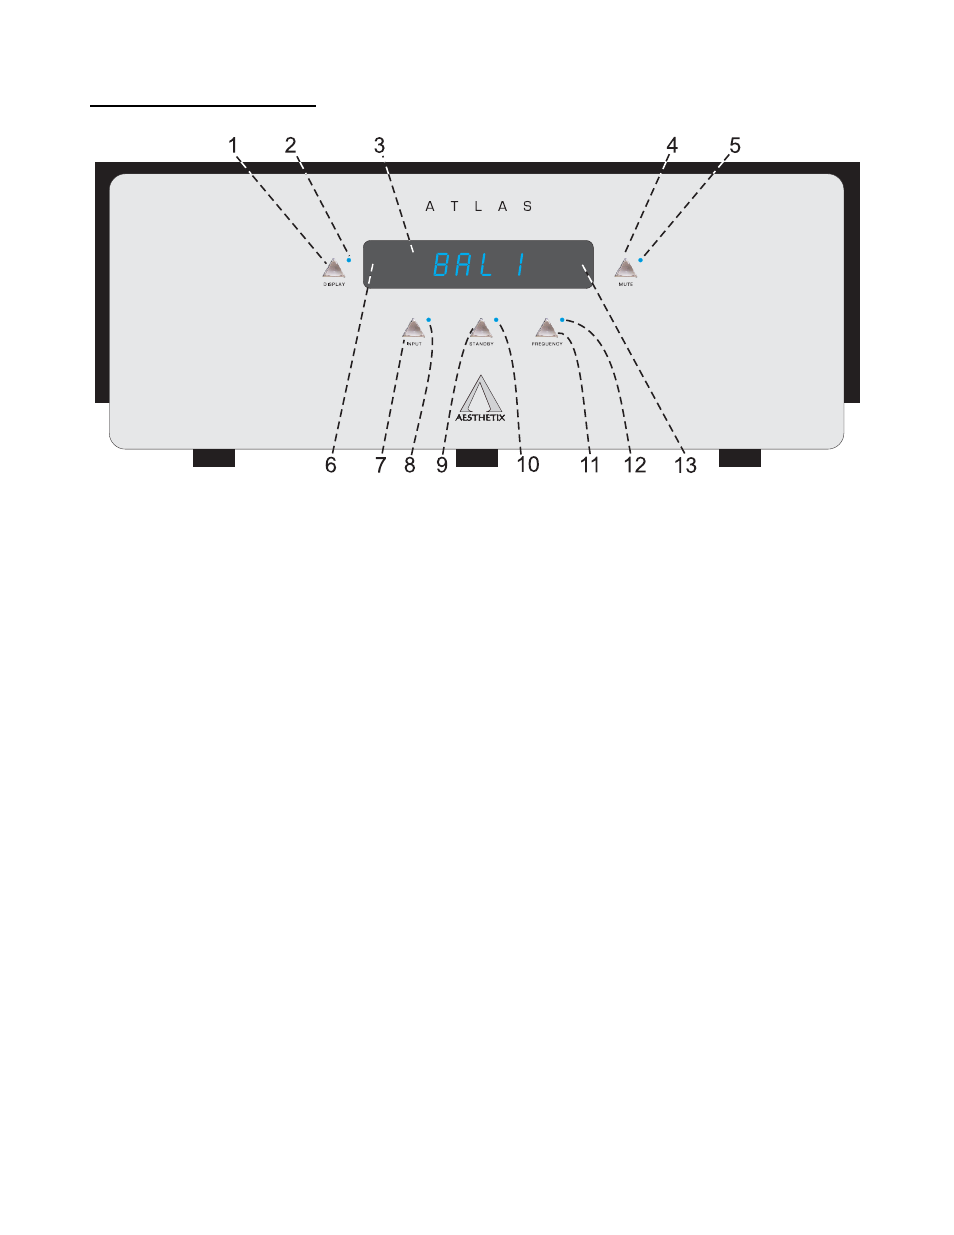
Front Panel Layout
Figure 1 - Front Panel Layout – Stereo and Mono versions
1. DISPLAY button. Press to extinguish or turn on the display, set display brightness.
2. Display
LED. Not used.
3. LED DISPLAY
4. MUTE button. Toggle to mute or unmute the Altas.
5. Mute
LED. Illuminates when the Mute function is active.
6. Pressing the left side of the DISPLAY will decrement the value when in a submenu.
7. INPUT button. Used to select the appropriate rear panel input connector. Ensure that this is set correctly.
8. INPUT
LED. Illuminates when the INPUT menu is active.
9. STANDBY button. After the rear panel MAIN POWER switch is turned on press the front panel STANDBY
button to exit the standby mode. Pressing this button again will put the Atlas into
STANDBY and illuminate the Standby LED.
10. Standby LED. Illuminates Red when the Atlas is in Standby, Blue when the Atlas is active (out of standby).
11. FREQUENCY button. Press to enter the crossover frequency selection menu.
12. Frequency LED. Illuminates when the Frequency menu is active.
13. Pressing the right side of the DISPLAY will increment the value when in a submenu.
6