Quick start guide – digi scan 1600, Connections, Settings – Analog Way Digi Scan 1600 - DSV1600 User Manual
Page 6
QUICK START GUIDE – DIGI SCAN 1600
ANALOG WAY
EDITION : 06/07
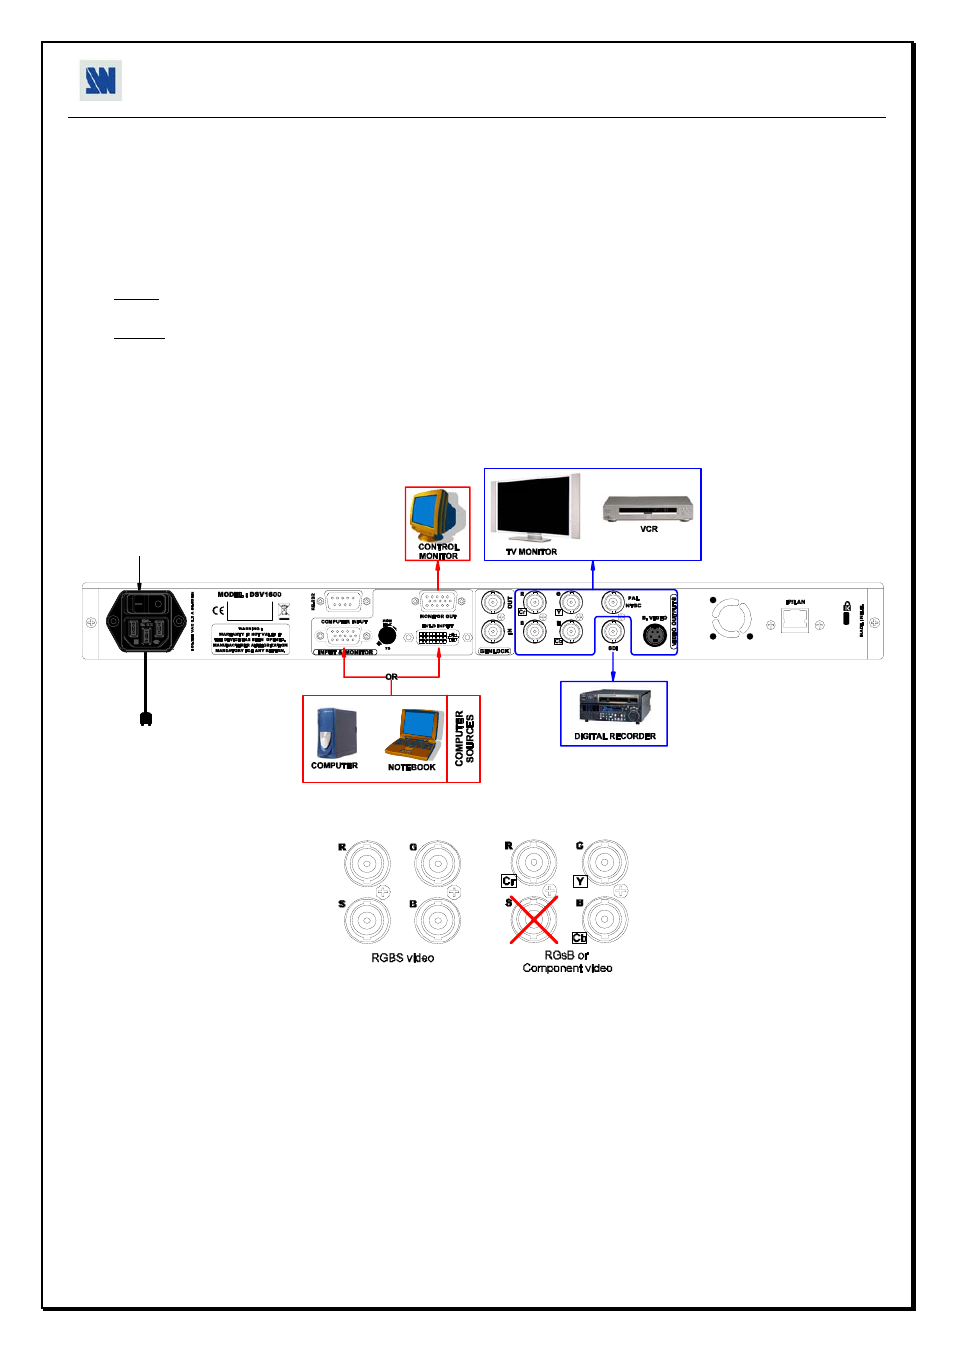
CONNECTIONS:
c Turn OFF all of your equipment before connecting.
d Connect the AC power supply cord to the DIGI SCAN 1600 and to an AC power outlet.
e Connect your computer source to the COMPUTER INPUT (HD15) connector or the DVI-D INPUT connector.
f As required, connect a control monitor on the MONITOR OUT (HD15) connector.
NOTE: Set the RGB Hi-Z/75
Ω button on Hi-Z if you connect a monitor on the MONITOR OUT connector. If not set
it on 75 Ω.
NOTE: The MONITOR OUT is available only if the COMPUTER source is analog.
g Connect your display devices (TV monitor, VCR...) to the outputs (analog or SDI).
h Turn ON the DIGI SCAN 1600 (rear panel switch). Then turn ON your input source and then your display devices.
• DIGI SCAN 1600 connection diagram:
2
6
Ω
3
4
5
5
• RGB/COMPONENT output connection:
SETTINGS:
c We recommend resetting the DIGI SCAN 1600 to all of its default values, with the front panel display menu (Control >
default value > yes) before proceeding.
d Select the Input source (ANALOG or DVI) with the front panel display menu (Input > Input select.).
e Select the Output standard with the front panel display menu (Output > output std).
f Select the Output rate mode (internal or genlock) with the front panel display menu (Output > output rate).
g Select the type of the RGB/YUV output with the front panel display menu (Output > RGB/YUV out).
h As required, make the following adjustments:
-Select the UNDERSCAN mode with the front panel display menu (Image > under/over).
-Adjust the image position & size with the front panel buttons.
-Adjust the level of anti-flicker with the panel display menu (Image > flicker filter).
-Make the others adjustments, available in the Image menu.