Chapter 4 : starting – Analog Way Scan Vision VHX II - VHX480 User Manual
Page 8
Chapter 4 : STARTING SCAN VISION VHX II
™
PAGE 8
Chapter 4 : STARTING
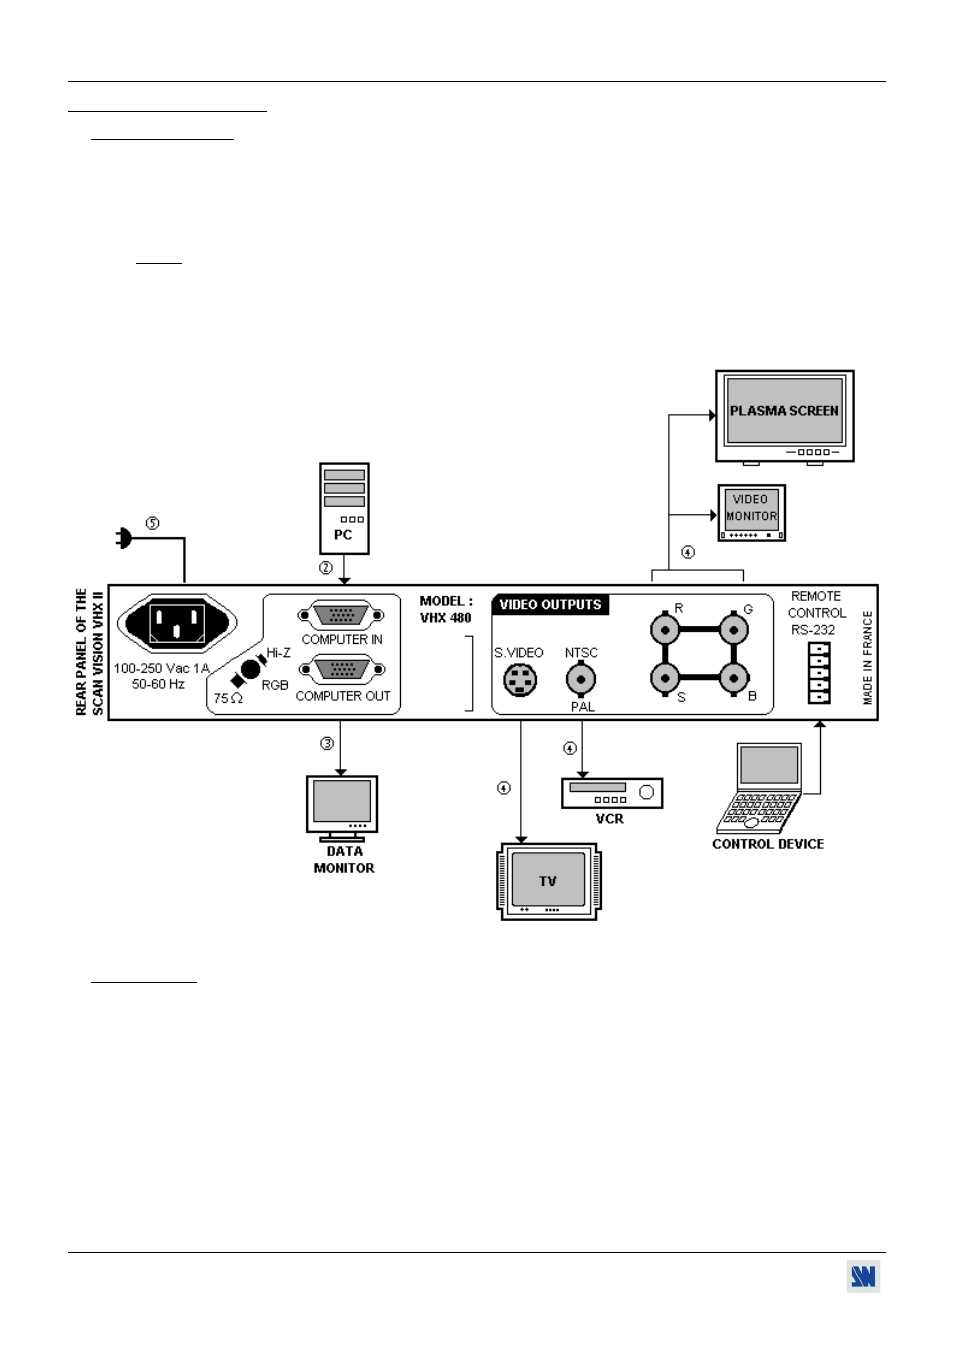
4-1. CONNECTIONS
c Turn OFF all of your equipment before connecting.
d Connect your computer source to the COMPUTER IN connector (HD 15 F) of the SCAN VISION VHX II
™
.
e Connect if necessary, the computer monitor to the COMPUTER OUT connector (HD15 F), and set the RGB 75Ω /
Hi-Z button on Hi-Z.
NOTE: If you don't connect a monitor set the RGB 75Ω / Hi-Z button on 75Ω.
f Connect your display device (TV monitor, VCR,...) to the VIDEO OUTPUTS of the SCAN VISION VHX II
™
.
g Connect the AC Power Supply Cord to the SCAN VISION VHX II
™
and to an AC power outlet.
h Turn ON your computer source and then your display device.
4-2. SETTINGS
c Select the output video standard with the front panel switch (PAL or NTSC).
d Select an anti-flicker level (1, 2 or 3) with the ANTI FLICKER front panel push button.
e Select the Standard mode (STD) and adjust the position and the size (with the POS/SIZE button and the
¥
¦
knobs) to display the image in full screen.
f Then select if needed a zoom mode (OVER or ZOOM) with the front panel push button and adjust the position and
the size of the image with the POS/SIZE button and the
¥
¦
knobs.