Controls and operation – ART Pro Audio Auto-Tune Pre User Manual
Page 6
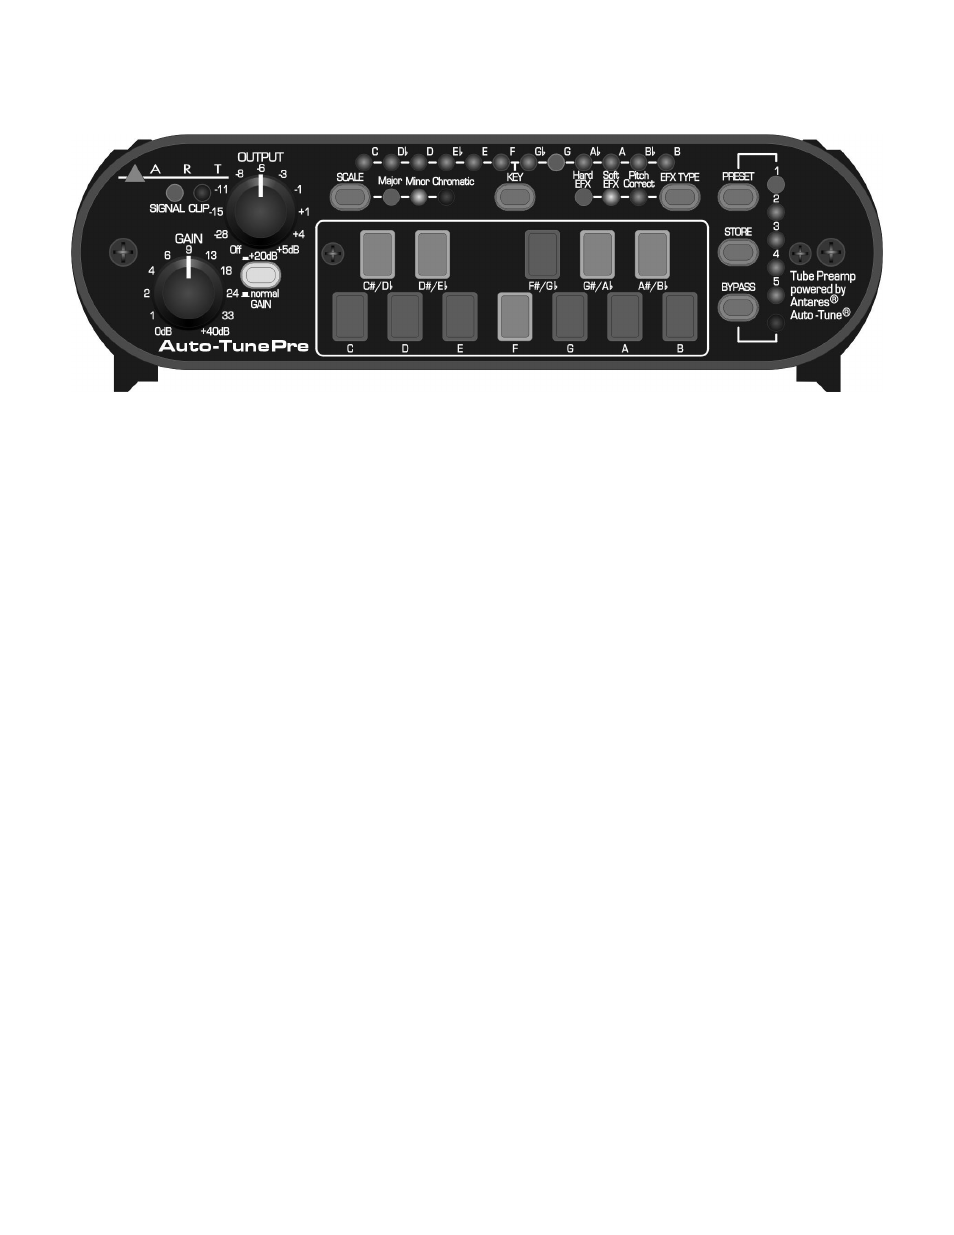
CONTROLS AND OPERATION
PREAMP SECTION CONTROLS
The GAIN control directly adjusts the input amplifier’s gain, giving you control over the
dynamic range of your source. You get from 0 to 48dB of gain depending on settings.
Set this control counterclockwise to minimum gain when first connecting the input jack.
The GAIN switch adds 20dB more to the preamp gain. This is useful when you need
more gain than the input GAIN control can provide.
LED metering circuitry aids in setting gain. It has a fast attack to indicate any clipping.
The metering is located in the signal chain just after the preamp section and displays
the signal level going to the Auto-Tune section. The red CLIP LED comes on at 3dB
before clipping and should light on musical peaks. The green SIGNAL LED comes on
at 20dB below the CLIP LED. It should be on most of the time during performance and,
if not, it indicates that your signal level or input gain may be too low for best preamp
and Auto-Tune section performance.
The OUTPUT control adjusts the signal level that is sent to the Main output connec-
tions. This signal level is after both the Preamp and Auto-Tune sections.
PREAMP SECTION SETUP
First plug your microphone or signal source in and turn on phantom power if needed.
Increase the Gain control on the front until the Signal LED comes on and the Clip LED
lights briefly on peaks. If you need more gain than the Gain control can provide, then
use the Gain switch. Next, turn up the Output control until the output signal level is
correct for your system. By doing this, you optimize the dynamic range of your system.
Make sure the Output level switch is set to the –10dBv setting if you are running into a
microphone preamp or instrument amplifier for best noise performance.
6