Avery Dennison SNAP 700 User Manual
Page 60
60
User’s Manual—SNAP™ 700 Printer
locating pins. Pull the head towards the stacker end of the printer. It will slip
out from under the flat retaining springs located at both ends of the head.
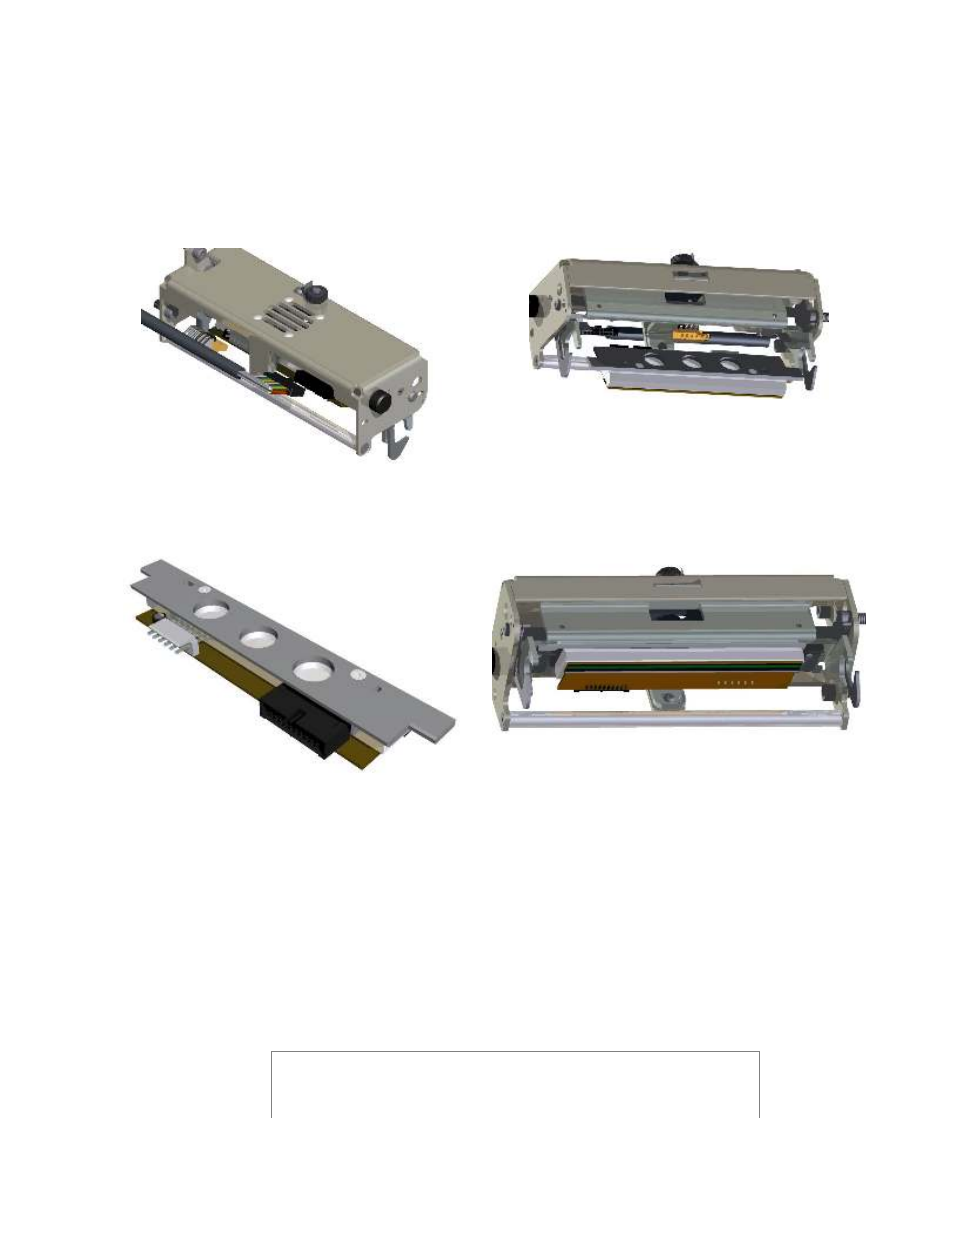
9. Unplug the two cables that connect to the print head by grasping the print
head cable, rocking it gently (see Fig. 17a). Remove the print head
assembly from the print station (see Fig. 17b).
Figure 17a. Unplugging Print Head Cable
Figure 17b. Print Head released from springs
Figure 17c. Print Head Assembly – Removed
Figure 17d. Inserting Print Head Assembly
10. Place the new print head assembly onto the print station (see Fig. 17c and
17d).
11. Reconnect the two print head cable connectors, making sure that the
connectors are seated tightly.
12. Slide the head mounting plate under the two flat retaining springs until it
clicks into position.
WARNING: If the cables are not connected correctly, the print
head could be destroyed when the power to the printer is
turned on. Check to see that the cable is tight by observing
from underneath the print head. The cable’s connectors should