Baby Lock Ovation (BLES8) Instruction and Reference Guide User Manual
Page 12
O
V
E
R
V
I
E
W
10
B
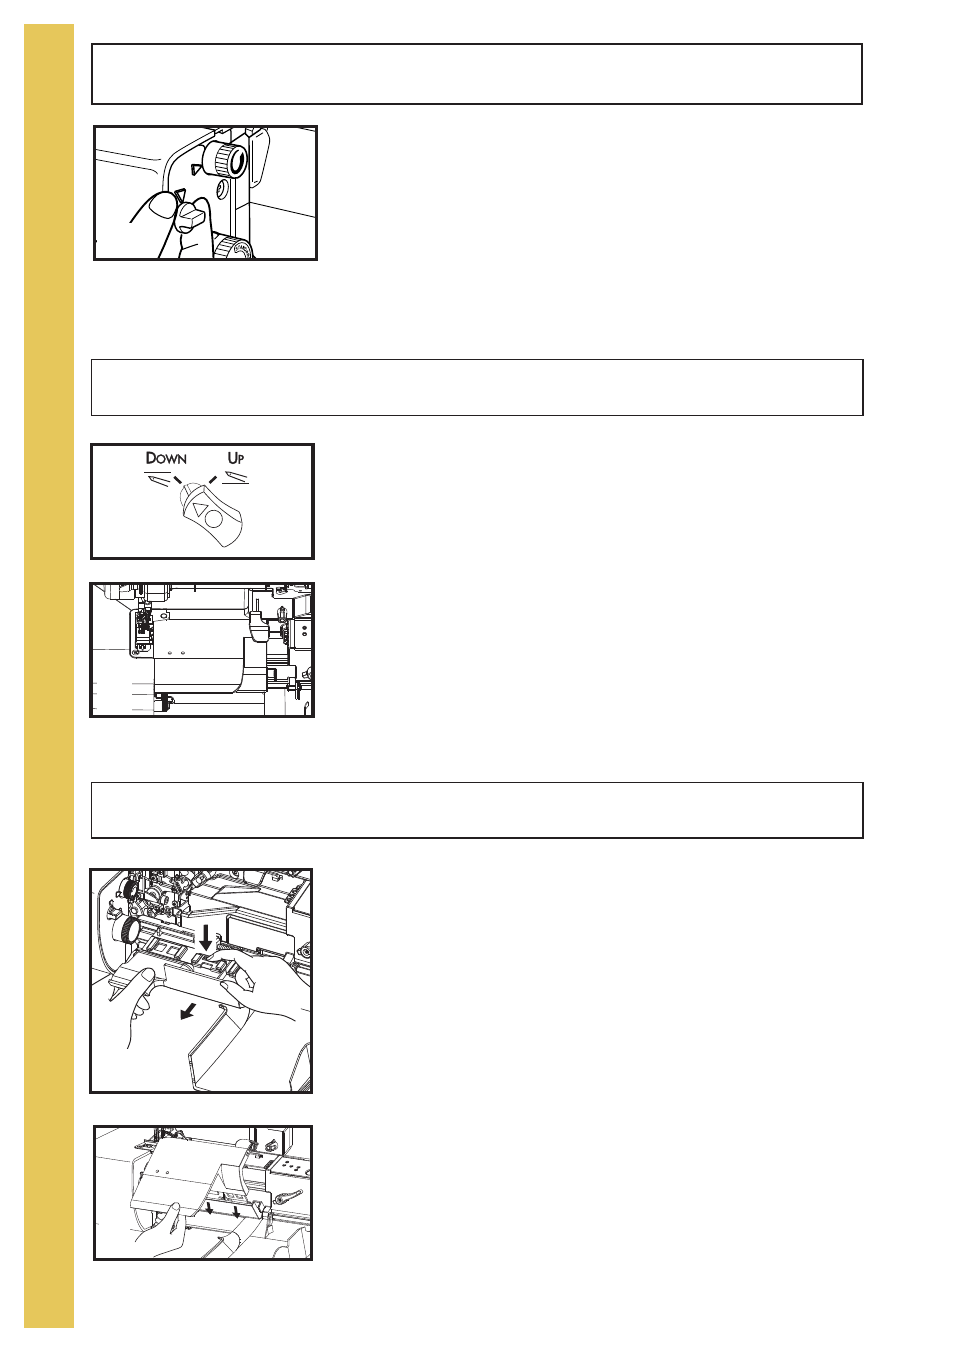
Cutting Blade Locking Dial
Cutting Blade Cover and Sewing Table
Upper Looper Positioning Knob
To lock cutting blade down:
Turn the dial clockwise 180 degrees until you see "LOCK" on the
top.
The cutting blade will stay below the needle plate for non-cutting
techniques. (fig. A)
To re-engage cutting blade:
Turn the cutting blade locking dial half of a turn counter-clockwise.
The blade will start moving automatically when you start sewing.
To use the sewing table for chain/cover stitching you will need to
change the cutting blade cover as follows:
a) Open front cover and cutting blade cover. (page 9, fig. G & H)
b) Depress the center snap and gently pull toward you to unsnap
blade cover (fig. D) and then snap sewing table into place. (fig.
E)
c) Disengage the upper looper by turning the upper looper
positioning knob to "Down". (fig. B)
d) Move the stitch width adjusting dial to the 3.0 setting.
e) To close the sewing table door raise to the up position and slide
to the left placing the tab of the table under the needle plate. (fig.
E)
f) Close the front cover.
Note: Even though you are not using your cutting blade with the
sewing table, the adjusting dial needs to be moved to its lowest
setting for the table to fit against the needle plate.
When you change from overlocking to chain/cover stitching, you
should also disengage the upper looper by changing the upper
looper positioning knob to the "DOWN" position before you close the
sewing table door.
a) Turn the handwheel until upper looper is at its lowest position.
b) Change the upper looper positioning knob to the "DOWN"
position. (fig. B)
c) Close the sewing table door and then the front cover. (fig. C)
Note: Make sure the upper looper positioning knob is in the "UP"
position prior to locking the machine to thread the upper looper.
O
8 02
5 0 7
5 0 2
7 0 7
,/#
+
A
D
E
C