3e ngl is h, Attaching the circular attachment, Sewing a circle – Baby Lock Symphony (BLSY) Instruction and Reference Guide Addendum User Manual
Page 5
3
E
NGL
IS
H
Attaching the Circular Attachment
a
Place the circular attachment at left as shown
in the figure.
→ The two tabs on the underside of the attachment will
drop down into corresponding holes in the needle
plate, so that the attachment lays flat on the bed of
your machine.
b
Insert the screw on the circular attachment in
the screw hole at the right of the needle plate
(a).
a
Attachment Screw
c
Securely tighten the screw with the disc-
shaped screwdriver included in your
machine.
a
Disc-shaped screwdriver
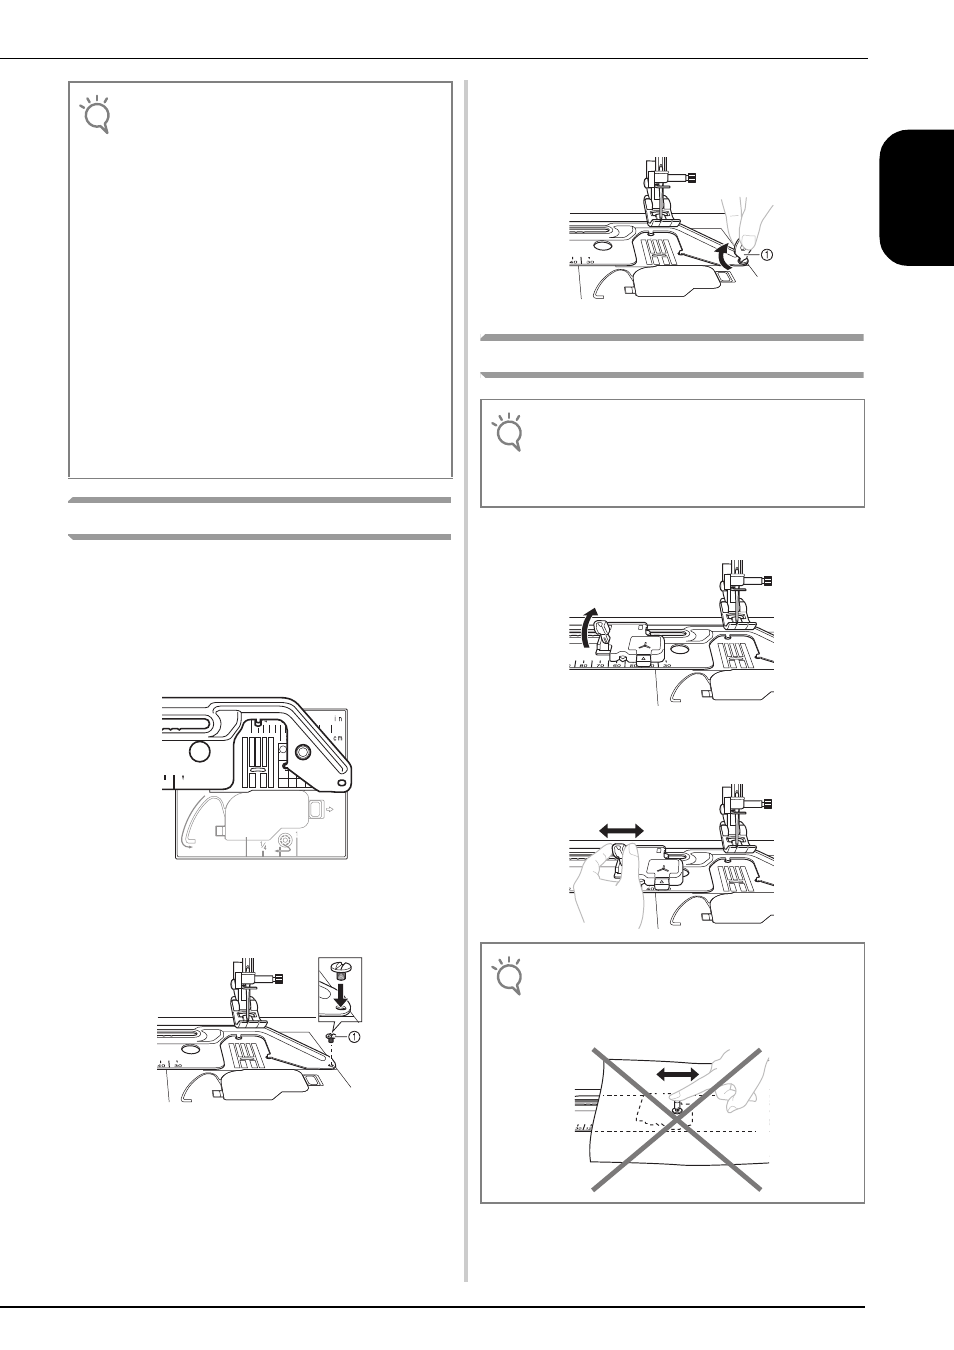
Sewing a Circle
a
Raise the handle.
b
Slide the indicator to match the desired size
of your circle.
Note
• We recommend that you use the extension table on
your sewing machine for smooth fabric control.
• Do not raise the extension table when the circular
devise is attached.
• The pivot pin may be released if you hold up the
fabric while attached to the circular attachment.
When holding up the fabric gently press down on the
top of the pivot pin.
• When sewing smaller circles or using fabric with a
grain or uneven textures, a perfect circle may not be
achieved.
• Some of presser feet such as the side cutter cannot
be used with this attachment, always test your
accessory feet with the attachment.
• When using this attachment test the sewing speed
of your machine for the best results.
• When sewing larger pieces of fabric or garments,
make sure that your fabric or garment does not get
caught on the machine creating drag or distortion of
your design.
30
40
Note
• Thread the machine needle before setting the pivot
pin into the circular attachment. Threading lever
may hit the pivot pin and damage the pin or the
machines threading mechanism.
Note
• Do not slide the indicator by holding onto the pivot
pin, doing so may cause the pivot pin to bend or
break.