Install ceiling bracket read before installing – Cetacea Sound Astronaut CL Quick Start Guide User Manual
Page 3
Recommended Tools
Phillips head screwdriver
Hand drill with ¼" and ½" bits
Measuring tape
INSTALL CEILING
BRACKET
READ BEFORE
INSTALLING
For in-depth safety, installation,
and operational procedures, read or
download the Astronaut CL Owner’s
Manual at www.cetaceasound.com.
ASTRONAUT
™
CL
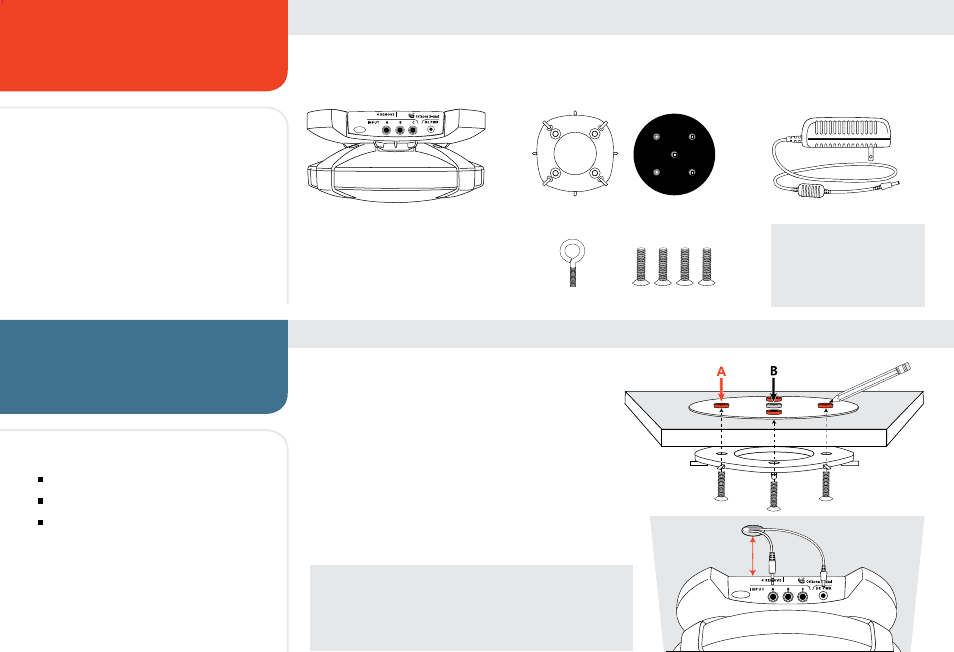
SYSTEM CONTENTS
Astronaut CL Speaker
Ceiling Mount Kit
Power Supply
Mounting Bracket
Aluminum Bolts (4)
Ceiling Plate
Eye Bolt
NOTE
Power supply style will vary
depending on the system
number you ordered.
NOTE: FOR HARD SURFACE CEILINGS
Ceiling plate
C
is not required for solid ceiling installations.
Modifi cation to the bracket
D
is required. Refer to the Owner’s
Manual at www.cetaceasound.com for instructions.
6 in.
D
C
CEILING
TILE
1. Remove a ceiling tile and set it on a fi rm surface.
2. Use the ceiling plate as a guide to mark 5 holes
A
&
B
.
3. Drill or tap ¼" holes for the 4 aluminium bolts
A
. Drill the
½" center hole
B
for the security eye bolt (optional).
4. If cable will be routed above the ceiling, cut a 1" hole about
6" away from the front of the speaker (optional).
5. Fasten the ceiling plate
C
to the top and ceiling bracket
D
to
the bottom of the tile using the provided 4 aluminum bolts.
FOR INSTALLATION TO FALSE CEILINGS