Temperature monitoring – CompX eLock Temperature Monitoring Programming User Manual
Page 4
Temperature Monitoring
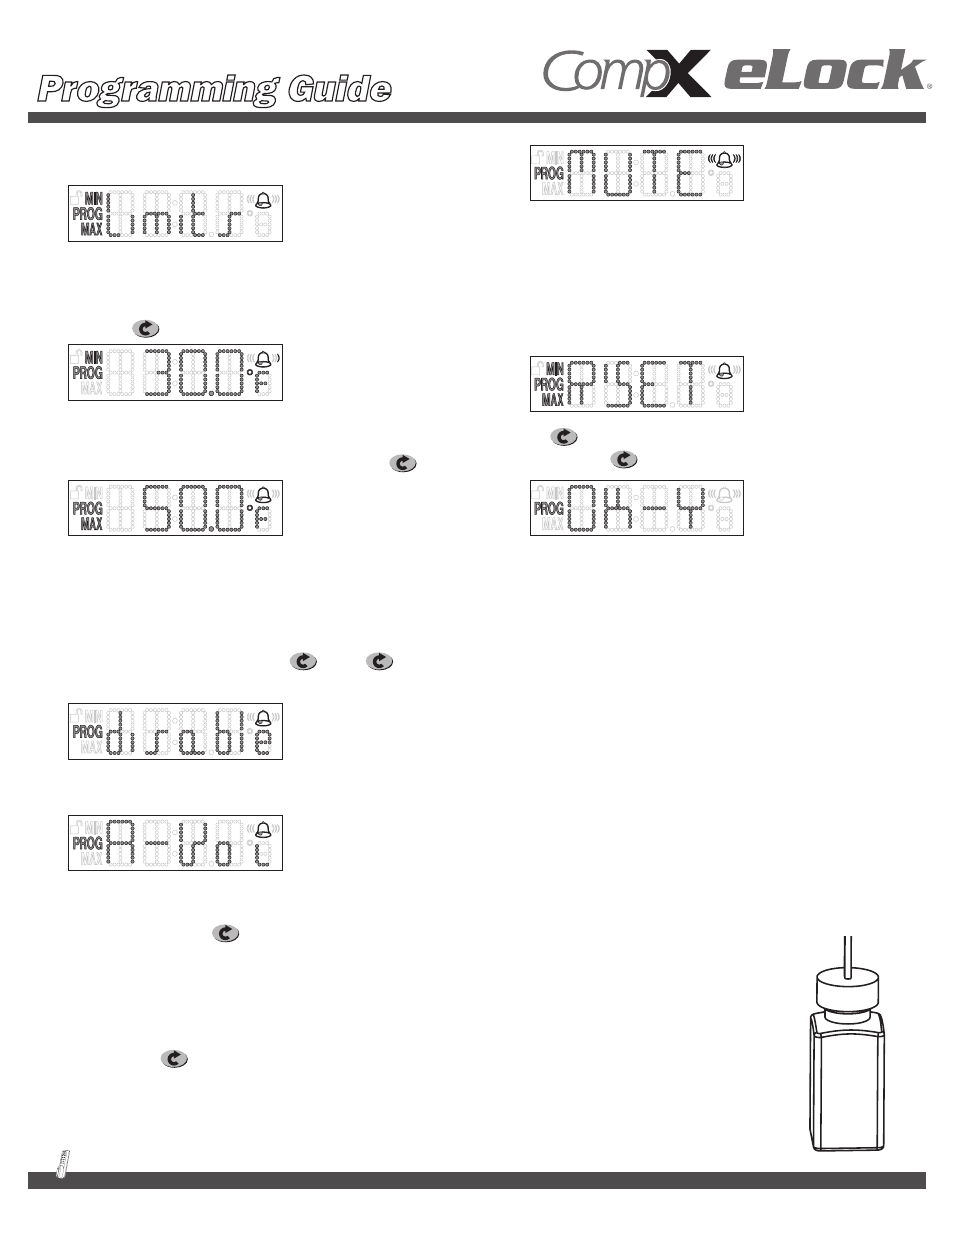
liMits
(AlArM Must be enAbled to chAnge this setting)
Use this screen to set the upper and lower limits of the alarm mode.
1.
If you choose Limits, the next screen will show you the
minimum temperature. Press up or down buttons or enter via
keypad until the desired minimum temperature is reached
and press .
2.
The next screen is your maximum temperature screen. Again,
use the up or down buttons or enter via keypad until the
desired maximum temperature is displayed and hit .
3.
The unit will momentarily say “Done” and then revert back
to time and temp.
disAble
(AlArM Must be enAbled to chAnge this setting)
If you choose Disable, the screen will allow you to turn the alarm
off. Choose the desired setting and press . Press again
to confirm.
A-vol: (Alarm must be enabled to change this setting)
1. If you select Adjust Volume, you can pick the alarm volume
level from three preset settings: LOUD, MED, Soft. Select
desired setting and hit . DONE will appear momentarily
and then the screen will revert back to Time and Temp. Factory
default setting is MED.
Mute: (Alarm must be enabled to change this setting)
1.
Selecting the Mute setting will silence the alarm. Select desired
setting and hit . The bell icon on the LCD will flash
indicating the alarm was muted.
reset
1.
This function will reset the upper and lower temperatures
the unit has recorded since the last time it was reset.
It will not reset the upper and lower limits for alarming.
If the alarm limits need to be changed, see previous section
on “LIMITS.”
2.
Hit on the R’set screen. The screen will prompt you
“OK-y.” Press to confirm.
to chAnge Any setting After initiAl set-up,
A supervisor code will be needed.
teMperAture-buffered sensor
The temperature probe (green bottle) provides and maintains
accurate readings when refrigerator doors are opened.
Probe is sealed in a miniature bottle that simulates vials, and is filled
with non-toxic glycol (recognized by the FDA as safe), eliminating
concerns about incidental contact with food or medicines.
Self adhesive wire routing clips provided for your convenience.
Bring wire over door, keeping the wire taut. Use wire routing clips to
keep the wire in place. Wire is 10 feet long, allowing it to be used
anywhere within the refrigerator.
It is highly recommended that this probe is placed on a shelf along
with other medications and not on the inside of the refrigerator door.
4