Crate TX50DB User Manual
Page 7
C R A T E
7
14. LOW (Active only with the Channel Select
switch out): Use this control to adjust the low
frequency level for the instrument channel 2.
15. MID (Active only with the Channel Select
switch out): Use this control to adjust the mid
frequency level for the instrument channel 2.
16. HIGH (Active only with the Channel Select
switch depressed): Use this control to adjust
the high frequency level for the instrument
channel 2.
17. LEVEL (Active only with the Channel Select
switch out): Use this control to adjust the out-
put level of the instrument channel 2.
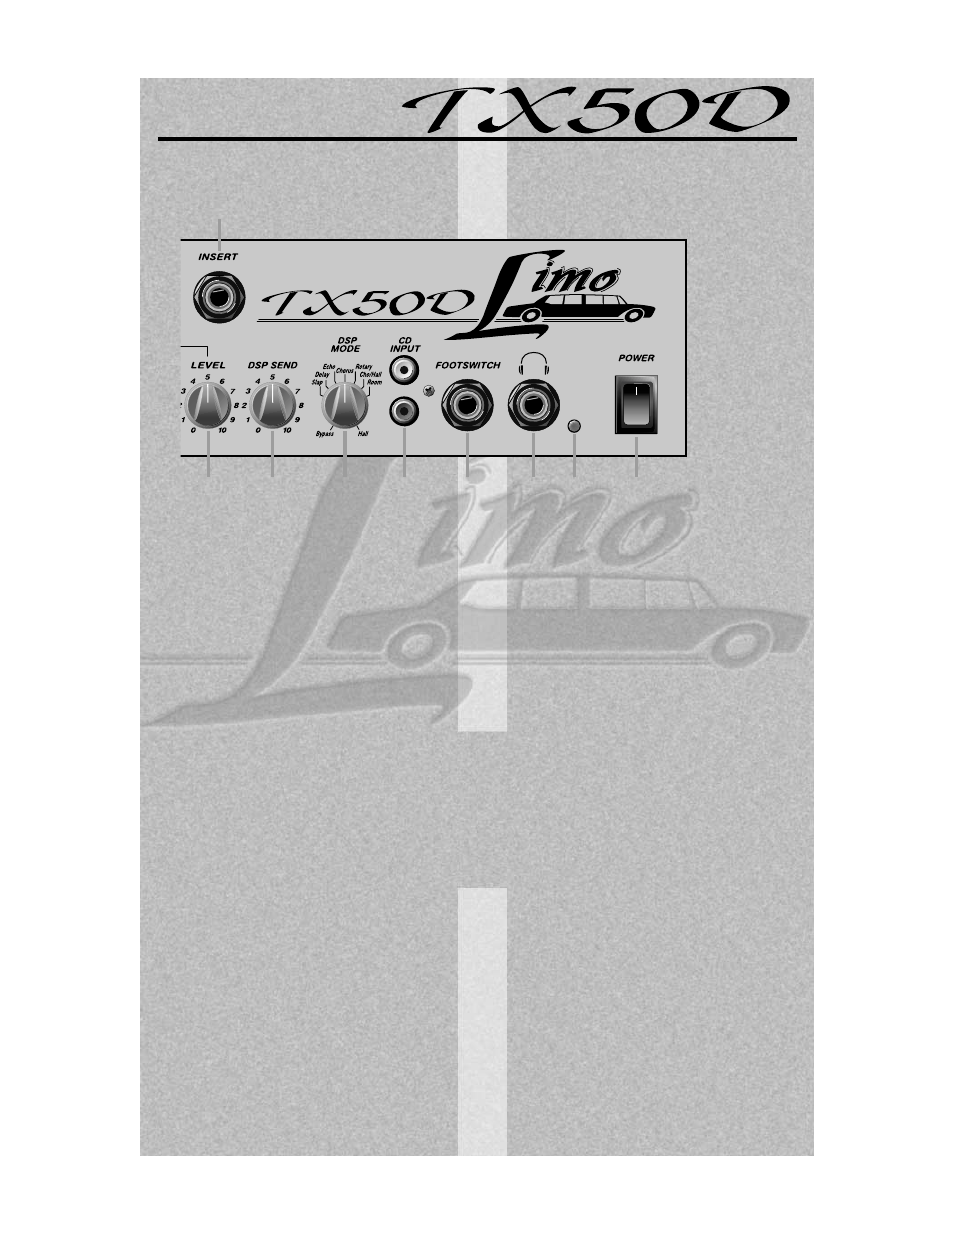
18. DSP SEND: Use this control to adjust the
amount of signal sent to the internal Digital
Signal Processor (DSP) for the instrument
channel.
19. DSP MODE: Use this control to select the
type of Digital Signal Processing (DSP) effect
applied to the signal. The nomenclature around
the control is as follows:
BYPASS: No effect applied
SLAP: Moderate slapback delay
DELAY: Moderate delay with regeneration
ECHO: Long delay with regeneration
CHORUS: Moderate chorus effect
ROTARY: Simulated rotating speaker effect
CHO/HALL: Chorus combined with large reverb
ROOM: Small reverb effect
HALL: Large reverb effect
20. CD INPUT: Use these jacks to connect the
outputs of a CD player or tape player to the
amplifier. The output of the CD or tape player
may need to be attenuated for a suitable mix
with the input channels – see the notes on page
10.
21. FOOTSWITCH: Use this jack to connect a
footswitch to the amplifier for remote control of
the Instrument channel selection and turning
the DSP on and off. The jack is wired as fol-
lows:
Tip = Instrument channel selection
Ring = DSP control
Sleeve = ground
22. HEADPHONES: Use this jack to connect a
pair of stereo headphones for private practice
sessions. The internal speakers are discon-
nected when headphones are used.
23. LED: This LED illuminates yellow when the
power switch is at the on position – when the
amp is fully charged. The LED illuminates red
when the battery needs recharging.
24. POWER: Use this switch to turn the amplifi-
er on (top of the switch depressed) and off (bot-
tom of switch depressed).
8
17
18
19
20
21
22 23
24